chim
Elite Member
The first pair was several years ago for the L3200. Post# 18 in the link below has a brief description of them. The pictures in the link don't show a couple add-ons that made them pretty much self installing. Sort of like the "early photo" in an obit. Since those forks were custom made to fit the L3200 pin on bucket, they went along with the tractor when it was sold:
https://www.tractorbynet.com/forums...hp-kubota-bx2350-2.html?highlight=brush+forks
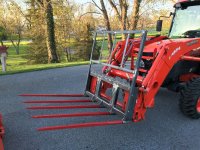
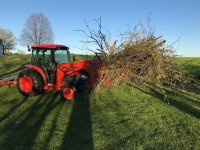
I do use brush forks fairly often and it didn't take long to miss them. Since the L4240 has a QA bucket, these forks will be on a QA frame. A few months ago there was a super heavy duty frame on FB Marketplace for a reasonable price. Yesterday the project was started. Nothing will happen today, but this coming week should be productive. I'm in the middle of restoring another Caroni RFM, but the need for the forks is greater, so the deck was put on the saw horses in the background. The 5' RFM will just be for backup, rough stuff, trimming or fun on the Ford.
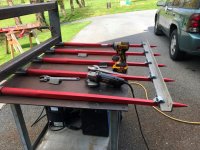
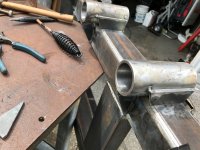
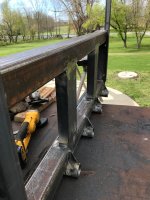
Here's the start. Had to remove the vise from the welding table to get a nice surface for everything to fit. Bale spears (48") were chosen because they are strong and can be replaced easily if they would get damaged. The pieces shown are all tacked and ready for welding. Two pieces of channel will be added between the top and bottom horizontal tubes for added strength. Gussets will be welded between the spear bushings and the bottom tube. I'll add a slotted angle on the top tube for chains. There will be a headache rack to keep the brush from rolling off the back. It will be bolt-on for easier repairs if damaged. Still need to come up with some loops or some method of being able to attach a rope or binder for that odd load.
https://www.tractorbynet.com/forums...hp-kubota-bx2350-2.html?highlight=brush+forks
I do use brush forks fairly often and it didn't take long to miss them. Since the L4240 has a QA bucket, these forks will be on a QA frame. A few months ago there was a super heavy duty frame on FB Marketplace for a reasonable price. Yesterday the project was started. Nothing will happen today, but this coming week should be productive. I'm in the middle of restoring another Caroni RFM, but the need for the forks is greater, so the deck was put on the saw horses in the background. The 5' RFM will just be for backup, rough stuff, trimming or fun on the Ford.
Here's the start. Had to remove the vise from the welding table to get a nice surface for everything to fit. Bale spears (48") were chosen because they are strong and can be replaced easily if they would get damaged. The pieces shown are all tacked and ready for welding. Two pieces of channel will be added between the top and bottom horizontal tubes for added strength. Gussets will be welded between the spear bushings and the bottom tube. I'll add a slotted angle on the top tube for chains. There will be a headache rack to keep the brush from rolling off the back. It will be bolt-on for easier repairs if damaged. Still need to come up with some loops or some method of being able to attach a rope or binder for that odd load.