This post will have a great deal of detail, and it will be long. Grab a cup of coffee. It will be invaluable to someone who is planning to do a similar upgrade, and even more so if you have the same model 48 backhoe. To the casual reader, much of this will be laborious, so I’ll try to make it entertaining.
So here’s how the hydraulic plumbing went: Once the spool valve was mounted, then I could take measurements and go have all the hoses made up. There’s a company about 20 minutes away that will make up hoses on the spot, and they have good prices too. I wrongly assumed that the guy there knew something about hydraulics, so he had to keep reminding me that he “just makes hoses.” So on Friday morning I was there when they opened to have all the hoses made. I wanted to be there early so if I needed any adjustments, then I still had time to go back for some tweaks before they close at 5 PM for the weekend. I did have to pay them a second visit – more on that later.
Once everything was home, it was all assembled on the driveway just as a final fit-up, mostly to be sure that all the pieces were there and that they got along with each other. The two original lines that feed the backhoe are seen at the top of this photo. BTW: If anybody wants these, they are yours for the cost of shipping. Otherwise they go in the trash.
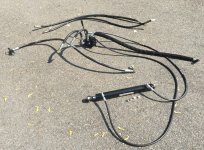
The next step was to attach the drain and power beyond hoses to the valve and tighten them up. Once the valve is bolted in, there’s not enough space in there to tighten those fittings. The other 3 fittings are pretty easy to get to. The South Bend 13x36” lathe can be seen in the background. I used this backhoe project as an excuse to go out and get that last summer. I got very lucky and found a machine that was clean, well oiled, and pretty much ready to go. Most of the used SB’s out there are pretty nasty looking and tired.
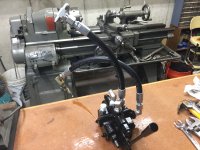
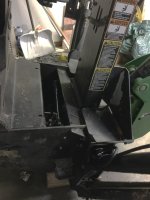
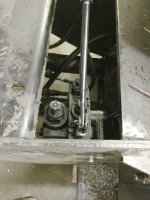
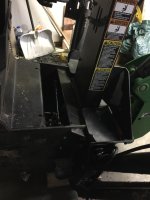
Then the valve was bolted in, and the power beyond line connected to the backhoe valve and tightened up. I had to laugh that for a while I was studying the valve trying to figure out which of the two lines coming from the tractor were the in and out. Then it finally dawned on me that there’s a label right next to the valve that describes which is which. For the backhoe valve, IN is on the bottom, drain is on the top. In this photo, the new valve is on the right and the left hose is the power beyond hose from the thumb valve to the IN port for the backhoe. I’m pretty happy that I measured well on this hose.

The drain line was next. When I took my measurements I was thinking that the drain on the backhoe valve would connect directly to the thumb valve, so I sized that line accordingly. Then later when I realized that it needed to go to a T, I had to futz around a bit to figure out how to route that since the lengths were not quite optimum. I worked it out, but this ended up meaning that the line going up to the tractor was about 10” too short. So on my second trip to see my hose-maker friend, a 10” extension was made up, and that goes to a 90 degree bend, so in effect this ended up creating a much neater implementation up on the tractor. The original hose had to make this 90 degree bend, which was kind of sloppy. BTW: When I first got the backhoe, that drain line fitting on the tractor was just a little quick connect sticking out of the rear end. It was nearly impossible to get your arms down there and get this hooked up, so I added a line up to the bracket where the power beyond line comes out. Much easier.
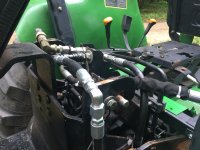
The remaining 3 hoses are easy to connect to the new valve from below. The two cylinder hoses can also be reached from above, though you don’t have much room for a wrench to turn.
Next was the hose that goes up to the power beyond output on the tractor and feeds the IN port on the thumb valve. That was easy and there were no issues.
When it came to the thumb cylinder lines, I had to scratch my head as to why both new hoses were way too short. Then I realized my mistake. To measure the length of these hoses, I went to Lowes and picked up a 20 foot piece of rubber electrical cord that’s about the same diameter as the hydraulic hoses. Then I could route that through the machine and get an exact length – I was so proud of my splendid idea. I wrapped electrical tape on the cord to mark the length of each future hose. Then when I took the measurements from the electrical cord, I measured from the wrong end of the cord. Duh. These things happen to keep us humble, and I am really humble. So on that second trip to the hose-maker shop, I also picked up two new hoses with a coupler to lengthen the too-short lines. One nice thing about this is that if I ever blow one of those lines, I only have to replace the half that’s blown and won’t have to go through routing it through the whole machine. I can pretend that I designed it this way for that purpose, and nobody will ever know anyway because those couplers are hiding inside the boom.
All of the above work was done on the backhoe with it sitting up on some wood blocks so I could get in from below, which means that the boom is fully up. That makes it impossible to snake the thumb cylinder hoses through the boom pivot. So the end of each thumb cylinder line was snaked out under the backhoe valve and left dangling. Each one was capped since I have to use the backhoe itself to lift it high enough to get the large pins slipped in. The tractor’s rocker arms lift it up, but it’s always about 1/8” short. I have adjusted the rocker feedback so it goes all the way to the top and that’s still not enough. So I lift it with the rocker arms, and set it down on some smaller diameter pins. Then the hydraulics are switched over and it’s lifted the rest of the way by pushing the bucket into the ground. The point of all that is that the hydraulics in the backhoe needed to be powered up in order to get it fully mounted, thus the plugs in the dangling thumb cylinder lines in case new thumb spool valve gets bumped.
Here’s an interesting off-topic story about the prior owner of my tractor: He was not the most mechanically-inclined man in the world. One time when he was mounting the backhoe, he had this same problem getting the big 1” retainer pins in place. So he slipped his thumb into the hole to check the alignment while he wiggled the control lever. He wiggled it too much and the backhoe dropped, cleanly slicing off his thumb at the end joint. For this reason, all the neighbors referred to him as Tom-Thumb. But I give him credit that he didn’t let this minor handicap stop him. He used the machine for many more years before I ended up with it.
Finally, it’s always a good idea to check every fitting one last time to make everything is nice and snug. But when you’re anxious to try out a new machine it’s easy to convince yourself that it’s fine. That led to a puddle of hydraulic fluid in the garage with a thin stream leading to another puddle in the driveway. That leak was tightened up, then I found another loose fitting once I took it into the woods – I’ll let nature clean up that mess. My wife was asking why there were planer shavings all over the driveway, and whether I had plans to pick them up. I wanted to sarcastically say that I put them there for decoration, but just kind of grunted.
Once it was all plumbed up, the first test was to see if the bucket could push the thumb work port relief into bypass. I was surprised that it could not. I have not adjusted those and they should be factory set to 2500 PSI. I was also happy to see that the backhoe seems to operate just like it did before, even though it is being fed through this new valve with an input relief also factory set to 2500 PSI.
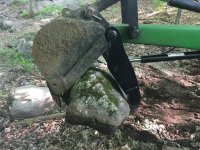
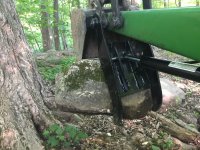
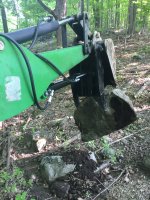
The next test was to get into the woods. It was able to easily grasp “two-man” rocks, but the boom wasn’t always able to lift them. It’s possible that the input relief in the new valve is bypassing. I think I need to crank up all the reliefs on the new valve to their max.
I don’t have a foot pedal yet, but the stock lever is easy to push down with the foot to extend the thumb, or lift it with the toe to retract.
