Built my computer desk

/ Built my computer desk #1  

hitekcountry

Gold Member
Joined
Oct 14, 2004
Messages
495
Location
Ca. Mountains west of Silicon Valley
Tractor
Kabota 6100 Kabota L35
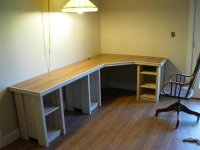
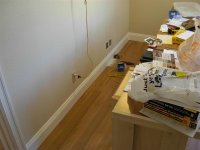
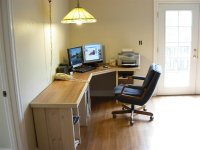
I’ve had my computer in the dining room for probably more than ten years (one of those temporary arrangements) so now I decided to move it into the family room.

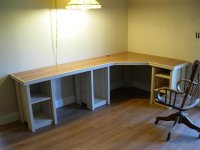
I do have a nice oak desk but it’s too large for what I want, it tends to make the room look small, so I thought I would buy something that would look good in there and not dominate the room.

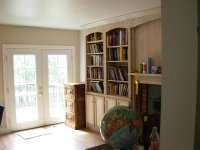
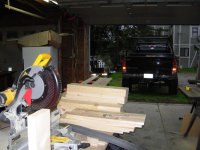
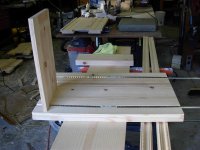
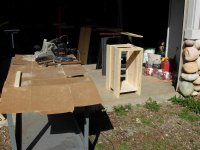
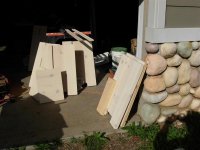
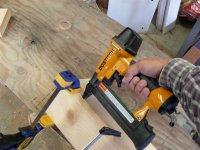
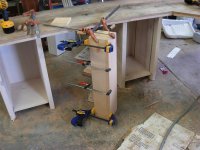
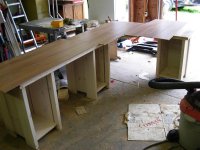
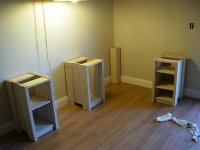
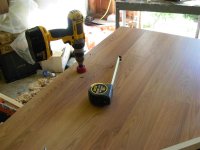
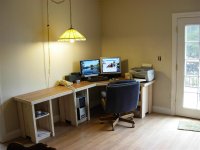
Well after looking for about a month and not finding what I wanted, I decided to just design and build it myself. Part of the problem was I was trying to match the book case/shelves that I had built back about 12 years ago

Pic of book case
 

Attachments

  • Picture 1860 (Medium).jpg
    Picture 1860 (Medium).jpg
    55.6 KB · Views: 498
/ Built my computer desk
  • Thread Starter
#2  
Materials for the build -- all pine
1 3 1x12x6’
2 3 2x12x6’
3 2 trim 8’
4 1 1x18x4’
5 1 sheet bead board
 

Attachments

  • Picture 798 (Medium).jpg
    Picture 798 (Medium).jpg
    58.6 KB · Views: 408
  • Picture 797 (Medium).jpg
    Picture 797 (Medium).jpg
    67.2 KB · Views: 340
/ Built my computer desk
  • Thread Starter
#3  
Rip the 2x12s and cut everything to length
 

Attachments

  • Picture 799 (Medium).jpg
    Picture 799 (Medium).jpg
    78 KB · Views: 260
  • Picture 800 (Medium).jpg
    Picture 800 (Medium).jpg
    69.6 KB · Views: 243
/ Built my computer desk
  • Thread Starter
#4  
Sanding and then the dado cuts. Sure makes a lot of saw dust.
 

Attachments

  • Picture 804 (Medium).jpg
    Picture 804 (Medium).jpg
    56.9 KB · Views: 256
  • Picture 805 (Medium).jpg
    Picture 805 (Medium).jpg
    56.4 KB · Views: 219
  • Picture 807 (Medium).jpg
    Picture 807 (Medium).jpg
    77 KB · Views: 203
  • Picture 806 (Medium).jpg
    Picture 806 (Medium).jpg
    82.4 KB · Views: 221
/ Built my computer desk
  • Thread Starter
#5  
Using the biscuit joiner and then gluing. Two clamps for each of these side pieces and I’m making six side pieces, I need 12 clamps – Ok good --I have just enough. Can never have too many clamps.
 

Attachments

  • Picture 1017 (Medium).jpg
    Picture 1017 (Medium).jpg
    67 KB · Views: 260
  • Picture 1018 (Medium).jpg
    Picture 1018 (Medium).jpg
    49.4 KB · Views: 191
  • Picture 1019 (Medium).jpg
    Picture 1019 (Medium).jpg
    67.9 KB · Views: 201
  • Picture 1022 (Medium).jpg
    Picture 1022 (Medium).jpg
    51.8 KB · Views: 272
/ Built my computer desk #6  
Please help me see a desk or a tractor? :D

I see a bookshelf, a globe, a 3-drawer file cabinet, and some more stuff, but no desk or tractor.... :eek: :eek:

I know it's just me.... Nice looking floor.
 
/ Built my computer desk
  • Thread Starter
#10  
Here I apply the finish, I’m just using white paint and applying it like you would stain.
 

Attachments

  • Picture 1094 (Medium).jpg
    Picture 1094 (Medium).jpg
    60.8 KB · Views: 258
  • Picture 1095 (Medium).jpg
    Picture 1095 (Medium).jpg
    60.2 KB · Views: 202
  • Picture 1096 (Medium).jpg
    Picture 1096 (Medium).jpg
    61.9 KB · Views: 313
/ Built my computer desk
  • Thread Starter
#11  
First one glued together and then with the bead board nailed to the back.
 

Attachments

  • Picture 1205 (Medium).jpg
    Picture 1205 (Medium).jpg
    42.9 KB · Views: 370
  • Picture 1259 (Medium).jpg
    Picture 1259 (Medium).jpg
    40.3 KB · Views: 295
  • Picture 1260 (Medium).jpg
    Picture 1260 (Medium).jpg
    58.4 KB · Views: 293
/ Built my computer desk
  • Thread Starter
#12  
Here’s the first picture that gives an idea of what it’s going to look like.
The top is a 4x8 sheet of ¾ ply with an additional ¾ thick by 1½ strip all along the front edge and ends. On the far right end (just to the right of the glue bottle) the top was extended 6” to make that end 4’6” long. I later decided 5’ would have been better
 

Attachments

  • Picture 1387 (Medium).jpg
    Picture 1387 (Medium).jpg
    78.4 KB · Views: 395
/ Built my computer desk
  • Thread Starter
#13  
It’s clear I need a support for that back corner, so I’ll build a leg to put back there.
 

Attachments

  • Picture 1388 (Medium).jpg
    Picture 1388 (Medium).jpg
    73.1 KB · Views: 344
  • Picture 1389 (Medium).jpg
    Picture 1389 (Medium).jpg
    72.3 KB · Views: 359
/ Built my computer desk
  • Thread Starter
#14  
Well I have some left over laminate flooring from the room where the desk is going; I think I’ll use that for the desk top. Why not!!

I try to attach the laminate flooring material to the plywood using contact cement, and it’s just not sticking worth a ****. Now the day I was doing that it was quit cold, so I took the top into the gym where I have a number of electric heaters to where I can worm up the room and hopefully get the contact cement to stick. Didn’t work!!

I had some linoleum glue and used that and clamped the thing and let it set overnight. That worked.
 

Attachments

  • Picture 1390 (Medium).jpg
    Picture 1390 (Medium).jpg
    72.4 KB · Views: 299
  • Picture 1391 (Medium).jpg
    Picture 1391 (Medium).jpg
    78.6 KB · Views: 232
  • Picture 1392 (Medium).jpg
    Picture 1392 (Medium).jpg
    89.7 KB · Views: 292
/ Built my computer desk
  • Thread Starter
#17  
Applying the edge trim.
Drilling a hole for wires.
 

Attachments

  • Picture 1407 (Medium).jpg
    Picture 1407 (Medium).jpg
    70.7 KB · Views: 271
  • Picture 1408 (Medium).jpg
    Picture 1408 (Medium).jpg
    73 KB · Views: 266
  • Picture 1409 (Medium).jpg
    Picture 1409 (Medium).jpg
    62.5 KB · Views: 251
/ Built my computer desk
  • Thread Starter
#18  
Finished desk
 

Attachments

  • Picture 1410 (Medium).jpg
    Picture 1410 (Medium).jpg
    47 KB · Views: 553
  • Picture 1411 (Medium).jpg
    Picture 1411 (Medium).jpg
    47.5 KB · Views: 575
  • Picture 1413 (Medium).jpg
    Picture 1413 (Medium).jpg
    33.9 KB · Views: 454
/ Built my computer desk
  • Thread Starter
#19  
Ooops major oversight—no phone or power in that corner of the room (old house). There is an outlet on that wall but it’s switched for lights.

Need to run power and phone.

Ok got that all hooked up, power works, phone line does not.

Now wait a minute, if I’m good at anything I’m good at electrical, and I can’t even hook up a phone jack correctly?? What the %&**!!! ( electrical engineering 40 years) Disconnect, reconnect, check everything several times, still doesn’t work. Finally I took a look into the RJ11 connector plate (new from HD) and notice one of the pins was bent. I took the connector apart, repositioned the pin, and everything worked fine after that.
 

Attachments

  • Picture 1816 (Medium).jpg
    Picture 1816 (Medium).jpg
    51.9 KB · Views: 286
  • Picture 1818 (Medium).jpg
    Picture 1818 (Medium).jpg
    46.2 KB · Views: 258
  • Picture 1819 (Medium).jpg
    Picture 1819 (Medium).jpg
    43.7 KB · Views: 238
  • Picture 1822 (Medium).jpg
    Picture 1822 (Medium).jpg
    47.1 KB · Views: 280
 
Top