I have a small backhoe and have about 2000 ft of ditch around my place that I need to clean out. They are full of mud from field run off. I have a 39" grave digging bucket that will do the job nicely. My problem is how to keep the bottom of the ditch level. I have a level transit to set the ends but know that as I dig I will go up or down. If I had a lazer level I could make a mark on the bucket to set depth. I know that real backhoe operators can start at one end and get to the other end and keep it level. Not me. The edges of my ditches are not on level so can not use them. HELP big dan
You are using an out of date browser. It may not display this or other websites correctly.
You should upgrade or use an alternative browser.
You should upgrade or use an alternative browser.
cleaning ditches
- Thread starter oldhippy
- Start date
/ cleaning ditches
#1
theonlybull
Gold Member
- Joined
- Sep 6, 2003
- Messages
- 307
generally, you can go by what's already in the ditch, if you need to take 6", then take 6" from the whole ditch
theonlybull
Gold Member
- Joined
- Sep 6, 2003
- Messages
- 307
no magic,,,,, just luck, unless you want to spend mega $$$$ on a bucket mounted lazer guiding system.
after you ditch for awhile, you kinda get the feel for it. but a 16' board, and a level will ensure you have enough grade when you first get goin too
after you ditch for awhile, you kinda get the feel for it. but a 16' board, and a level will ensure you have enough grade when you first get goin too
charlz
Elite Member
That is a lot of ditch to work with a hoe. If your tractor can straddle it I would look at using a plow to open it back up. One of the problems with using a hoe is you remove the material, more slough's in from the sides and the ditch eventually gets wider and wider as you keep cleaning it out. With a plow you are moving the dirt back onto the sides. Plowing is way faster than a hoe.
3RRL
Super Member
- Joined
- Oct 20, 2005
- Messages
- 6,825
- Tractor
- 55HP 4WD KAMA 554 and 4 x 4 Jinma 284
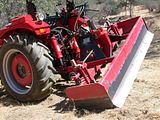
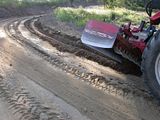
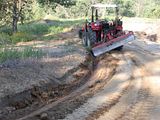
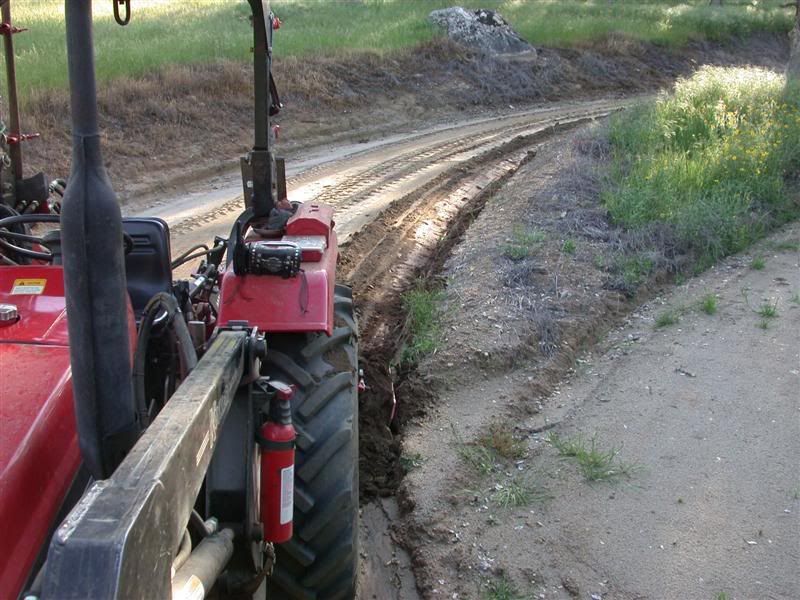
If you have a boxblade and are up for other suggestions, I use my boxblade tilted way over to the side and cut my ditches that way.
Works pretty good for me, especially if the ground is a little soft.
How big do you need your ditches to be?


Works pretty good for me, especially if the ground is a little soft.
How big do you need your ditches to be?


srjones
Platinum Member
- Joined
- Mar 6, 2006
- Messages
- 542
- Location
- Columbia County, Oregon, USA
- Tractor
- Mahindra 2015HST & Mitsubish R1500
I have a small backhoe and have about 2000 ft of ditch around my place that I need to clean out. They are full of mud from field run off. I have a 39" grave digging bucket that will do the job nicely. My problem is how to keep the bottom of the ditch level. I have a level transit to set the ends but know that as I dig I will go up or down. If I had a lazer level I could make a mark on the bucket to set depth. I know that real backhoe operators can start at one end and get to the other end and keep it level. Not me. The edges of my ditches are not on level so can not use them. HELP big dan
Hire/cajole/coerce/ask/beg someone to stand in or near the ditch with a laser level detector and have the check the depth often. Work out some hand signals so you know to dig deeper or stop.
This would also work with a transit, but you might need another person.
BTW, I'm talking about a rotary laser level. I've done what I think you're talking about but it's really difficult...especially on a sunny day.
Also, remember, you don't want to make the ditch bottoms level, you'll want build in some slope so it drains (somewhere). Otherwise, you'll get standing water (and skeeters)

Lastly, (worse case) run some strings along side as a guide, supporting them at various points between the ends.
I have people who I can cajole/coerce/ask/beg to help with ditch ( ain't friends grand). My ditches are to steep and have trees to where I could not get in with boxblade or plow to clean out. Roy that boxbladed ditch sure looks nice. The standing water won't matter so much as I am close to the river and have rice fields around me. We have turkey skeeters around the place. LOL Thanks big dan
ScottAR
Veteran Member
Might wait a day or two till the rain is dried a little. I dunno how wet it got in Clay, in Greene my lawn makes squishy sounds when I walk on it.
RedDirt
Gold Member
- Joined
- Dec 4, 2007
- Messages
- 469
- Location
- Northern Idaho
- Tractor
- Kubota BX23, Wards 16HP HST Garden Tractor, (previous) D2 Logging Cat
Does your transit tilt? I worked out a method the past couple of weeks placing a drain pipe at an accurate 1/4"/ft slope. My trench was straight. I don't know if this would work on a curved trench/ditch.
For ditch work it would work something like this:
Dig a portion of the ditch to the elevation you want/need and set the transit there. Measure off 100 ft on the ground from the transit. From the transit sight level to a story pole at the 100 ft marker and calculate the drop (or rise if going up hill). eg. 1/4"/ft is normally expressed as 2% slope for civil work so 100' x .02 = 2' (or 100' x 1/4" = 2ft) (25" actually but 1" in 100 ft is considered negligible for most drainage work). Now lower (or raise) the target on the story pole that distance (from your level mark). Next tilt the transit until you are sighting the target. Your instrument is now an invisible string line set to the slope you want to make.
As a precaution against jarring the tilt I sight a bench mark when the instrument is set to the calculated tilt. This can be a flagged nail on a road bank, tape on a tree or building...anything. That way if you inadvertently bump the tilt just sight to the bench mark and you're back in business.
When I'm trenching I dig the depth I think I need by eyeball then get off, put the story pole in the trench, sight the target and know if I'm an inch or two high or low. Mount up, correct the trench, if high, then push forward to the next boom length.
A friend to set the pole and shoot the target will make this go a bit faster but mostly they are just sitting there doing nothing while you dig 98% of the time. I did not find it too cumbersome to do myself. But ditch work will be a lot faster than the 4' to 3' trench I was digging in hard clay so a helper here would probably be beneficial.
You don't need to work the full 100 ft and have to walk that distance each time. When ever convenient just move the transit closer and re-do the set up. 30-40 feet worked well for my project but I'd go farther for ditch work especially with a helper. And you don't need to measure a 100 ft in the first place; I used that as an example for the math. Just calculate the drop for the distance you can shoot and set the target accordingly. In fact shorter distances can get you around corners, along an arc, etc.
The ditch example is more straightforward than a trench. With trench work you also need to pull in calculations of instrument height above the trench, existing grade and how far below existing grade your trench will be at the given distance in order to set your target height correctly. But the theory is the same; just a bit more math to set the target. I've done a lot of transit work in my career and I still find it helpful to draw a simple sketch to make sure I'm adding when I should be and not subtracting.
My transit is the least expensive Sears model I could buy as a young carpenter 40 years ago, paid $250 then. Now on ebay you can get equal to much better from $10 to $40. I recently picked up an excellent $600 Leica auto level for $65.
My story pole (rod) is just a 7ft tall board about the size of plaster lath with a cast-off broken tape measure taped upside down to it. The box is at the top, taped the back, tape pointing up, and I can extend another 5ft or so if needed (depends on wind). The tripod legs for the rod are two shorter pieces of lath that I spread to hold the rod fairly plumb and they are pinch clamped to the rod. I thought of screwing them onto the rod but the adjstability of the clamp method on uneven terrain and trenches works better.
Maybe this method will help you or someone else. Good luck and happy ditching.