Digging post holes

   / Digging post holes
  • Thread Starter
#41  
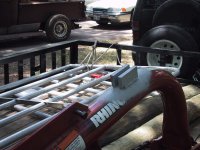
Phantom309, I dig the holes by myself. I have not had too many problems keeping the holes vertical although there have been a few places where some formation of rocks has caused the hole to slant. I doubt that anyone could have prevented this. There is not much slop in my setup and I think that helps. I started out with a TSC PHD but it is too light duty to use where there are rocks of any size. I just kept breaking shear bolts when I got out of the bottom land. I bought the Rhino unit to replace it and have only used the Rhino on very rocky holes and so far have broken 2 shear pins vs 40-50 with the TSC unit. Now I have sell the TSC unit to someone who lives East of I35 where there are no rocks.

The old pickup is a '34/35 International C1. It is or I should say will be a resto-rod because I did not get the original running gear with it. I have a Chevy engine in it now but I plan to replace it with the one that is in my Vette and rebuild the original Vette engine when I get time.
 
   / Digging post holes
  • Thread Starter
#42  
Harv, Thanks for the advice on post hole diggers. The one I had for a long time had too thin metal in the blades and I kept bending it so I looked for one with thick metal in the blades. The problem I have now is that I cannot open the handles wide enough to pick up the material at the bottom of a 9"x4' hole. I also find that some of the rock dust and fine materials just fall out of the digger no matter what. I try to only use manual diggers to clean out holes that I have bored by machine. New philosophy as I get older!

I designed the weight bar to have a 2:1 mechanical advantage. I did not do any stess analysis on the flat bar stock but I figured that a 1/2 x 3 inch bar would be able to support the 340# I was going to hang on it and if it didn't then not much was lost. I plan to weld a 3/4"x2" bar (what I have in the scrap pile) to the top of the 1/2" bar to give it a 'T' cross-section to keep it from bending to the side. I will also put a brace on the top to make it stronger still as it bounces around a lot. I will also weld a couple of pieces of square bar stock to the top of the auger boom to keep the weight bar centered with the axis of the boom. The only other changes I might make except to paint it would be to add hangers for more weights. I dug one hole today and it took all morning. I went through 4' of solid hard limestone. It seemed like it would take forever but it sure felt good to see a post set in the hole.
 
   / Digging post holes #43  
Don,

Sometimes just a touch of water, just a touch, little touch, will make the "flour" doughy enough to pick up with post hole diggers.

BTW I've been thinking for years about building a better set of manual diggers. The ones on the market are like screwdrivers used to be. They just haven't changed because no one's really looked at them close yet!

Of course with everything else on my plate these diggers are there in the background just a begging for attention and not even getting a glance.

Tell me about your new auger, brand, how much it cost, and more importantly, if you were building it what would you change?

Enquiring minds want to know...........
 
   / Digging post holes
  • Thread Starter
#44  
Harv, the auger is a Belltec 9" RAD (Rock And Dirt) auger that sells for $825. So far I would not change anything about it. It has the carbide bullet teeth and Rockwell 65 hardfacing on the flighting. The only compromise that I see they made is that there are only two bullet teeth on the edge of each flight. I suspect the outer teeth are spaced closer together on their dedicated rock augers but that is just my assumption. The dealer I buy from had never sold a rock auger for use with a 3PT PHD because they are supposed to be used with down pressure. If he had not told me that the rock augers cut very slowly I might have not been as satisfied but since he was refering to how they work with hydraulic augers with down pressure I expected them to work even more slowly with my setup. My biggest fear was that adding enough down pressure to make the auger work would just cause me to break shear pins but it is not a problem in solid rock because the rock is relatively uniform and the auger just grinds the rock into a power instead of breaking it off in chunks. Where I might have problems is in areas with large rocks that are only in part of the hole. If this ends up being a problem I will just buy a new driveline with a clutch instead of shear pin.
 
   / Digging post holes
  • Thread Starter
#45  
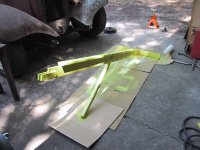
I added the reinforcement to the top the bar as seen in the attached photo. I also beefed up the support bar. Since I only had short pieces of thick wall square tubing I welded three pieces together over the exisiting bar. The weight of this thing about doubled and it is pretty heavy now. I had yellow paint available so that is what I used.
 

Attachments

  • 33-158063-Digger1.jpg
    33-158063-Digger1.jpg
    73.3 KB · Views: 260
   / Digging post holes
  • Thread Starter
#46  
I welded the two pieces of bar stock seen in this photo to the PHD boom to keep the weight bar lined up with the center line of the boom.
 

Attachments

  • 33-158064-Digger2.jpg
    33-158064-Digger2.jpg
    71.4 KB · Views: 239
   / Digging post holes #47  
Looks good Don.

You know I've been a tithering over this hanging the weight out there. I know the farther you get away from the fulcrum (point of the auger) the more leverage you have and the heavier it feels or seems like it should be.

But it just didn't make sense that if you had two hundred and fifty pounds over the auger point or out six feet beyond the auger point that you could change the weight but I still know you were. I just couldn't figure out why.

Then a couple of minutes ago in the shower it hit me. Your three hundred and fifty pounds of suitcase weights out at six feet is a whole bunch heavier than if it was sitting just above the auger point.

Let's say your point where the three point picks up the weight of the tractor is four feet from the auger point. Then if you put your three hundred and fifty pounds out four feet on the other side of the auger point you'd theoretically be balanced with three hundred and fifty pounds on each side. The auger point would see seven hundred pounds, right?

I guess what we need is for one of the engineering types or someone like bgott who is so good at finding things to come up with the equasion so you and me would know just how much weight we're using.

Course you've probably figured all this out and are wondering why I'm so slow. I'm just glad I'm not stopped, been there, hard to excited about not moving.
 
   / Digging post holes #48  
This is gonna take some digging. First thing we have to figure out:

There are three kinds of levers:

1) First Class Lever -- the effort and the load on either side of the fulcrum. Some examples would be a crowbar or a seesaw. The effort is only less than the load if the load is closer to the fulcrum. The lever then acts as a force magnifier and the mechanical advantage is greater than one. If the effort is closer to the fulcrum, then the effort is larger than the load and the mechanical advantage is less than one. In this case the lever acts as a movement magnifier.

2) Second Class Lever -- the load is between the fulcrum and the effort. An example is a nutcracker or a wheelbarrow. This type of lever always acts as a force magnifier and its mechanical advantage is greater than one.

3) Third Class Lever -- the effort is between the load and the fulcrum. An example is a pair of sugar tongs. This is a movement magnifier which means its mechanical advantage is less than one. The load moves more than the effort. (When you use sugar tongs, a small movement of the fingertips makes the jaws of the tongs move a lot.)

I'm thinking we're dealing with a second class lever...What do y'all think?
 
   / Digging post holes #49  
This is a bigger PITA than I thought it would be. Lots of elementary school stuff, not much else. But I did find this:

MECHANICAL ADVANTAGE OF LEVER

Consider any kind of lever say 1st kind.

In equilibrium position torque of effort is always equal to the torque of load
i.e.
clockwise torque = anti clockwise torque
Torque of effort = torque of load
OR
effort x effort arm = weight x weight arm
P x OA = W x OB
OA = W x OB/P
W/P = OA/OB
but [W/P = M.A.]
M.A = OA/OB
OR
M.A. = effort arm / weight arm
This equation shows that mechanical advantage of lever can be increased
By increasing effort arm.
By decreasing weight arm

The picture that shows where the As and Os and Ws are didn't copy when I paste'ed this stuff so here's the site:

http://www.citycollegiate.com/machine2.htm

I'll see if I can find some more on this.
 
   / Digging post holes #50  
Work=force x distance. I guess if your weight is 250 pounds and your lever is four feet long you're exerting 1000 pounds on the auger. If I'm wrong I'm sure some college boy will chime in to set me straight. ;) It's been a while since I've really thought about this stuff. Usually, if the object I'm trying to move doesn't, I get a longer lever or some more a$$ on it and be done with it. :)
 

Tractor & Equipment Auctions

Kubota RTV-X900 Utility Cart (A50322)
Kubota RTV-X900...
LINK BELT LB-98 LOG LINE YARDER WITH MOTORIZED CARRIAGE (A51222)
LINK BELT LB-98...
Mayrath 10 x 32 Auger (A50514)
Mayrath 10 x 32...
Case IH Farmall 75C (A52349)
Case IH Farmall...
2016 WITZCO RG-35 RGN LOWBOY TRAILER (A50459)
2016 WITZCO RG-35...
RIGID 150 PSI AIR COMPRESSOR (A50854)
RIGID 150 PSI AIR...
 
Top