Driveway Project

   / Driveway Project #1  

KAB

Gold Member
Joined
Feb 16, 2004
Messages
345
Location
NE Ohio (Lake County)
Tractor
Kioti CK20
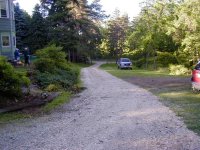
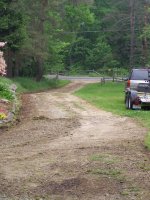
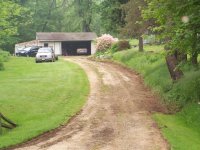
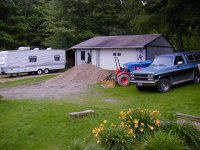
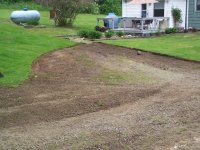
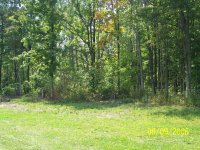
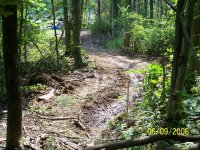
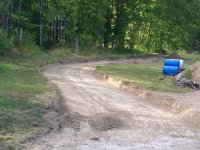
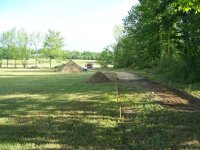
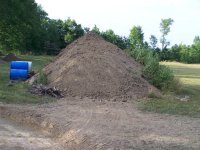
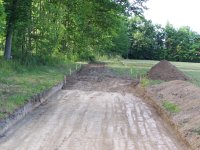
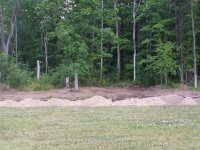
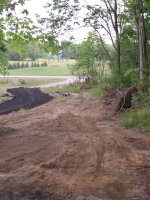
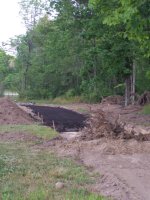
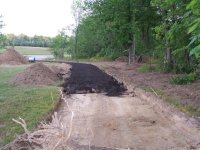
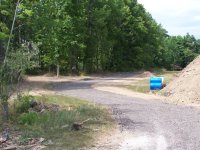
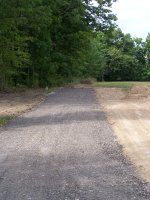
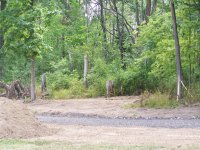
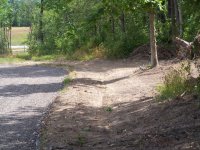
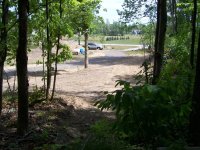
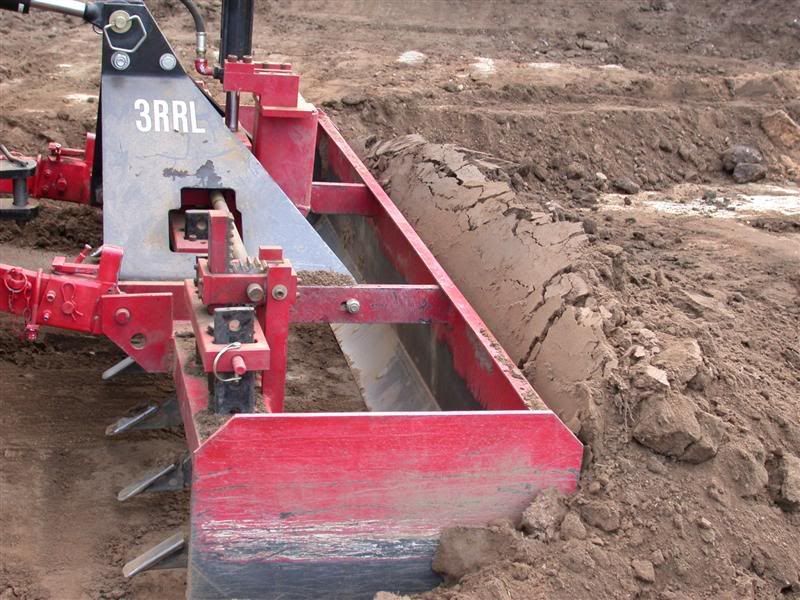
I have been working on a driveway project for a couple of years now. Well actually, trying to find the source of water crossing where the driveway will be going and a few days of actual work on the driveway.

During a heavy rain last summer I had a chance to do a little exploring and found that surface water had found an underground path and resurfacing about 50' away. In an attempt to resolve the problem I worked in a swale to attempt to redirect the water from where the driveway will be going.

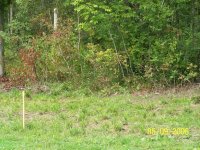
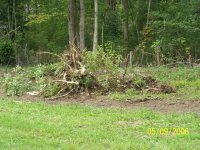
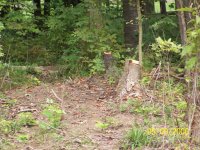
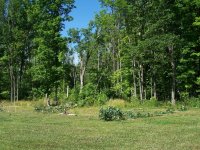
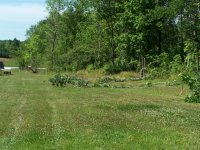
The first series of photo's are from Sept 06 (The dates on the photos list the month in the 2nd position).

Kurt
 

Attachments

  • 100_0456.JPG
    100_0456.JPG
    282.7 KB · Views: 430
  • 100_0457.JPG
    100_0457.JPG
    267.9 KB · Views: 292
  • 100_0459.JPG
    100_0459.JPG
    241.2 KB · Views: 280
  • 100_0463.JPG
    100_0463.JPG
    264.3 KB · Views: 257
  • 100_0467.JPG
    100_0467.JPG
    295.1 KB · Views: 275
  • 100_0474.JPG
    100_0474.JPG
    298.6 KB · Views: 328
   / Driveway Project
  • Thread Starter
#2  
We (my wife and I) layed out the driveway and I cut down some trees that were going to be in the way. (June 07)
 

Attachments

  • 100_0688.JPG
    100_0688.JPG
    278 KB · Views: 307
  • 100_0690.JPG
    100_0690.JPG
    283.9 KB · Views: 267
  • 100_0693.JPG
    100_0693.JPG
    274.8 KB · Views: 244
  • 100_0699.JPG
    100_0699.JPG
    305.1 KB · Views: 229
  • 100_0702.JPG
    100_0702.JPG
    276 KB · Views: 309
   / Driveway Project
  • Thread Starter
#3  
With everything marked and ready I used the box blade, with the help of TNT, to get 162' of driveway dug down to a clay base. This took about 8hrs of tractor time. I also decided on this day to extend the lenght of driveway that I would be working on to a total of 240'. When deciding to work on a project that requires the removal of dirt you have to have a place for it. The pile of dirt in the one pic is for a total lenght of driveway dug out to that time - 250'.
 

Attachments

  • 100_0721.JPG
    100_0721.JPG
    228.6 KB · Views: 308
  • 100_0726.JPG
    100_0726.JPG
    228.7 KB · Views: 294
  • 100_0722.JPG
    100_0722.JPG
    204.1 KB · Views: 296
  • 100_0723.JPG
    100_0723.JPG
    220.9 KB · Views: 326
   / Driveway Project
  • Thread Starter
#4  
The next day that I worked on the driveway I had some help to resolve that water issue that decided to return. Even with the swale in place I still had water resurfacing were the driveway was going. I had a friend stop by with his Volvo EC35 mini excavator. While I was working on extending the drive he was busy clearing stumps, clearing brush and roots, and roughing in swales. Sorry, no action pics, just pics of the finished projects after I cleaned the area up with the Kioti.
 

Attachments

  • 100_0730.JPG
    100_0730.JPG
    225.5 KB · Views: 319
  • 100_0731.JPG
    100_0731.JPG
    241.1 KB · Views: 294
  • 100_0736.JPG
    100_0736.JPG
    198.2 KB · Views: 339
   / Driveway Project
  • Thread Starter
#5  
The same day as the other photos were taken, as could be partially seen in some of the prior photos, this was also accomplished.

The material that was used for the base was a parking lot tear out. There were probably a dozen and a half of large material that I had to remove. Some of it can be seen along the side of the drive. I had 4 tri-axle loads of that base and 3 loads of an asphalt grindings as a topping.

Kurt
 

Attachments

  • 100_0728.JPG
    100_0728.JPG
    204.7 KB · Views: 322
  • 100_0732.JPG
    100_0732.JPG
    170.3 KB · Views: 279
  • 100_0733.JPG
    100_0733.JPG
    198.9 KB · Views: 306
   / Driveway Project
  • Thread Starter
#6  
Yesterday I got the driveway finished, 15yds of #1/2 crushed concrete, and 30 yds of a mix of asphalt and fine crushed concrete. I also spent some time cleaning up the swale and leveling the dirt along the sides of the driveway.

There will be more topping added to the driveway after we get the house built. So as it stands right now there is approx a total of 330' of drive way with a minumum base thickness of 7" and a min of 2" inches of topping.

The material that was placed before yesterday did not move when the three truckloads of materials were delivered. That was actually a bit of relief.

Kurt
 

Attachments

  • 100_0737.JPG
    100_0737.JPG
    219.2 KB · Views: 340
  • 100_0738.JPG
    100_0738.JPG
    265.2 KB · Views: 269
  • 100_0739.JPG
    100_0739.JPG
    227.6 KB · Views: 248
  • 100_0740.JPG
    100_0740.JPG
    268 KB · Views: 253
  • 100_0741.JPG
    100_0741.JPG
    234.3 KB · Views: 269
  • 100_0742.JPG
    100_0742.JPG
    260 KB · Views: 240
  • 100_0744.JPG
    100_0744.JPG
    232.5 KB · Views: 332
   / Driveway Project #7  
Great photos and a good looking drive. I like the meandering path you chose so as not to make it boring.
Man, you did a really nice job with the boxblade too. Just goes to show you how valuable a tool that is when you use it right. I'll bet you really thanked yourself for having the TnT too. Sure makes all that adjusting a snap.
Looks to me you went the extra mile to do it right.
Good job, it turned out great.
 
   / Driveway Project #8  
Is that a normal base for a driveway? Why not just use pit run and then 5/8 on top?
 
   / Driveway Project
  • Thread Starter
#9  
Investorguy said:
Is that a normal base for a driveway? Why not just use pit run and then 5/8 on top?

The tear out from a parking lot is not normal for residential use, talking to the one driver it is more normal for gas - oil well use but with a deeper base. I used it since I could not pass on the price. The crushed concrete is used quit a bit in the area. The price is less than the other 2 common material, sandstone and limestone.

I now have all 3 base materials, sandstone in the first 88', parking lot tearout in the next ~180, and crushed concrete in the rest. It took a while to get the sandstone base to completely lock in and not move. The parking lot material locked in what appears to be very quickly, and what I have seen of the crushed concrete it appears to lock in nicely.

Issue with each:
The concrete had the wire and rebar in it.
The parking lot material had a lot of chunks that were hard to work with using the box blade and the ck20. Those chucks were moved to the side, then moved to the area where the cruched concrete was spread.
Sandstone takes a while to get settled into place. It will not be used in an area the will be seeing heavy traffic right after installation. It took about a year of settling before I stopped noticing movement when driving on it. (It was topped with 304 then 411 limestone.)

Kurt
 
   / Driveway Project
  • Thread Starter
#10  
3RRL said:
Man, you did a really nice job with the boxblade too. Just goes to show you how valuable a tool that is when you use it right. I'll bet you really thanked yourself for having the TnT too. Sure makes all that adjusting a snap.
Looks to me you went the extra mile to do it right.
Good job, it turned out great.


3RRL, It has been amazing how much faster I have been able to do work with the BB and Rear Blade since I added TnT. The original swale took a lot of time to get it right because of all of the adjustment. The new swale, even being roughed in, would have probable taken twice as long (compare to what it did) since I could change angles on the fly. Even when digging the drive it worked best to cut in the edges the clear out the middle. Tilted to either side to mark the edges then start to clear the middle. It also helped to get some crown in place prior to spreading the base.

I have been really please on how well the KK BB has worked. The only area that I wish it would work better is at the beginning and ends of the drive where I wanted it squared off instead of a taper. At those areas I used the toothbar to dig down and square off the ends.

Kurt
 
   / Driveway Project #11  
KAB said:
I have been really please on how well the KK BB has worked. The only area that I wish it would work better is at the beginning and ends of the drive where I wanted it squared off instead of a taper. At those areas I used the toothbar to dig down and square off the ends.

Kurt
Well, I think you did a great job as it turned out .
If you wanted to square the ends up, using your fel is fine. But if you had some room to work perpendicular to the drive, you could box blade in reverse like a dozer at the end. Then approach parallel ON the drive to broach out the corners in reverse also ... much like a carpenter uses a chisel to square out a corner.


I don't know if your thought about using the boxblade that way or not, but I do that quite a bit. If you need some contour or bank on the drive, you can use the side tilt to create it, like a bulldozer would. Then you could go back and re-work the sides of the drive to build it back up square too. (If you have the room)
Just don't bend your lower drag links pushing like that. I beefed mine up to take the added stress pushing in reverse after I bent mine.:)
 
   / Driveway Project
  • Thread Starter
#12  
3RRL said:
Just don't bend your lower drag links pushing like that. I beefed mine up to take the added stress pushing in reverse after I bent mine.:)


That is part of the story that I left out.:eek: After loosening and removing most of the dirt at the lower end. I then attempted to clean up the remaining dirt by pushing the loose dirt into a pile in the corner. I caught the edge of the dirt with the right side of the BB and bent both lower links and the rt side link. (I put the hydraulic side link on the left side) I was able to heat up the side link to straighten it out and found a press to straighten out both lower links.

I did not take any pictures of the bent links.

Kurt
 
   / Driveway Project #13  
LOL ... Don't feel bad, I took them for you.:)


I fixed them up and welded a super thick scarifier to the bottoms to beef them up and several weld passes to build up a fillet.


They have not bent since then, and I have subjected them to even more severe stress duty. I also bent one turnbuckle side link. Mine were 1" dia thread so when I changed to hydraulic side tilt, I used really big cylinders ... Ø3-1/2 with Ø1-3/4 rods! I changed both sides out.

Back to your project, are you going to be doing any more drives or other dirt work? From your photos it looks like you really got the knack of working that boxblade. All that cutting with it came out terrific. What's next then?
You have to find something to do now that you got all that neat stuff on the tractor.:)
 
   / Driveway Project
  • Thread Starter
#14  
Rob,

I did a 24 x 60 driveway for my BIL over Memorial Day weekend. The driveway was fairly easy, it was moving the spoils over 300' that took forever. He now has a large pile of dirt at the back of his property.

That same weekend I installed one of these Royal Outdoor Products - Storage Buildings and Sheds, after tearing down the wood shed that was there, at my MIL campsite. and did the attached pics. to her driveway. The before are after I leveled it about 3 yrs ago, right after I got got the Kioti. I had other projects that needed done that weekend and did not have time to ditch the side of the drive. It is a 2hr drive to get there, and there is usually a long list of items to be done.

I also had 23 tons of limestone spread on the driveway after I had everything roughed in.

Back to my property... I need to figure out the exact placement of where the house will be located so I can finish the last part of the drive and parking area. I will also be adding a garage there in the future.

One thing that I had done to save some cost was to use the same cylinder for the side link and for the grapple. Some of these are still works in process due to the various projects that I have been working on. As I get them completed I will post what I did.

And thanks for the bent lower link pics. Those are what mine pretty much looked like. I will probably reinforce them sometime in the future as time permits. I have a 78 MGB that my wife wants me to start working on again now that I have most of the parts.

Kurt
 

Attachments

  • Old Driveway from top.JPG
    Old Driveway from top.JPG
    62.7 KB · Views: 206
  • driveway from top.JPG
    driveway from top.JPG
    130 KB · Views: 198
  • Driveway - Ditched.JPG
    Driveway - Ditched.JPG
    116 KB · Views: 219
  • Old Upper Drive.JPG
    Old Upper Drive.JPG
    61.5 KB · Views: 203
  • upper drive.JPG
    upper drive.JPG
    132.2 KB · Views: 203
   / Driveway Project #15  
KAB said:
With everything marked and ready I used the box blade, with the help of TNT.............................excuse my ignorance , what is TNT?
Otherwise interesting reading and a nice job.

Joe
 
   / Driveway Project #16  
Hi praha,
TNT is Top and Tilt. A description for having a hydraulic top link and hydraulic side link(s). It allows you to adjust the top link on the fly such as when using a boxblade for cutting or smoothing. Y can also adjust the side links on the fly for tilting the implement sideways such as a boxblade when you want one side of it to cut lower than the other. The system saves oodles of time spent manually adjusting the links. Saves wear and tear on your back too, just jumping in and out of the tractor for adjustments too.

KAB,
You've done a lot of work with your rig. I'll tell you what...
LOL ... I'd rather spend all day on the tractor cutting that drive than putting together that shed with the gazillion nuts and bolts any day!
 
   / Driveway Project #17  
praha said:
excuse my ignorance , what is TNT?


Joe


Either what Rob said, or Trinitrotoluene. C6H2(NO2)3CH3

I guess you can use it in small quantities to remove obstacles or limit out quickly when fishing.
 
   / Driveway Project #18  
Very nice. I wish they would build the roads in Ohio that well.
 

Tractor & Equipment Auctions

John Deere 5090GN (A60462)
John Deere 5090GN...
207274 (A52708)
207274 (A52708)
2025 Ligchine Spiderscreed Concrete Screed (A59228)
2025 Ligchine...
Kubota KXO40-4 (A53317)
Kubota KXO40-4...
8 TOOTHED BUCKET FOR MINI EXCAVATOR (A58214)
8 TOOTHED BUCKET...
Sakai SV505 Vibratory Roller (A53317)
Sakai SV505...
 
Top