Thought I would share my experience swapping the clutch disc in my 1986 Ford 3910 (13" Clutch with IPTO). First off, thank you to member ovrszd for his thread, the photographs and advice were a big help. Overall the job went smoothly and was not nearly as intimidating as it appears. It took about 4 hours on a Saturday to get it split and the clutch apart (I am not a pro).
The problem I was having with my machine was most noticeable at high throttle it was very difficult to shift. You could push in the clutch and it didn't want to disengage, like something was dragging. I tried adjusting it as far as it would go and it still would not disengage fully. Problem turned out to be a defective clutch disc, the rivets were all loose, the friction surfaces had cracks in them and looked like in spots they were dragging on the flywheel. Total cost for parts was $580 CDN for clutch disc, 3 seals (1 engine/2 tranny), new radius arm bolts/axle bushing, cork gasket, pilot bearing, throwout bearing).
Some advice I thought I'd share for others relating to a few specific parts of the process. (Some of this has been said before and some things may seem really basic/obvious to some)
1. Radius Arm Bolts
The bolts that attach the radius arms to the front axle were a fight and a half to get out. My tractor has been used as a loader tractor and the front axle pivot bushing had worn which puts a big load on these bolts and creates a bit of a shoulder in them which is hard to drive out. One technique I discovered that made this a bit easier was to put a bar through one of the unused axle bolt holes and try to twist the axle back to its normal alignment (i.e. as if the pivot bushing wasn't worn).
2. Splitting Supports
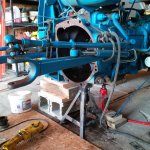
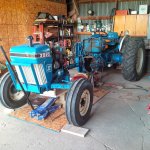
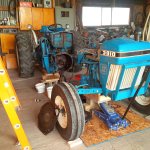
My supports were a lot less slick than ovrszd's (very nice job btw), but they did the trick and were quick and easy to build out of scrap lumber. I built a simple box frame that straddled the oil pan and allowed me good flexibility to use a trolley jack and blocks as required. I also pounded two hardwood shims between the front axle and the frame to keep the front end rigid so it didn't want to flop when torqueing bolts, etc.. I just used an axle stand/bottle jack on the rear end.
Some pictures post-split when I had the front end dropped onto blocks for working.


3. Watch your gap when separating
When you are at the point where you have all the bolts out and are trying to roll the two sections apart, take a look at the gap and make sure it is even at the top and bottom. I found I had to adjust my supports a bit as I was wider at the bottom than the top. Once adjusted it rolled apart really easily. Shouldn't need to put any real muscle into it.
4. Pulling the Rear Main Seal
I've never pulled a seal that size before. I watched a youtube video where a guy drilled two diametrically-opposed holes in the centre of the seal and drove two wood screws through them to drive the seal out. This technique does kinda work, but your wood screws end up going in the gap between the crank and the end cap which isn't great. I decided to put two pan head screws in just so they bit the metal plate in the seal, then used a claw hammer to rock the seal out gently. Worked like a charm and didn't damage anything!
5. Clutch Alignment Tool Not Needed
I spent some time trying to source a clutch alignment tool locally, had no luck. Turned out you really don't need one. Itエs pretty easy to eyeball and I had no issues on re-assembly.
6. Don't forget the cork gasket!
Good advice given to me...thought I'd repeat it. This is the gasket the seals the main bearing end cap and is sandwiched behind the metal backing plate.
7. Don't forget to grease the guide tube that the throwout bearing slides on. Also grease the phenolic bushings where the clutch shaft penetrates the bell housing on each side. I used anti-seize on the input shaft splines (lots of debate online about whether to do that or not..)
Hope some of this is helpful to others looking to do this job. If anyone has any questions about the job, just ask.
Thanks,
Brad


