frighten102
Member
- Joined
- Feb 27, 2025
- Messages
- 29
- Tractor
- MF1533
I looked in many places for a walkthrough for my particular equipment however I didn't find one that was 100% the same. Many tutorials and videos showed 80% similar steps but there were nuances that weren't the same, like the wire retaining clip. Eventually I came to a point where I felt I had enough to give it a try and now I'm sharing what I experienced here.
My (age-unknown, has >600 hours) MF1525 FEL curl cylinders had an internal leak so that any significant load on the bucket would tilt it down.
I looked at many seal replacement kits online but I didn't have the dimensions to order them. The local MF Dealer's parts shop needed the first 5 digits of the cylinder SN (mine is 30766) and they sold me the seal kits for ~$56 each, which is not a bad price compared to generic kits I found online.
Most every tutorial / video I saw they took the cylinder into a shop and used a vice. I didn't have that luxury so I used the tractor itself as the vice by always having one end pinned to the tractor. I set my FEL bucket facing down which better exposed the ends of the cylinders upwards.
Nearly all the other tutorials start the same way: relieve pressure on the lines, disconnect the lines, drain the fluid. After that is where this writeup starts.
Leaving the cylinder pinned at the top but disconnected the bottom, I pivoted cylinder up so I could rest the lose end on my shoulder which made for very easy view and access to the snap ring.
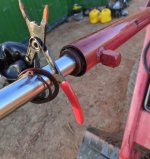
I then turned the cylinder upside-down and pinned it into the lower bracket. With the piston pointing up, this allowed me access for the next steps.
I used a hammer and punch to push the gland inside the cylinder ~1/2 inch to where the wire retaining ring was visible and could be accessed.
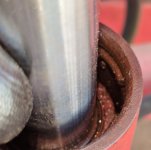
To remove the wire retaining ring, I found that a medium sized flat blade screwdriver with a tap by a hammer to push one end back (inside) went easiest. With that end back, I could get the screwdriver behind the outside of the ring and pop the other end out.
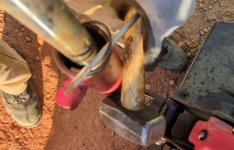
I turned the cylinder back over, re-pinning the piston to the lower bracket. With my FEL bucket face-down, it set the piston at the perfect height to allow me to lay the piston across the top of a 5gal hydraulic oil can.
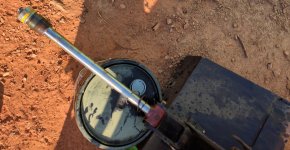
My seals were so shot that the cylinder case came off easily.
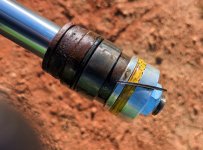
With the piston still pinned to the tractor, it kept the piston from rotating while I used an adjustable wrench to loosen the nut. The top of the 5gal can made a decent shelf for the task.
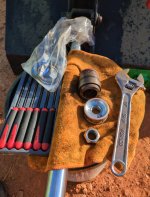
For the end piece, there was the two-part wipe on the outside and nothing on the inside.
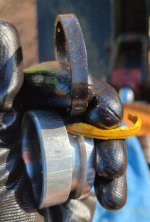
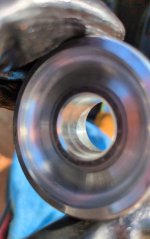
On the gland, there was a bushing / dust cover that was pressed into the end. The flat blade screwdriver fit in underneath and it didn't take much pressure to pop it out.
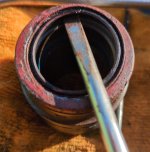
The outside of the gland had a flat wipe backed with a thick O-ring, which came right off. The inside of the gland had a squared wipe which also came off easy with a pick.
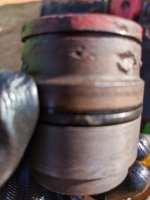
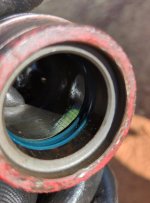
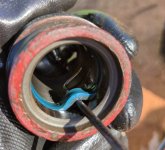
Going in reverse order, I put all the new seals on and re-assembled.
The trick to getting the inside seal in is to shape it like a kidney far enough to get it into its grove inside, then with a nudge, it'll pop back into shape.
Note: There is a 'front' and 'back' to the blue wipe; make sure it's oriented the correct direction.
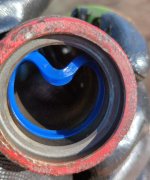
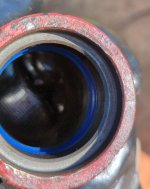
The bushing went into the gland nice and tight.
NOTE: I got over-eager on the 2nd run and smacked it with a hammer and put a slight roll on the edge of the bushing. It would've gone better had I used something flat between the bushing and hammer.
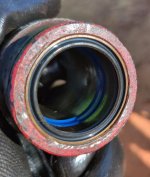
The exterior o-ring and wipe were easy. I double checked to put them in the original order (flat/wipe towards the cylinder opening/painted end, with the o-ring behind it).
The replacement external wipe for the end was completely different than the original (two flat pieces, yellow in the earlier pics), it's an o-ring inside a 3-sided ring. I found it easiest to put the o-ring on first, then the outer ring. That way, the o-ring seemed to help hold the outer ring in place vs. doing them together.
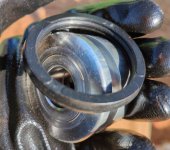
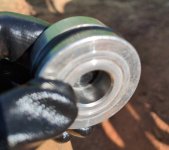
Reassembly was straightforward with a tighter fit. Ensure the pieces are facing the correct direction. Bucket was perfect height and having the end held by the FEL pin worked great.
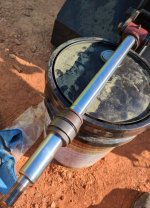
As could be seen in several pics, dust and pollen were definitely an issue doing the project outside, however, I did a thorough wipedown of all the items before re-sealing the unit back up.
Misc:
I took a lotof pics so I could see which item was in what place.
Tightened the nut back TIGHT. Having the piston pinned to the tractor works wonders again.
Connect the hoses back to the right ports (refer back to all those pics I took).
My way to purge the air was to leave the hose ends furthest from the pump very slightly loose so that the lines can purge the air, and reacted quickly when the air was out, otherwise oil could be wasted.
Replenish any hydraulic oil lost in the process.
The ops checks all passed and I'm calling this mission successful.
My (age-unknown, has >600 hours) MF1525 FEL curl cylinders had an internal leak so that any significant load on the bucket would tilt it down.
I looked at many seal replacement kits online but I didn't have the dimensions to order them. The local MF Dealer's parts shop needed the first 5 digits of the cylinder SN (mine is 30766) and they sold me the seal kits for ~$56 each, which is not a bad price compared to generic kits I found online.
Most every tutorial / video I saw they took the cylinder into a shop and used a vice. I didn't have that luxury so I used the tractor itself as the vice by always having one end pinned to the tractor. I set my FEL bucket facing down which better exposed the ends of the cylinders upwards.
Nearly all the other tutorials start the same way: relieve pressure on the lines, disconnect the lines, drain the fluid. After that is where this writeup starts.
Leaving the cylinder pinned at the top but disconnected the bottom, I pivoted cylinder up so I could rest the lose end on my shoulder which made for very easy view and access to the snap ring.

I then turned the cylinder upside-down and pinned it into the lower bracket. With the piston pointing up, this allowed me access for the next steps.
I used a hammer and punch to push the gland inside the cylinder ~1/2 inch to where the wire retaining ring was visible and could be accessed.

To remove the wire retaining ring, I found that a medium sized flat blade screwdriver with a tap by a hammer to push one end back (inside) went easiest. With that end back, I could get the screwdriver behind the outside of the ring and pop the other end out.

I turned the cylinder back over, re-pinning the piston to the lower bracket. With my FEL bucket face-down, it set the piston at the perfect height to allow me to lay the piston across the top of a 5gal hydraulic oil can.

My seals were so shot that the cylinder case came off easily.

With the piston still pinned to the tractor, it kept the piston from rotating while I used an adjustable wrench to loosen the nut. The top of the 5gal can made a decent shelf for the task.

For the end piece, there was the two-part wipe on the outside and nothing on the inside.


On the gland, there was a bushing / dust cover that was pressed into the end. The flat blade screwdriver fit in underneath and it didn't take much pressure to pop it out.

The outside of the gland had a flat wipe backed with a thick O-ring, which came right off. The inside of the gland had a squared wipe which also came off easy with a pick.


Going in reverse order, I put all the new seals on and re-assembled.
The trick to getting the inside seal in is to shape it like a kidney far enough to get it into its grove inside, then with a nudge, it'll pop back into shape.
Note: There is a 'front' and 'back' to the blue wipe; make sure it's oriented the correct direction.


The bushing went into the gland nice and tight.
NOTE: I got over-eager on the 2nd run and smacked it with a hammer and put a slight roll on the edge of the bushing. It would've gone better had I used something flat between the bushing and hammer.

The exterior o-ring and wipe were easy. I double checked to put them in the original order (flat/wipe towards the cylinder opening/painted end, with the o-ring behind it).
The replacement external wipe for the end was completely different than the original (two flat pieces, yellow in the earlier pics), it's an o-ring inside a 3-sided ring. I found it easiest to put the o-ring on first, then the outer ring. That way, the o-ring seemed to help hold the outer ring in place vs. doing them together.


Reassembly was straightforward with a tighter fit. Ensure the pieces are facing the correct direction. Bucket was perfect height and having the end held by the FEL pin worked great.

As could be seen in several pics, dust and pollen were definitely an issue doing the project outside, however, I did a thorough wipedown of all the items before re-sealing the unit back up.
Misc:
I took a lotof pics so I could see which item was in what place.
Tightened the nut back TIGHT. Having the piston pinned to the tractor works wonders again.
Connect the hoses back to the right ports (refer back to all those pics I took).
My way to purge the air was to leave the hose ends furthest from the pump very slightly loose so that the lines can purge the air, and reacted quickly when the air was out, otherwise oil could be wasted.
Replenish any hydraulic oil lost in the process.
The ops checks all passed and I'm calling this mission successful.
Last edited:
