Mur386
Bronze Member
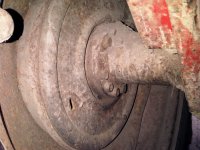
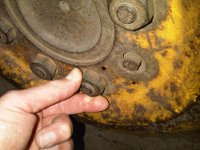
Sorry to disagree but the cutter/grinder will work, if you cut as in the picture, without gouging the Rim. You then use a chisel and hammer to break whatever part of the nut you cannot reach with the cutting disk. And there is another way as well, just thought of it, you could drill into the nut and then use a chisel and hammer to break it open. Recently used just a chisel and hammer to cut all the way through a 15/16 inch nut holding a gearbox to a bushhog, did not take very long, just trying to ease the work load with the cutting or drilling technique.
Good luck Mikescilly you can do it.
Billy
ps sorry that I did not give better instructions in the first post, let us know how it turns out. K?
Good luck Mikescilly you can do it.
Billy
ps sorry that I did not give better instructions in the first post, let us know how it turns out. K?
Attachments


Last edited:


")