You are using an out of date browser. It may not display this or other websites correctly.
You should upgrade or use an alternative browser.
You should upgrade or use an alternative browser.
My biggest project yet - a rear blade.
- Thread starter BGL990
- Start date
- Views: 5688
More options
Who Replied?
/ My biggest project yet - a rear blade.
#11
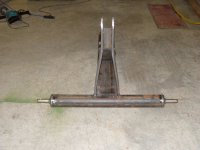
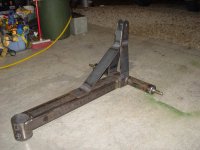
Again copying my landscape rake, I added a reinforcement bar at an angle to the uprights. I could have attached it to the uprights at a lower position. This way it looks a little goofy because it has to narrow down so much to fit the close-together end of the uprights. Oh well ...
Attachments
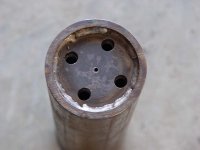
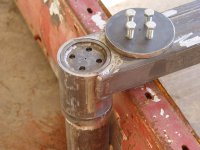
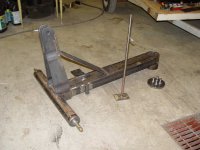
Now on to the blade itself. You have probably figured out that the short, large diameter piece of pipe on the end of the main beam is where the blade will hang and pivot. There needs to be a corresponding pipe sticking up from the blade itself. This is that piece, with a piece welded in the end which has 1/2" nuts welded on the back side of it. Their use will become clear in the next picture.
Attachments
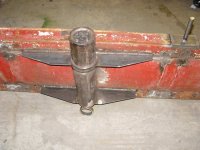
This is how the blade will hang from the main beam. The pipes fit together, with a stopper ring welded to the blade-side pipe as a lower stop,and a cap bolted on the top. The inner pipe is already tacked to the blade in this picture, but it was a bit of a nuisance to get it lined up.
Attachments
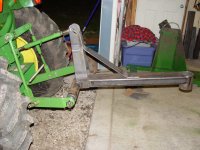
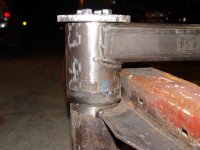
This is how I did it. I got the main beam set to just the right height and nicely levelled in all directions and dropped the inner pipe through the end of it. I then hung the blade from an engine hoist and tweaked it until it was level and just touching the vertical pipe. When everything was OK, I tacked it in place with the welder.
Attachments
To complete the attachment of the pipe to the blade, I welded more heavily where I had tacked it earlier and then added a couple of horizontal support plates. The extra support plates spread forces out along the top and bottom of the blade where it is already reinforced with heavy angle iron. In this picture you can also see a pin I added to the top edge of the blade. This is where the hydraulic angle cylinder will ultimately attach. There will be a lot of force on this pin, so I drilled out a piece of plate, inserted the bar through it and welded both top and bottom. The plate was then attached to the top edge of the blade.
Attachments
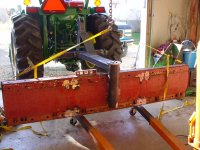
Finally getting close to the end. Here is everything put together. I don't have any rear hydraulic outlets on my tractor yet, so for now I will just hold the blade in position with a fixed bar. The angle cylinder mounts are 26" from pin to pin, which works out nicely for a 14" stroke cylinder available at a local farm supply store. I probably could have moved the mounts closer to the pivot point and used a smaller cylinder, but this way there will be less force on everything and the cylinders are not that much different in price.
