My Wedding Gazebo is 10 years old

   / My Wedding Gazebo is 10 years old #1  

EddieWalker

Epic Contributor
Joined
May 26, 2003
Messages
26,792
Location
Tyler, Texas
Tractor
Several, all used and abused.
Ten years ago I proposed to my wife. I asked her where she wanted to get married, and she said that she wanted it to happen at the pond. When I built the pond, I created a peninsula to build a gazebo on, but never got around to building it. So I drew some designs out for her to look at, she picked one that I liked a lot too, and the race was on to build it before our Wedding Day.

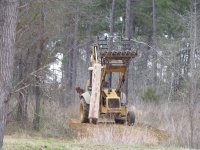
The before picture of where it's going to be built

1.JPG

After building the Pond, and after it was all full and happy, we had a really hot and dry summer that evaporated 8 feet of water. After that, I built a 2 foot concrete dam on my spillway to raise the overall water level two more feet. My thinking was the more water I had, the longer it would take to get back down to where it was that Summer.

This created an unforeseen problem for the Gazebo. The water level now went over the peninsula when the pond was full!!

IMG_7063.JPG

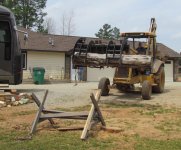
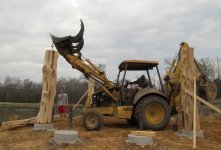
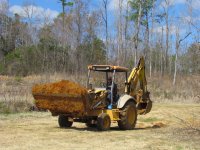
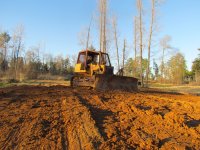
My only solution was to build up the peninsula 2 feet higher. I put my dad to work hauling the dirt on the backhoe. Then I spread it with the dozer. Like everything, this took a lot longer then I had hoped for.
20.JPG 27.JPG
 
   / My Wedding Gazebo is 10 years old
  • Thread Starter
#2  
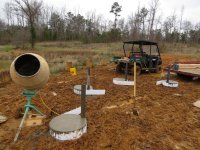
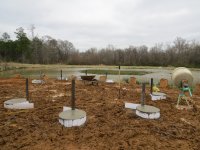
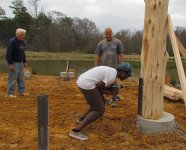
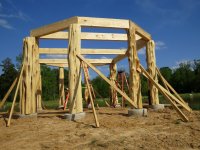
Once I had the dirt built up, I had to lay out where the posts where going to go. Then I drilled the holes, built the forms and leveled them out with a water level.

28.JPG 29.JPG

What I never thought of was how hard it would be to do this in the mud. It's been ten years, and I still remember how painful this was!!!

The C channel is 5 feet long. It sells in 20 foot sections, so the math worked perfect for this. I have about 3 feet in the center of the 12 inch hole, and about 18 inches above the 6 inch pad. Figuring out where to drill the holes so the C channel was where I wanted it, and then putting the concrete pad off to the side of the hole for the post to rest on was challenging. There was a lot of thinking involved in the project, and that's never been my strong point.
 
   / My Wedding Gazebo is 10 years old
  • Thread Starter
#3  
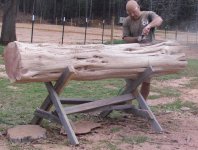
One of my favorite trees on my land are the cedar trees. Once they get to a certain size, their trunks become very random with a variety of curves to them.

I remove the bark with a big flat screw driver, then I hit it was a flap sanding disk on my 4 1/2 inch grinder. And finally I finish them of with my orbital sander. It takes a full day to get each post cleaned up.

31.JPG 33.JPG

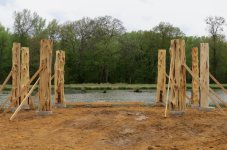
I bolted a chain to the top of the post and hauled them down to the pond. Once in position, I would spin it around to find the best side to look at from the front of the gazebo. Then I drilled two 1 inch holes through the C channel and the post and hammer in a length of 3/4 galvanized threaded rod to attach the posts to the footings. While doing all this, friends would stop by to help out, which was very appreciated.

34.JPG 45.JPG

37.JPG 48.JPG
 
   / My Wedding Gazebo is 10 years old
  • Thread Starter
#5  
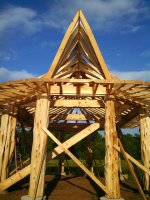
I wanted there to be a wide middle to the gazebo so we wouldn't be crowded for our wedding. Since 16 feet is such a common size for lumber, that's how wide I made it.

The drawing that we agreed to was based on whimsical ideas from the movie Lord of the Rings. While I never saw anything like this in the movie, it is what I was thinking about when designing it.

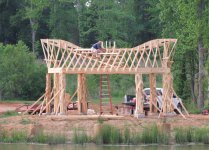
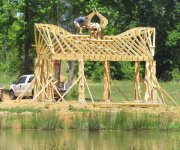
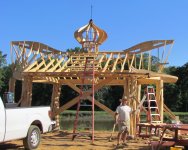
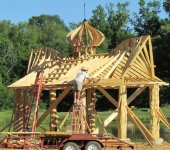
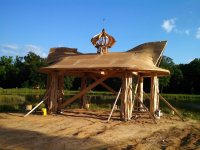
Overall, it's a simple gable roof, but with some added angles to it that made my head hurt. I never had a solid plan on how to cut these angles, I just dealt with each one when I had to.

The picture in my brain told me where to cut the lumber, and what angle to make it.

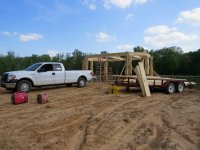
There isn't any power down there, so I bought a small Honda generator for this project. What I didn't know at the time is the Honda is only rated for 13 amps. My small air compressor was too much the Honda, so using air tools became impossible until I found a smaller air compressor that only drew 11 amps. That Bostick was a life saver!!!! I still have it and it works great. For the life of me, I can't understand why Lowes stopped selling them?

49.4.JPG 49.2.JPG

51.JPG

The most whimsical part of the gazebo is my cupola. I don't know why, but I have a thing for cupola's. I just love them, and I've built three of them on other things on my land. But they where all square, and kind of basic. For this one, I had the image of a rose bud in my head. That lead to finding pictures of Onion Domes on buildings in Russia that I really liked. So I started cutting plywood to create a shape that my brain liked, and went with it. A lot of the time, I'm in long discussions with my brain. Rarely do we both agree, but in this case, I think we nailed it!!!

53.JPG 58.JPG

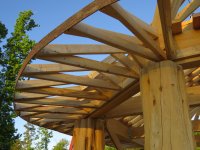
Since the goal was to be different, whimsical, Hobbit like, and reflect Mother Nature, I wanted the fascia and soffit to be different too. Making it round at the ends meant making every board a different size. It was slow going, but worth it in the end.


61.JPG


And to keep things interesting, I wanted light to come through the roof to open everything up. I kind of had an image of a Viking Long Ship in my brain when cutting the boards to build these on both sides.

62.jpg
 
   / My Wedding Gazebo is 10 years old #7  
Awesome work. Looking forward to the finished result.
 
   / My Wedding Gazebo is 10 years old
  • Thread Starter
#8  
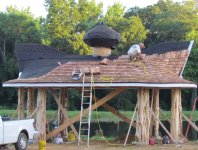
Once it was framed, I ran into a wall on how to deck it. I wasn't sure what I was going to use for shingles, but I knew I needed something that would hold nails. My first attempt with half inch OSB failed horribly with the angles. It just snapped when I tried to bend it. Half inch plywood failed too. Then while walking around in Lowes, I saw quarter inch OSB. I've never used it before, never even noticed it in the store before, but there it was!! It bent real easy, and a lot farther then the thicker stuff. Since it was too thin to hold a nail, I decided to use two layers of it. I still couldn't get a full sheet to bend like I needed it to, so I ripped it into 2 foot wide sheets, and I was able to make that work. I overlapped the seams on the second layer, and that seems to have worked pretty good.

59.JPG 65.jpg

My next, and my biggest challenge, was trying to figure out what to use for shingles. Asphalt shingles are probably the best for roofing something like this, with all it's angles. But I couldn't find anything that looked good. I was on a quest to create something special for our wedding, and I needed the roof to be something that adds to the gazebo, not disappoints. I spent hours with the guys at Home Depot and Lowes, going over their options, but never finding anything that I liked. Then I looked into tile and metal. I was real close to going with metal, and cutting each shingle into a shape to look like scales on a snake. I hate snakes, but I liked the look of metal scales on a roof. This was when I was getting desperate and running out of ideas.

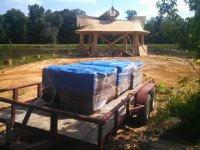
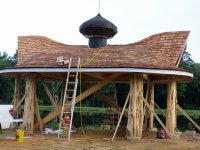
Then out of nowhere, Lowes started stocking Western Red Cedar Shingles. To provide some reference to how odd this was, it was only the one Lowes in my area that did this, it was the Lowes closest to me, and they only had 3 pallets of shingles. I bought all four, and they have never had cedar shingles in stock, EVER SINCE!!!

64.jpg 67.JPG

69.JPG
 
   / My Wedding Gazebo is 10 years old
  • Thread Starter
#9  
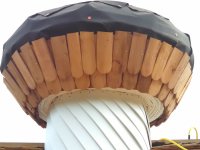
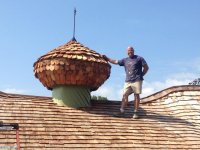
The Cupola is what I think of as the thing that makes the Wedding Gazebo so special to us. I've never seen anybody else do this, and when you see it, you smile.

Creating the shape hurt my head. My brain argued with me constantly on where to cut each board, and what the final shape would be. But the real pain didn't start until it was time to shingle it. That became an entire new level of stress, mental failure, brain fatigue and arguments with myself.

Wrapping the bottom portion with thin PVC was simple, and something I had planned on doing from the beginning. To me, it looked "plant-like" or similar to a stem for a plant.

For the soffit, I used PVC quarter round. It's hard to tell in the picture, because it's all twisty, but it's the same stuff everyone uses on their baseboards. Except it's PVC.

To vent it, I used a metal automotive funnel, some stainless steel wool, and a metal screen. The funnel is upside down, and there is a metal rod going through it that is attached to the framing. On top of the metal rod is a metal flame. I never did anything like this, but my brain came up with out of nowhere, and I just went along with it.

It's very common for me to have totally random thoughts to find a solution that I have no knowledge of, or what needs to be done. I can't explain it, but when it happens, I just go with it.

The shingles are where my brain failed me. We couldn't figure out how to attach cedar shingles to an onion dome and make it water proof, attractive, and not fall apart. I tried bending them in a steam box that I built from YouTube videos, but that failed miserably. I tried weaving them into a pattern, but that failed horribly. I tried making them shorter, but they still stuck up at the corners, and looked awful. Then I tried cutting them even shorter and making them all the same width, and then using a coffee can to create a half circle at the end. When I did that, it all came together as the only option possible. I cut shingles for a week, it never seemed to end!!!

IMG_20140621_173051_632.jpg 10524575_806671309356512_5491285994558430567_n.jpg
 
   / My Wedding Gazebo is 10 years old
  • Thread Starter
#10  
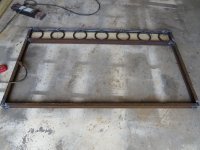
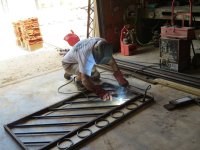
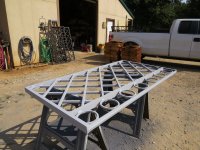
To lock the posts into position and stop racking, I fabricated a metal railing to fit between all of the posts except the front. My design was fairly simple. The goal was to create diagonal bracing for a truss type system that would be attractive, strong, and easy to make.

Each panel is a different size because each log is a different thickness. I don't care for welding, and I really don't care for cutting metal, but it was a simple DIY project to get it done. I primed and painted it with spray paint cans that where the most expensive ones they sold. I hope that meant the paint was better then the cheaper cans. So far, it's been ten years, and there is no sign of rust.

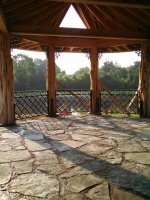
After the railing was installed, I went with flagstone for the floor.

95.JPG 96.jpg

97.JPG 10552359_10204539033298516_4295397438054615697_n.jpg
 

Tractor & Equipment Auctions

IF YOU BID ON AN ITEM YOU MUST PAY FOR IT!! NO BACKING OUT AFTER IT IS SOLD!! (A50775)
IF YOU BID ON AN...
2017 Nissan Murano SUV (A50324)
2017 Nissan Murano...
1049 (A50459)
1049 (A50459)
AGT Agrotk 680 Drop Hammer Attachment (A47384)
AGT Agrotk 680...
1994 LUFKIN (A50854)
90018 (A48082)
90018 (A48082)
 
Top