New Bucket for an old FEL

   / New Bucket for an old FEL #1  

GuglioLS

Veteran Member
Joined
Feb 13, 2005
Messages
1,155
Location
Edgewood, NM USA
Tractor
Jinma 354, 1953 Ford NAA Golden Jubilee, Komatsu Bulldozer
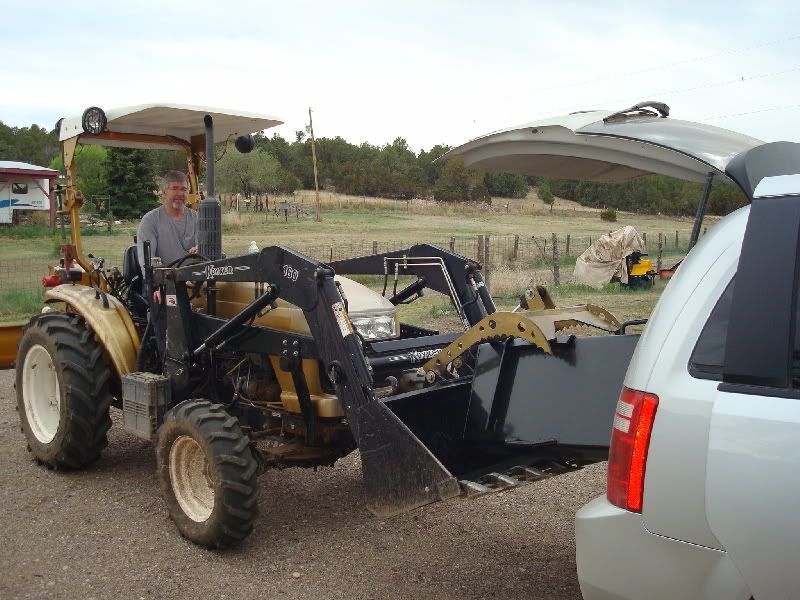
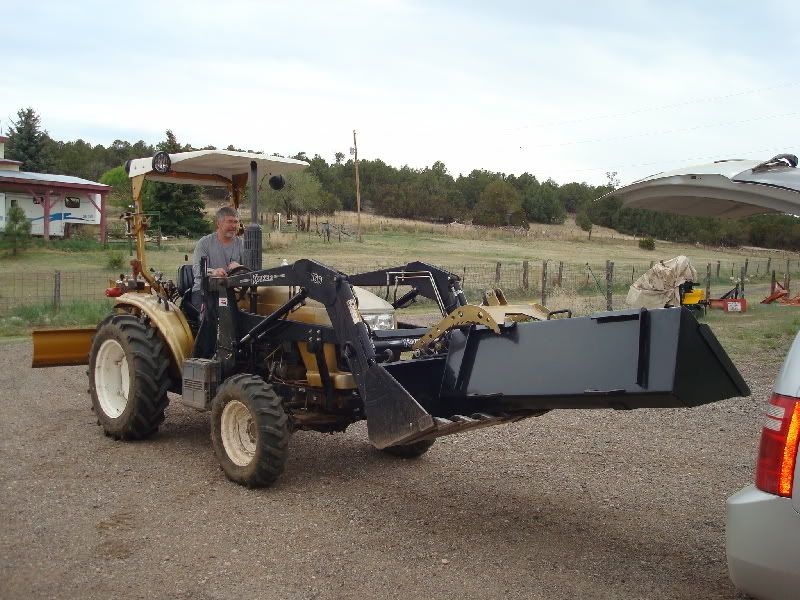
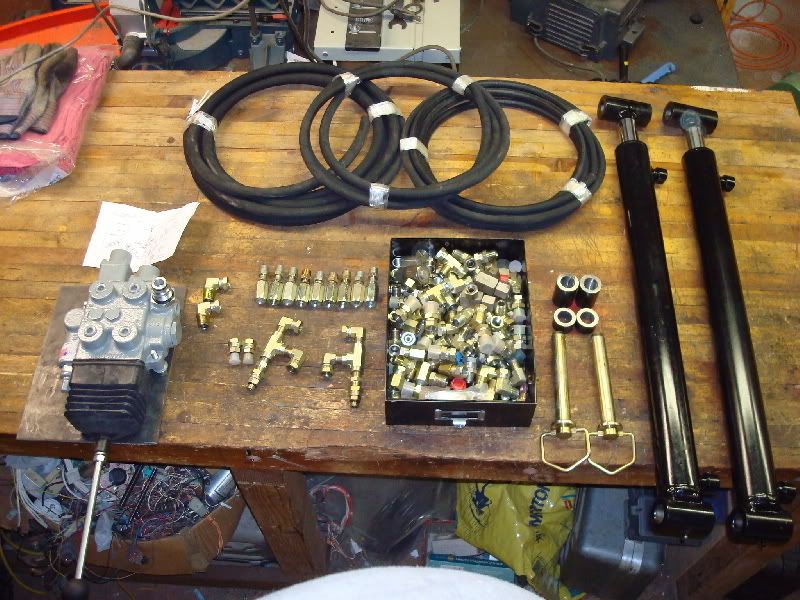
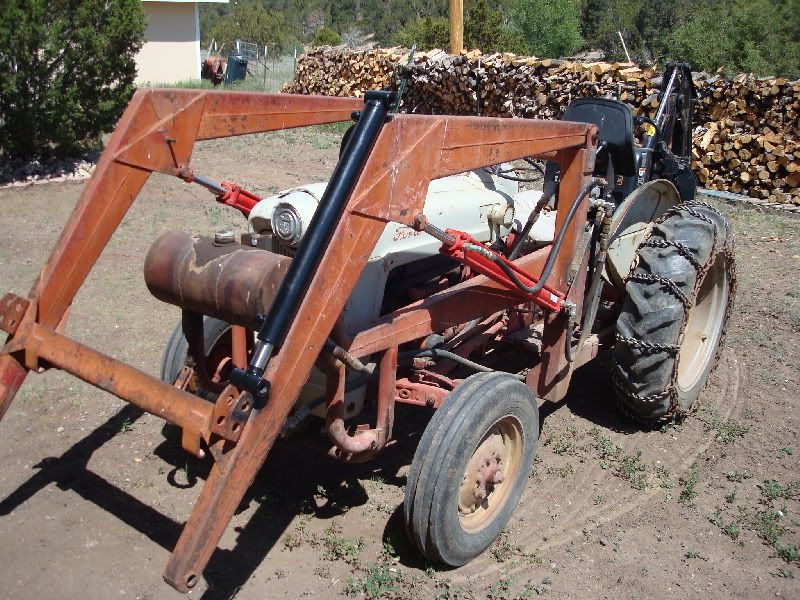
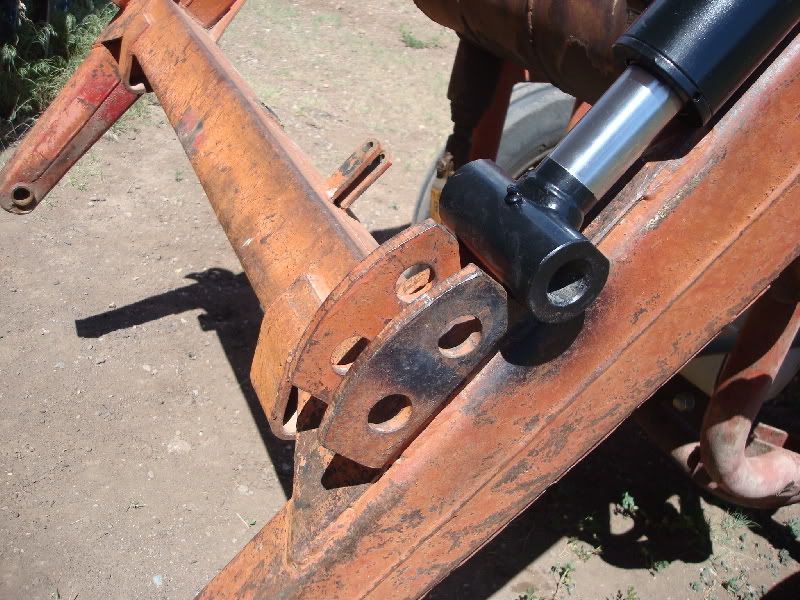
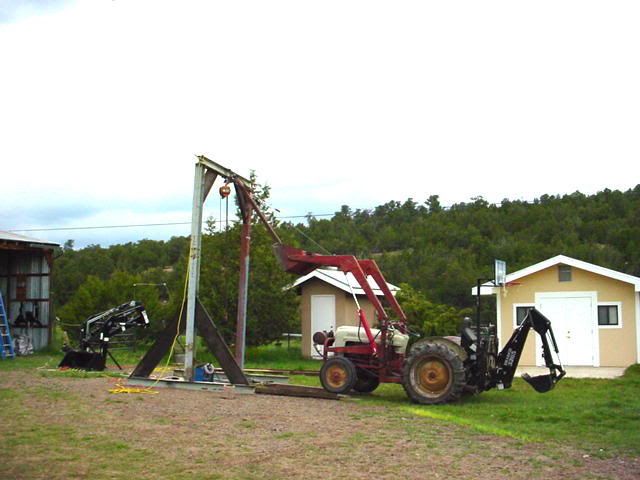
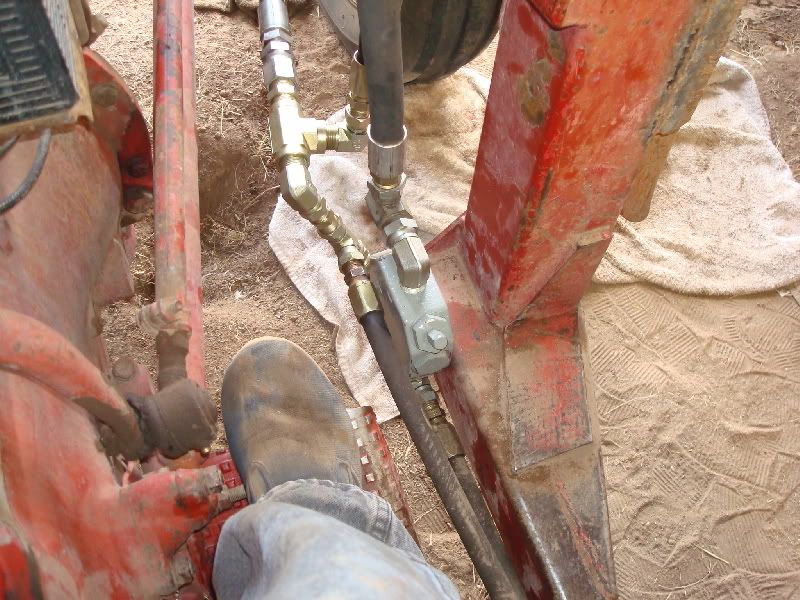
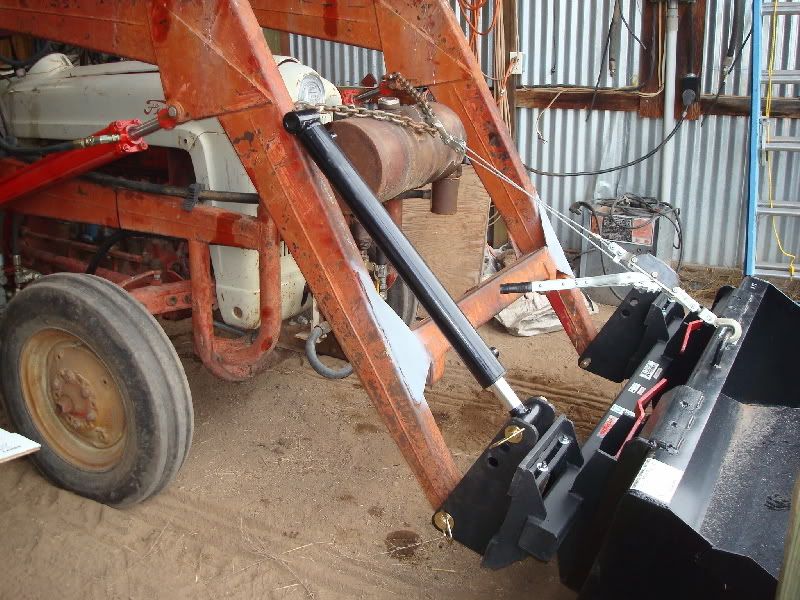
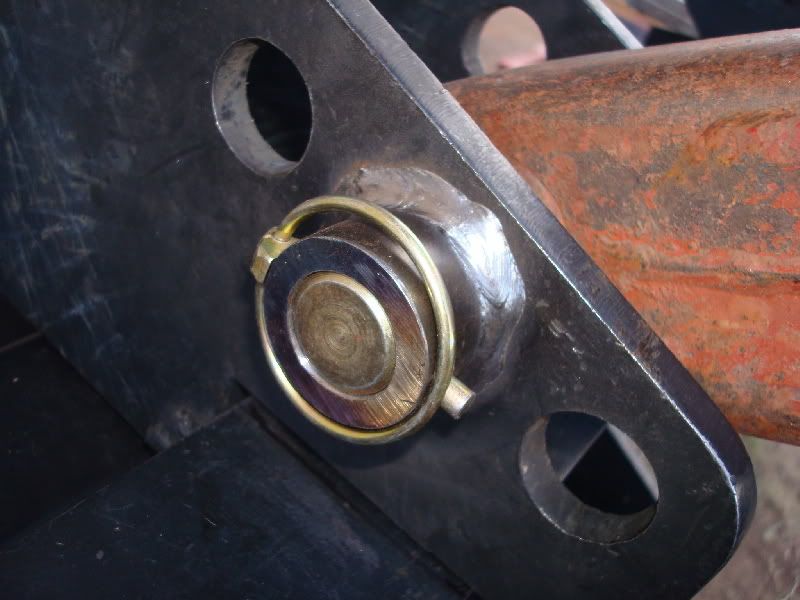
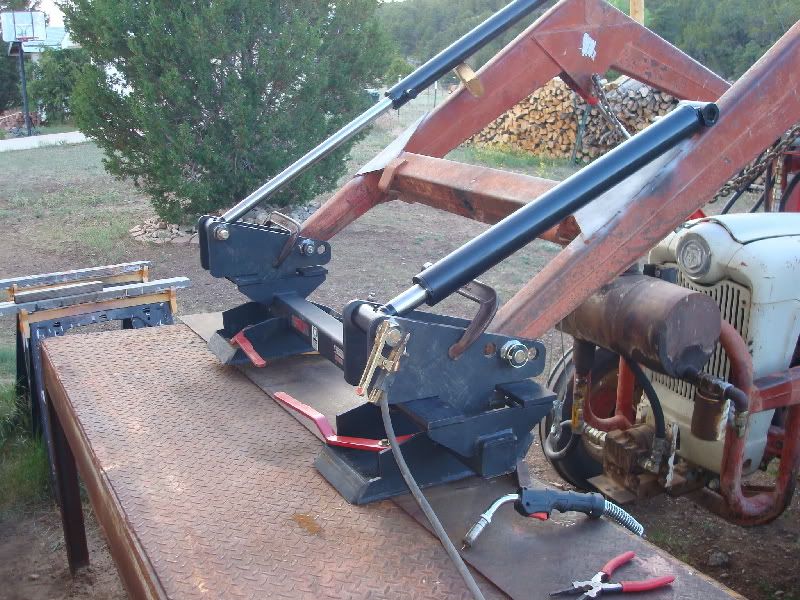
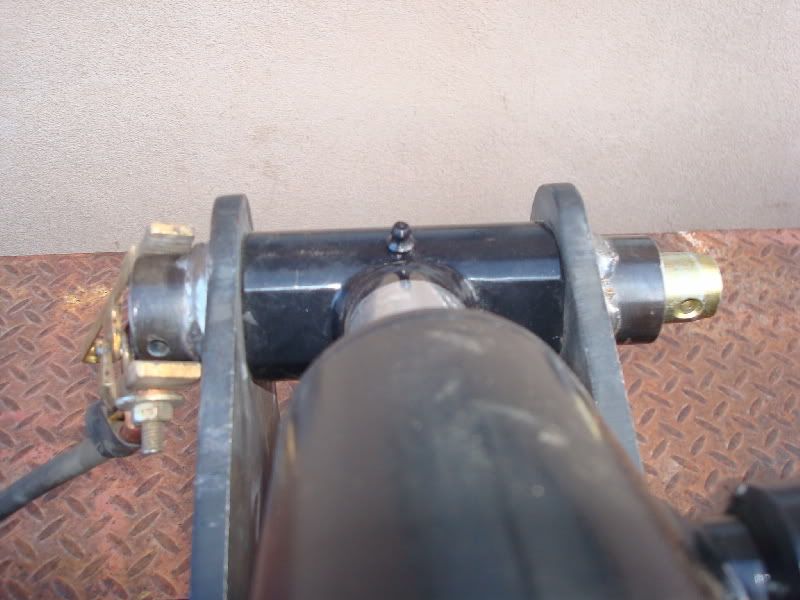
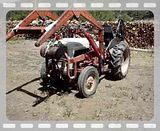
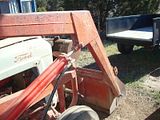
In addition to my 2005 Jinma 354 and 1989 Komatsu dozer, I own a 1953 Ford NAA tractor aka a Golden Jubilee. It has a 5 Y/O Bradco backhoe attached and a FEL that is near as old as the tractor. The original FEL lift cylinders were single action, (power lift, gravity lower) about 5 years ago when I installed the BH, I removed those old cylinders and upgraded them to 2.5" ID double action. At that same time the FEL valve was upgraded to double action with a detent float position. Doing those mods made a huge improvement in power and convenience of operation.

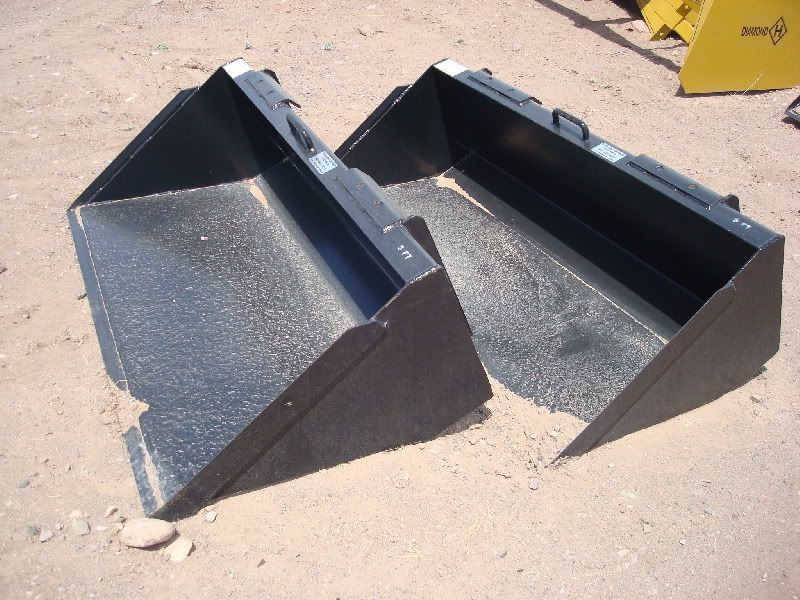
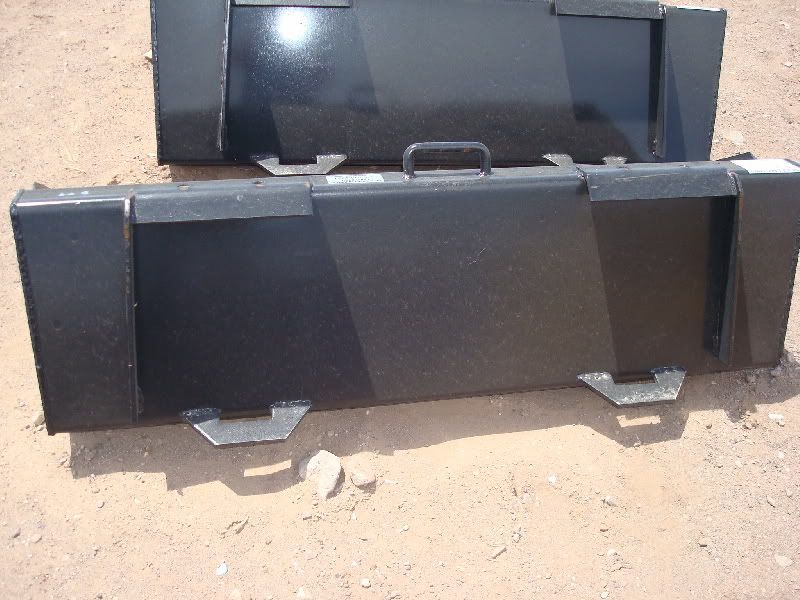
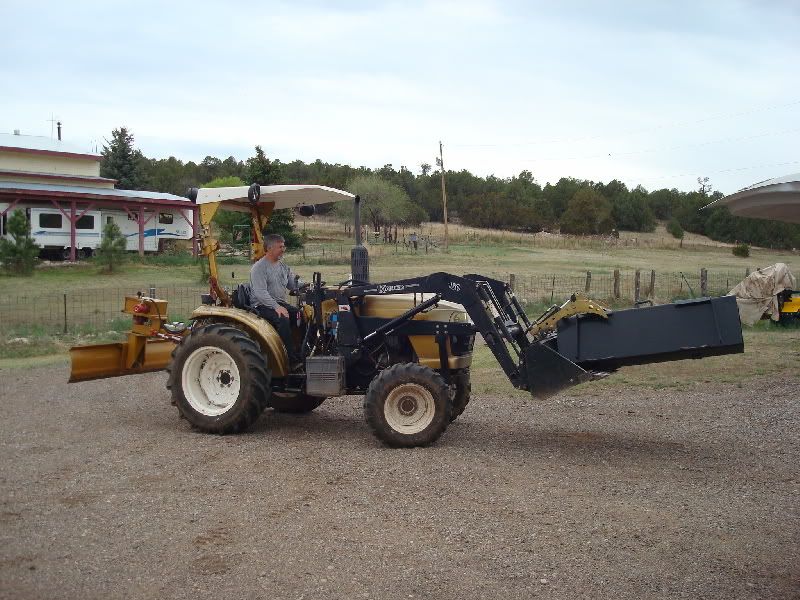
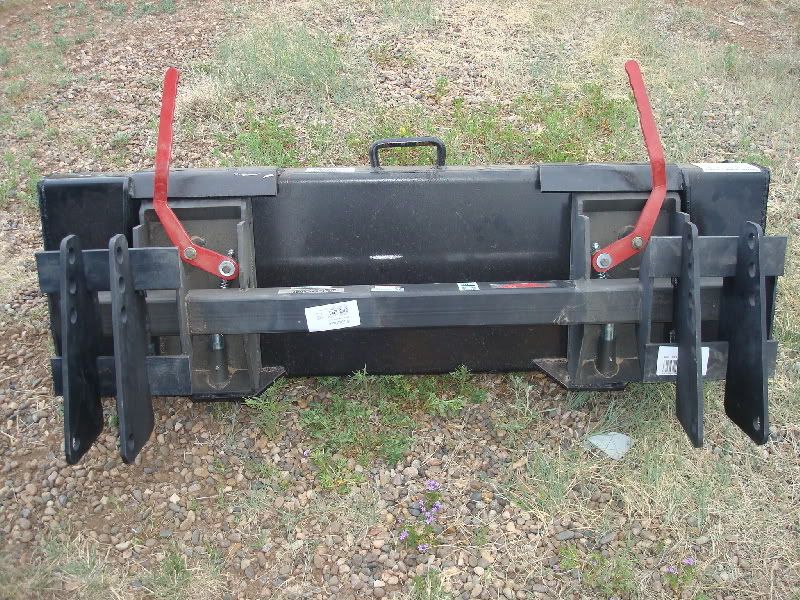
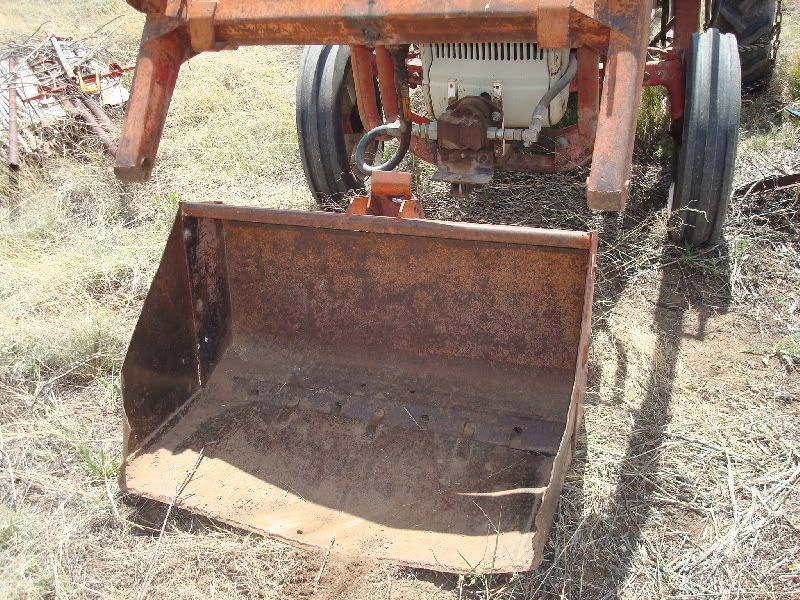
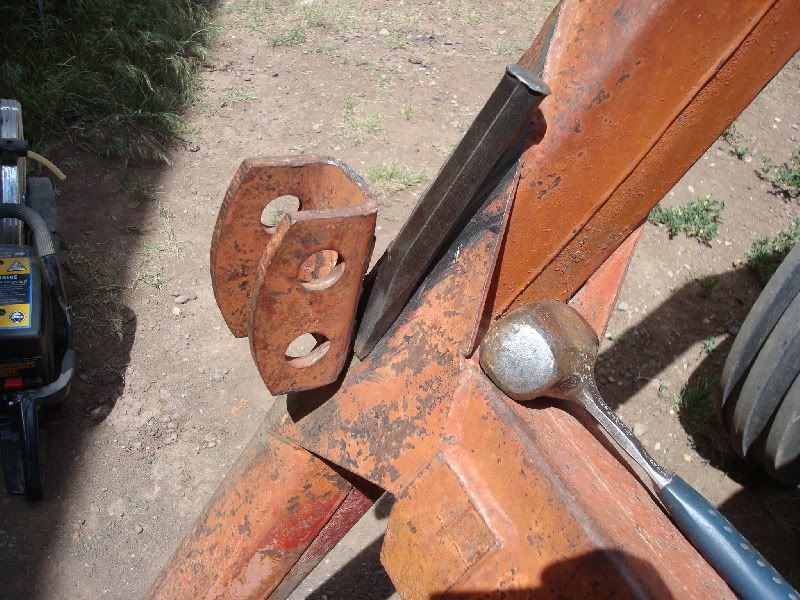
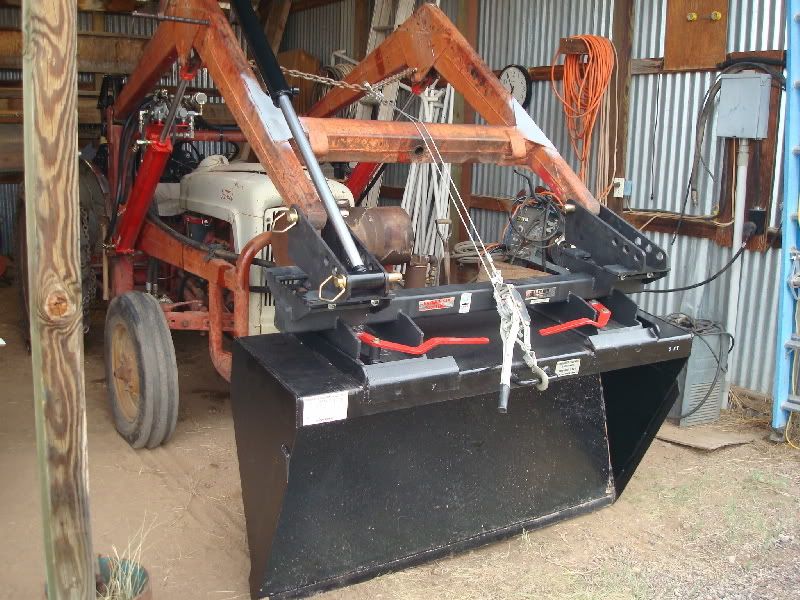
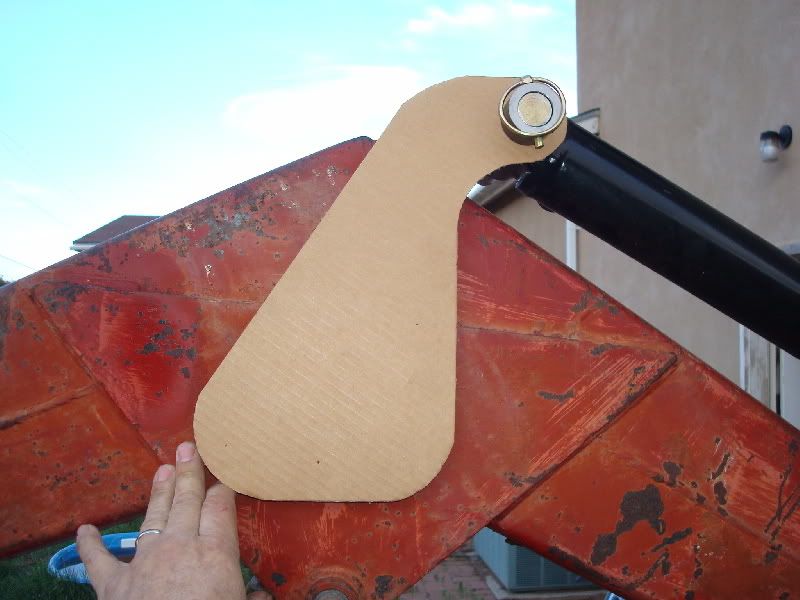
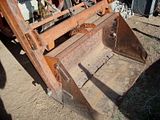
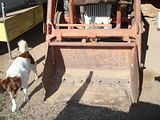
One important item remained to be upgraded on the FEL to become fully modern and easier to operate and that is the bucket and the means to dump it. As you see it is a trip bucket that is only about 40" wide.

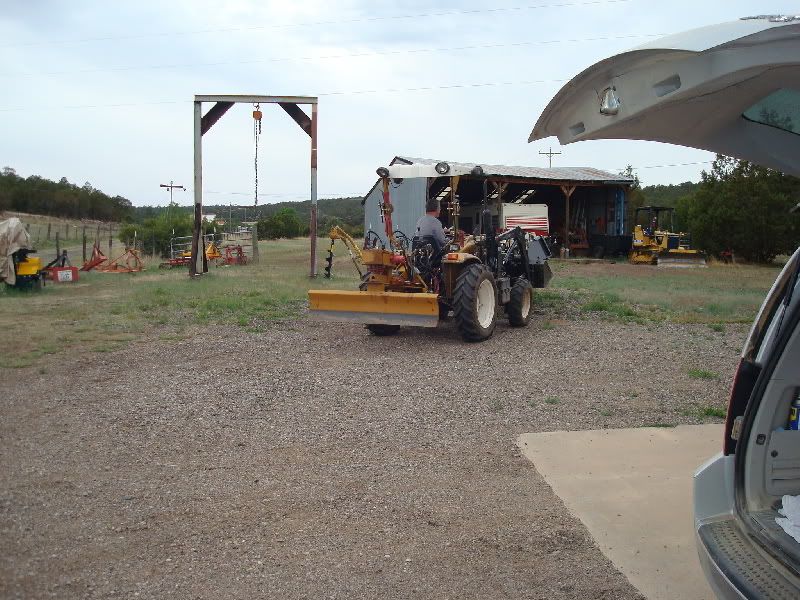
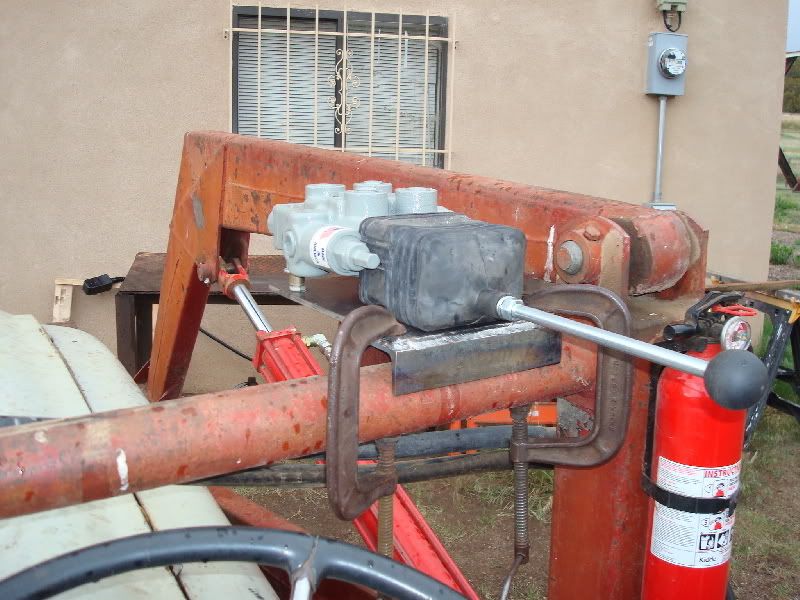
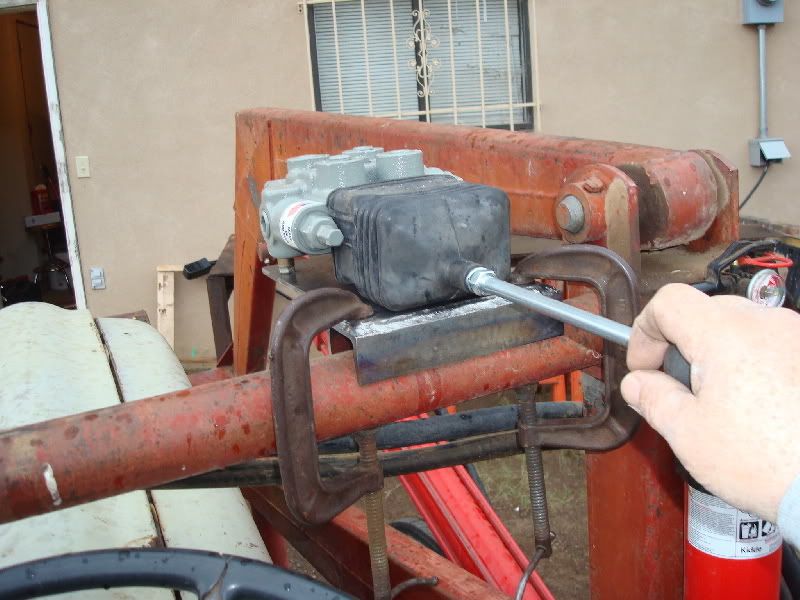
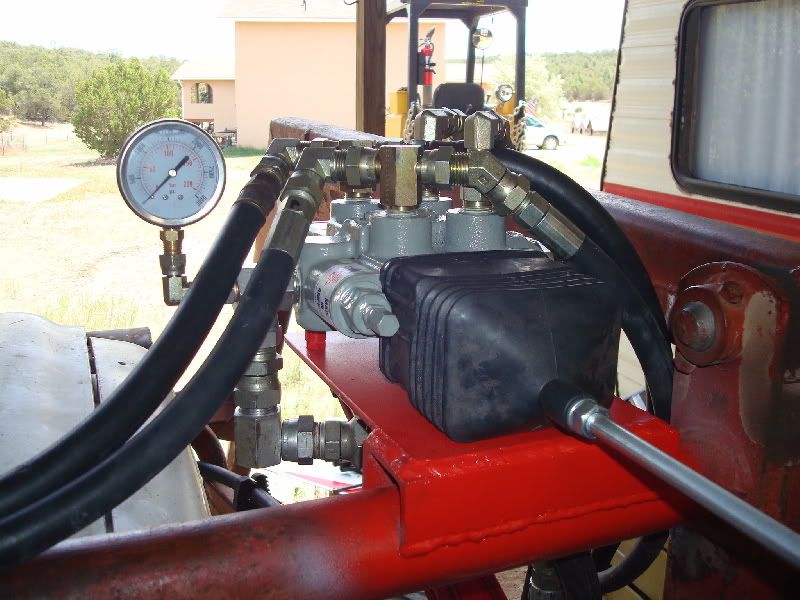
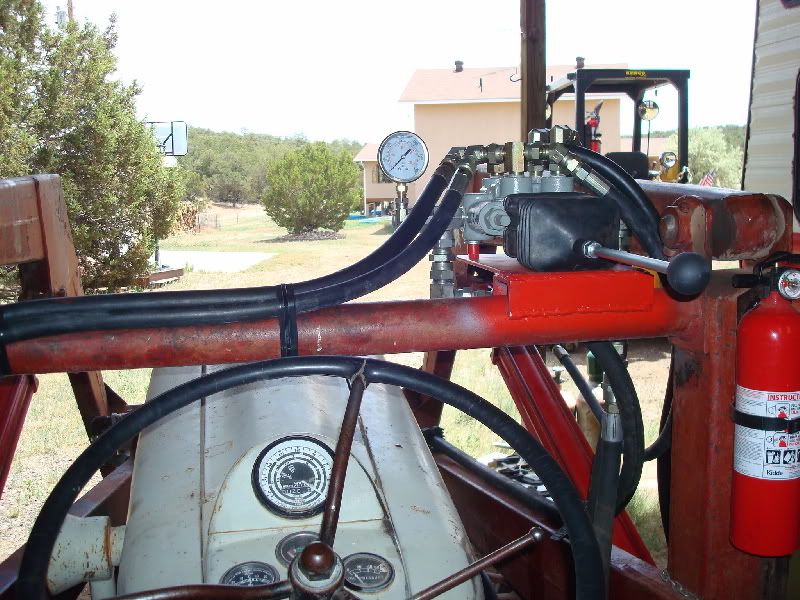
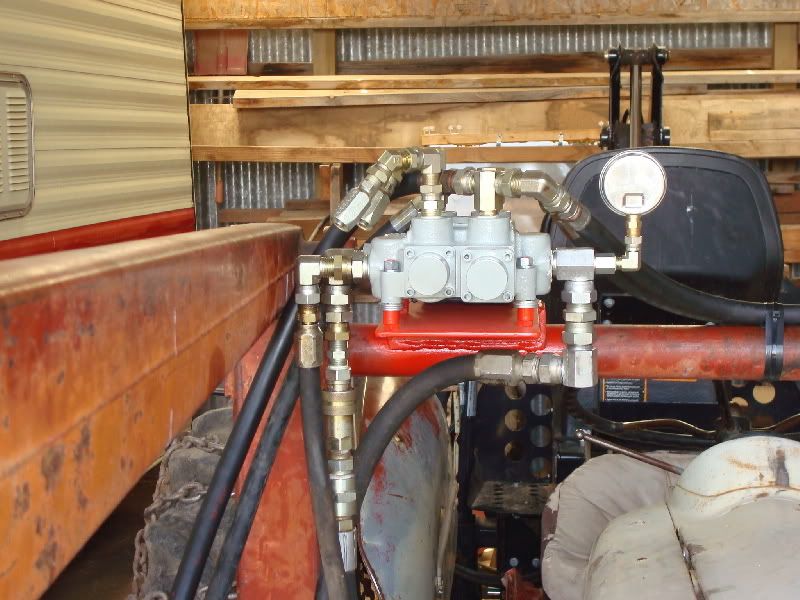
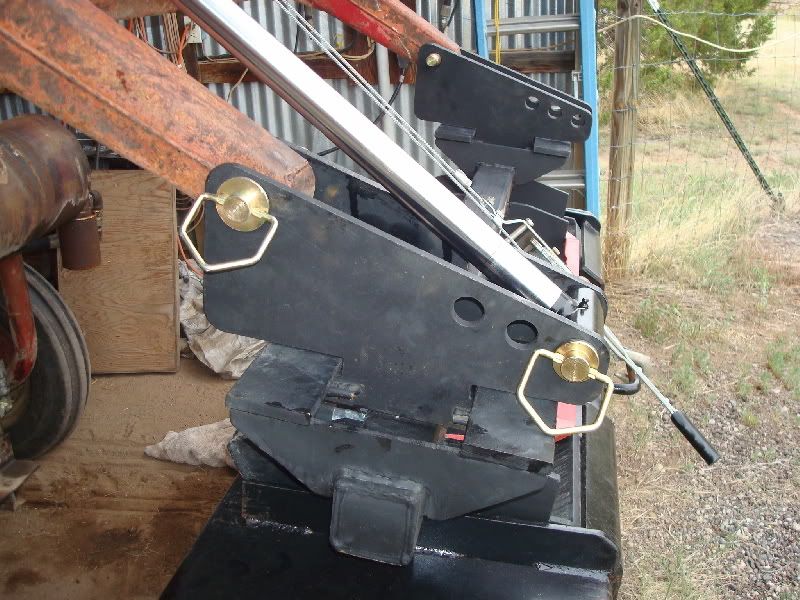
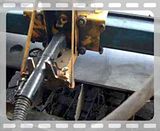
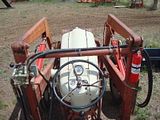
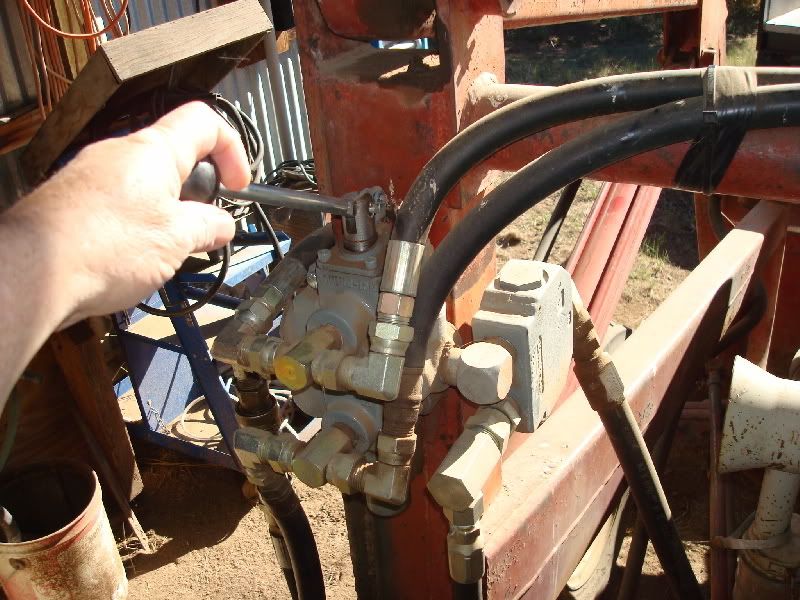
Another item of particular note is the side that the valve is mounted on. That's where it was from day one. Since I had purchased this tractor about 26 years ago, I had no idea that valves are now normally mounted on the right side, so naturally when I upgraded the cylinders and valve I put the new valve on the same side and have become used to it there.

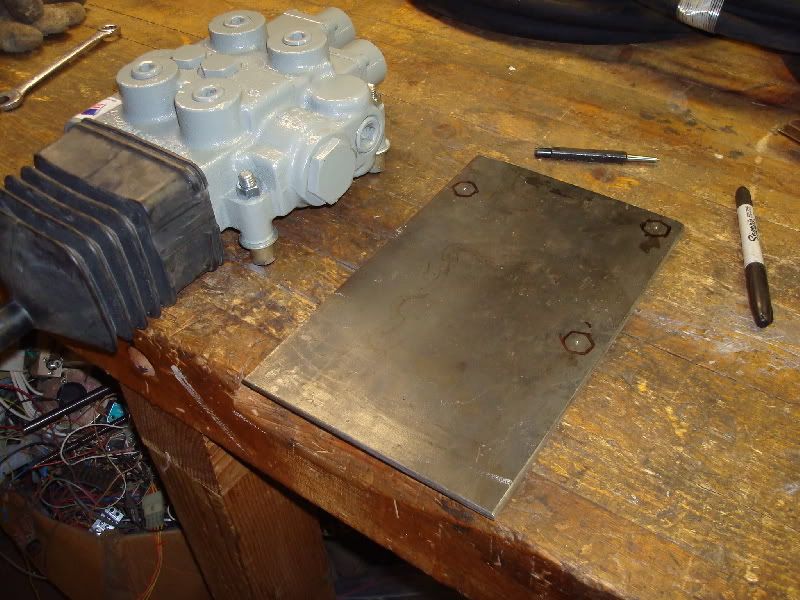
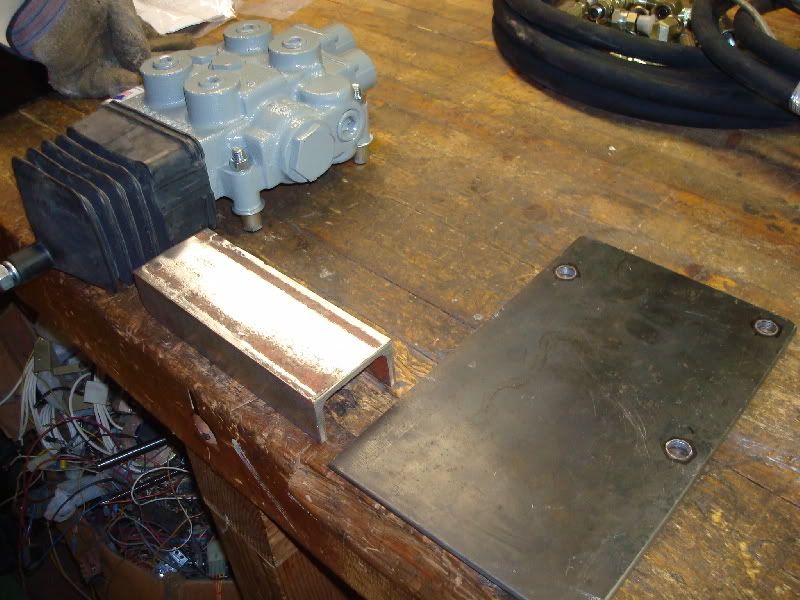
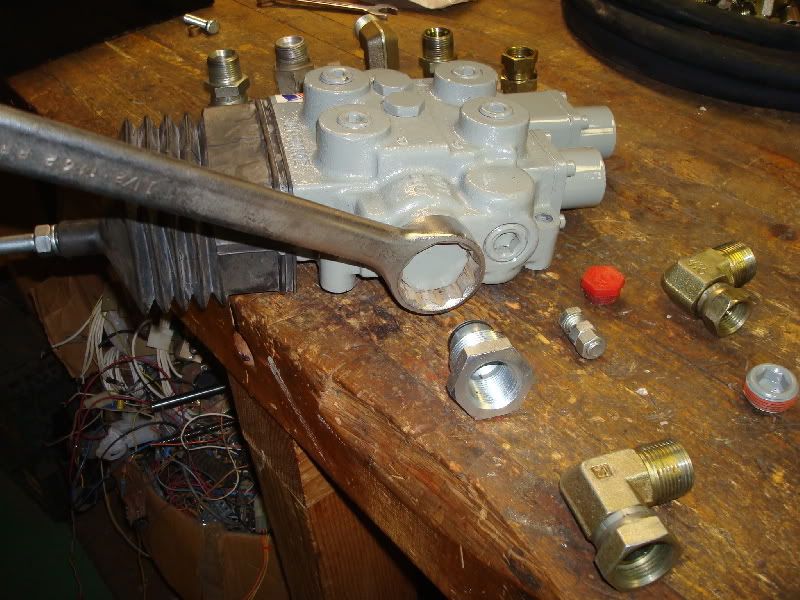
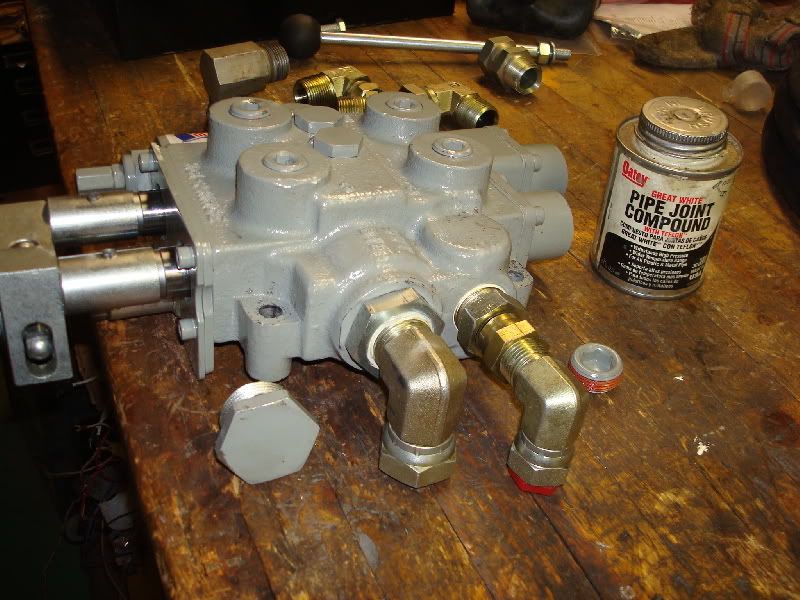
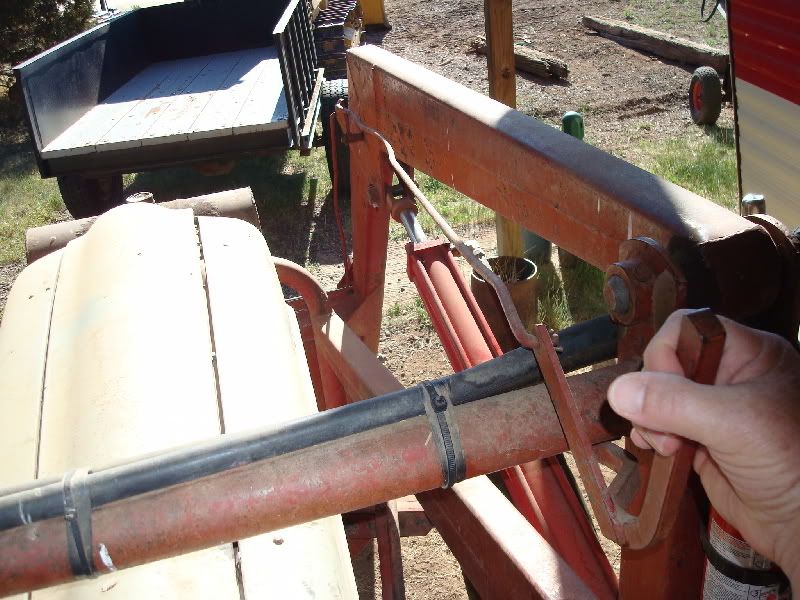
Now that I am going to upgrade again to a two spool valve, remove the trip handle and install cylinders for the bucket, do you think I should re-locate the valve to the right side? My hesitation in doing so is that all the plumbing is now configured to be on the left, moving it to the right side would require quite a bit of hydraulic hose, fittings and re-routing. There is also a flow divider to control the fluid flow to the BH in the mix, so I would have to relocate that too.

What do you think I should do? Put the valve on the right? Or put the new valve on the left? I've been on the fence about making a decision. Your input to help decide the right thing to do will be appreciated.


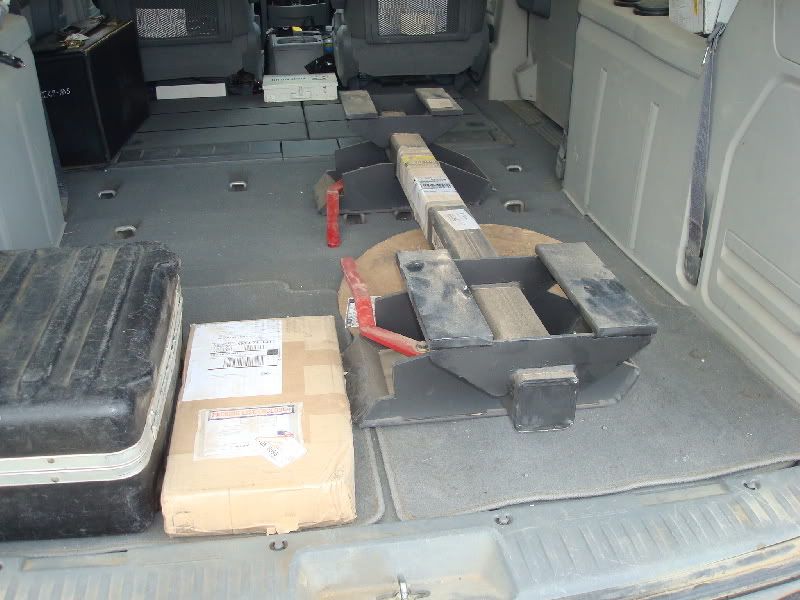
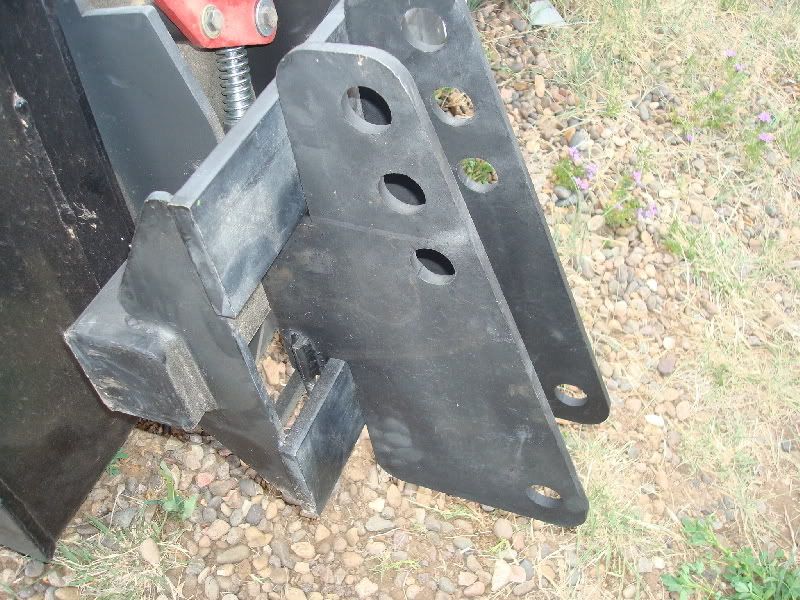
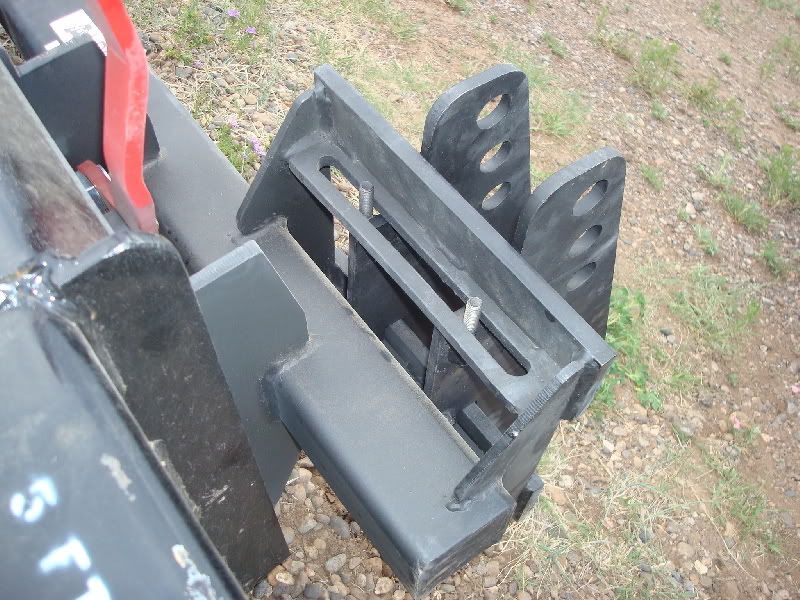
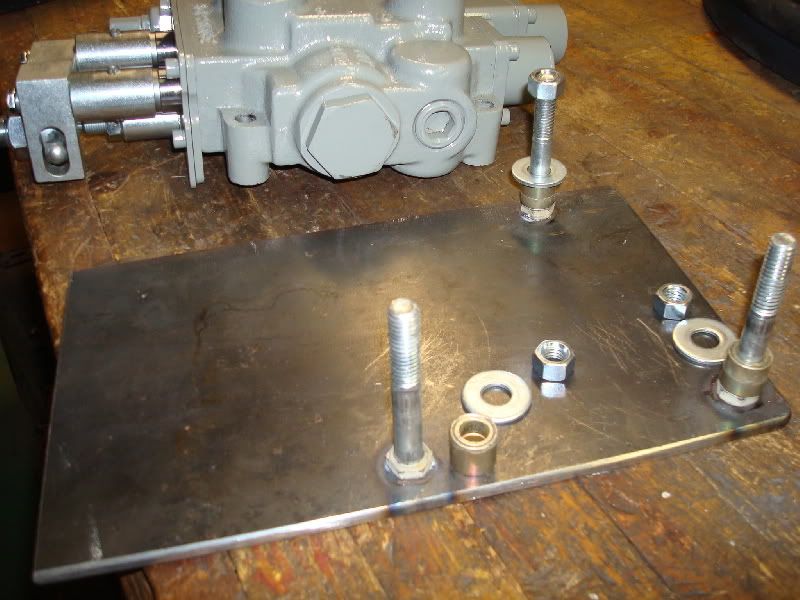
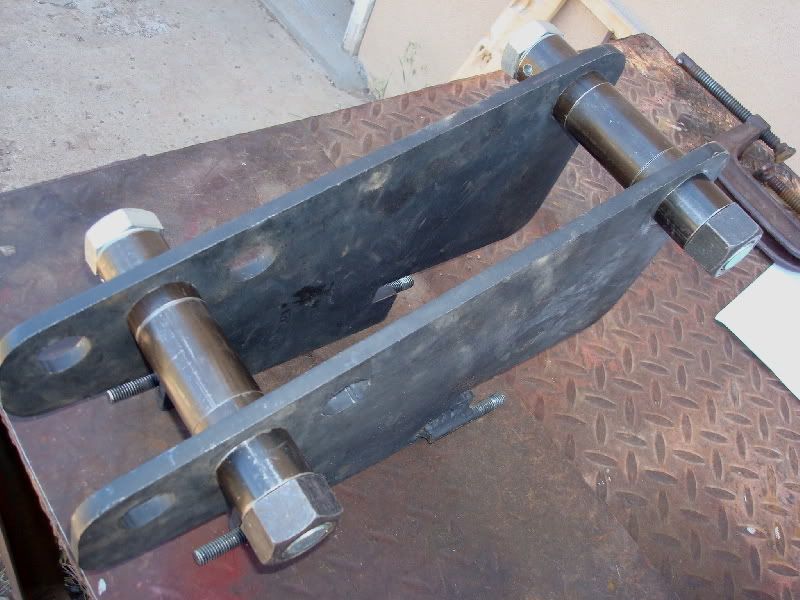
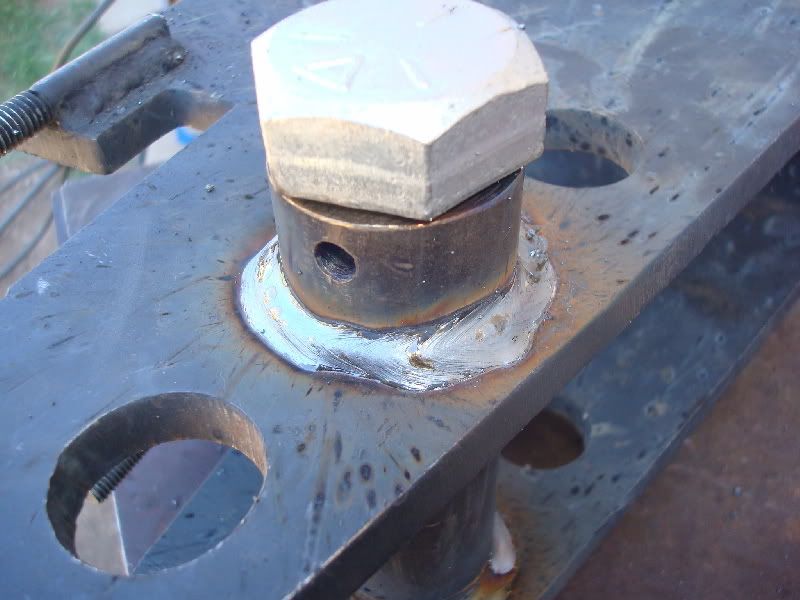
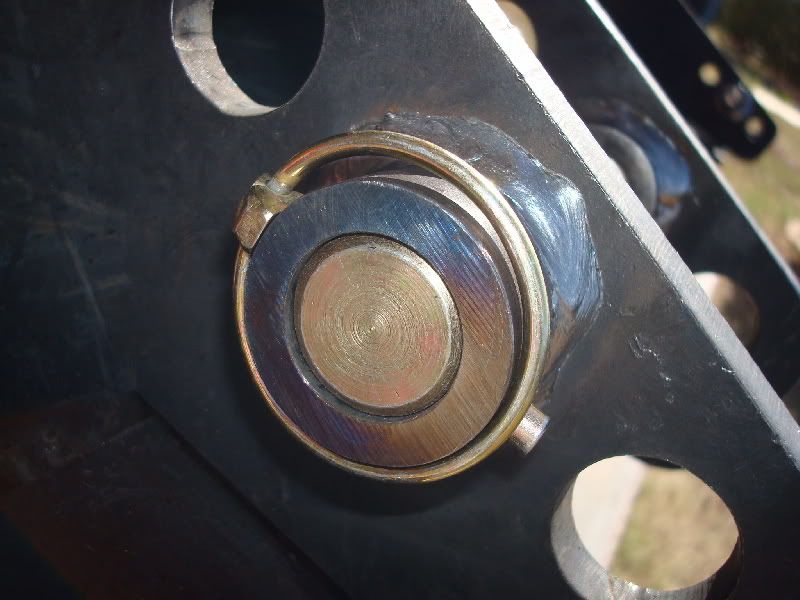
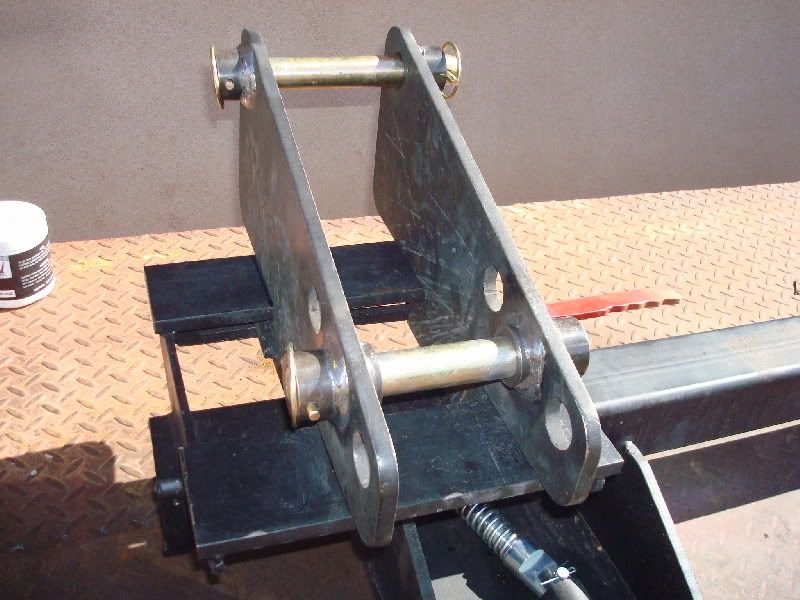
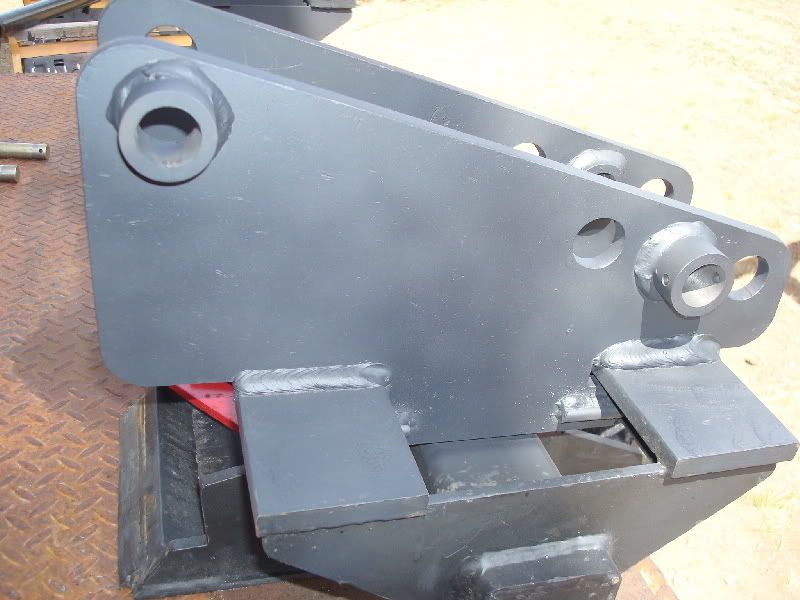
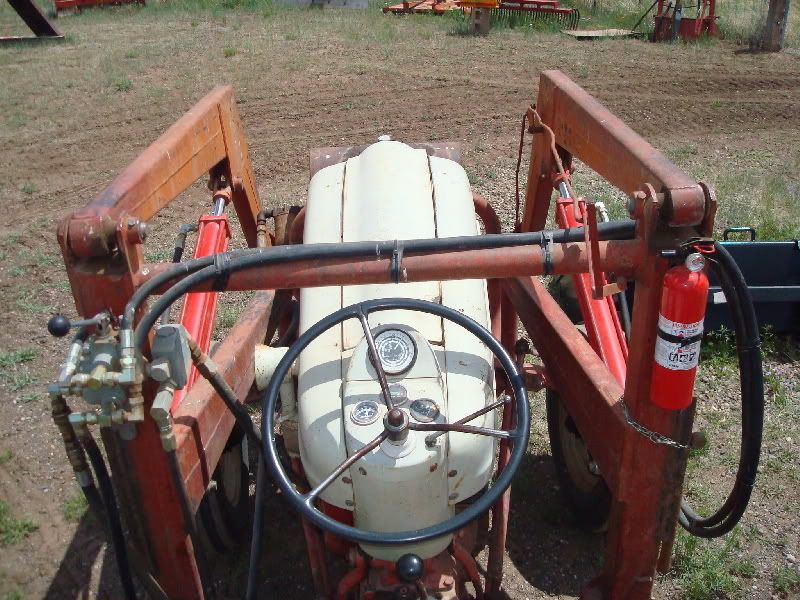
Hear are a few pics showing the 2.5" double acting cylinders, front, back and side views of the trip bucket, the valve on the left and trip handle on the right:


Larry
 
   / New Bucket for an old FEL
  • Thread Starter
#2  
One day while taking a break during a road trip, I was browsing around my favorite equipment auction yard (the same place where I scored my Komatsu dozer). I came across a pair of 60" skid steer buckets. Well next thing you know one of them is in the back of my van :D 
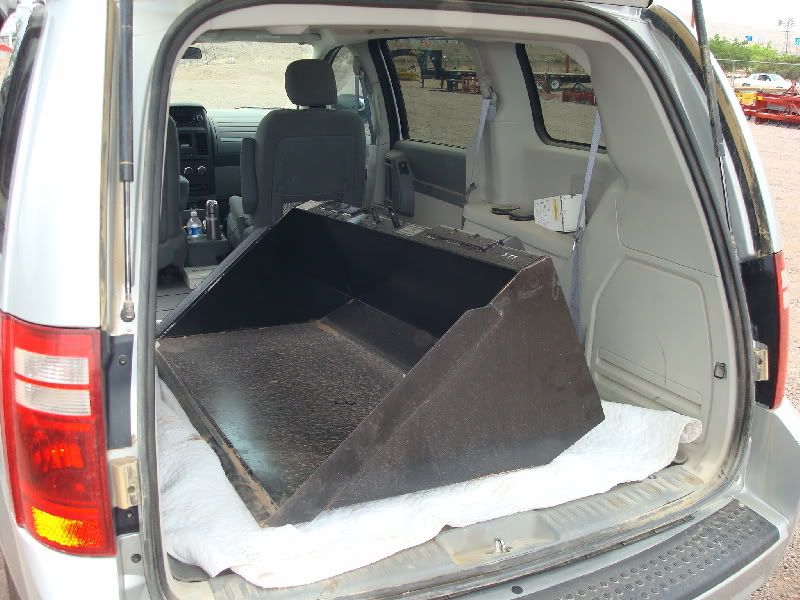
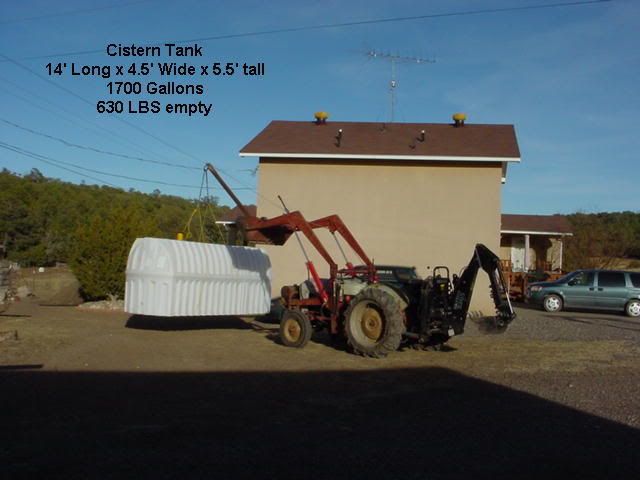
The guys at the yard used a fork lift to get it in.


When I got home, I fired up the Jinma and used the grapple to extract the new bucket from the back of the van.


Larry
 
   / New Bucket for an old FEL
  • Thread Starter
#3  
With a little bit of research, I found a universal skid steer QA (Quick Attach) adapter that will fit the FEL on the ole' Ford so I ordered one off the internet. It was shipped to me UPS ground and received it in only a couple of days.


This is the goal: Remove the old bucket and replace it with this new skid steer bucket, add two cylinders to operate the bucket and add a new two spool valve......


These are the parts rounded up so far to get this done:


The valve is a 2 spool, open center, 25 GPM Prince with power beyond, float, load checks, pressure relief, etc, etc.... It's a large valve. The cylinders are 33" retracted, 23" stroke. I got a hole drawer of fittings, some hose, re-usable hose ends, and some DOM to make bushings. I have some pins on order and hope to get them soon.


Larry
 
   / New Bucket for an old FEL
  • Thread Starter
#4  
Made a little progress yesterday.
Cut off these two clevis ends that were welded on right in the way of where the bucket cylinders needed to be. Then started to make a mounting bracket for the new valve....


Larry
 
   / New Bucket for an old FEL
  • Thread Starter
#5  
The piece of channel being cut in the first pic is from the original shipping crate of my Jinma. I decided to use 3/8" studs essentially spot welded to the mounting plate for the valve...


Larry
 
   / New Bucket for an old FEL
  • Thread Starter
#6  
After welding studs in place and allowing to cool, the mounting channel bracket was welded onto the valve plate. In the first pic you can see I will be using spacers to lift the valve up off the plate about 3/4". That is being done to allow enough clearance for the rubber boot and for full range of motion of the joy stick. Some of the challenges mounting this valve is it's large, getting it located where it will not in the way, still be within easy reach be able to get on and off the tractor from either side, and route all the hoses to and from it. Also of consideration is not getting in the way of any maintenance item on the tractor, like be able to still fill it with gas, or remove the battery, etc...


Here is the new valve located on the right side as my buddy Ken suggested. Next was to remove the open center plug from the valve and install the power beyond plug and return to tank fittings...


Thats what I got done yesterday.

Larry
 
   / New Bucket for an old FEL #7  
How much pressure are you running those 2.5" cylinders with ? On my loader i also use 2.5" cylinders, but the tractor carrying it is a whole different animal.
I guess you either run 80 bar hydraulics, or pick up the rear end of the tractor even with the heaviest implement you can find, on the back... ??
 
   / New Bucket for an old FEL
  • Thread Starter
#8  
Hi there my good buddy Renze. Thanks for checking this out and your question...
The relief pressure on the valve is set at ~ 2000 psi (137.89 Bar) I've had those 2.5" cylinders on that FEL for 5 years and no problems, it has lifted anything I have ever attached to it. And yes.... I have lifted up the entire rear end of the tractor several times trying to pick up something I should not have. Even with the rear tires filled with calcium chloride and a Back Hoe attached, I managed to lift the rear end completely off the ground.

Here are a couple of pictures of the tractor and Back Hoe, I had an 8 foot (2.5 meter) boom pole attached to the FEL to lift a chain hoist support I was building with heavy I beams and another of a cistern water tank carried with the boom pole attached...

 
   / New Bucket for an old FEL
  • Thread Starter
#9  
This is the latest progress report:

After welding the new valve bracket to the FEL upright support cross tube. I removed ALL the old plumbing... hoses, valve, took apart and cleaned all the fittings, removed the flow divider and control valve for the back hoe, and the back hoe hoses. Man what allot of stuff to remove. After doing all that, relocated and re-plumb everything in a new location. The goal was to re-use as much of the old hose and fittings as possible, and route everything as clean and neat as I could. The supply and return lines are 3/4" hose, working with that stuff is like wrestling one of those 8 foot rattle snakes you've seen at Rob's (3RRL's) rattlesnake ranch.

One thing missing from the old setup was a pressure gauge. So I ordered a liquid filled 0-3000 PSI gauge from surplus center. It came in yesterday afternoon. So I got busy modifying a 3/4" x 90* street elbow to accept the gauge. When drilling and taping the fitting I was surprised how soft the metal is. The drill and tap cut through like butter. I used a copper washer to seal the joint.


In the center picture, to the right of my hydraulic soaked and dirt covered canvas slip-ons is the flow control / flow divider for the back hoe, I have it set somewhere around 6 GPM. The direct drive crank shaft pulley driven hydraulic pump on the tractor puts out ~ 12 GPM. Seems like allot but it's perfect for those two 2.5" ID x 30" stroke lift cylinders for the FEL.


I've still got to plumb new hose and fittings for the new bucket dump / curl back cylinders. But first the cylinders have to be installed so I know where to run the hose.


Larry
 
   / New Bucket for an old FEL
  • Thread Starter
#10  
Now that all the plumbing and re-routing is complete, it was time to attach the QA and Skid steer bucket to get a handle on which pin holes to use and at what height and distance to mount the base end of the cylinder from the FEL arms. I gave up on trial and error so I'm drawing the whole darn thing up in auto cad to figure it out "on paper" instead of breaking my back on the real thing.


Once I fine tune cylinder placement in relation to the choice of three cylinder pin holes. I will need to sketch up a set of cylinder mounting brackets and have four of them plasma cut. So lots of figuring and work left to do.


Larry
 
   / New Bucket for an old FEL #11  
Larry:

I've been wondering what you've been up to, and I can hardly wait to see the finished product.
 
   / New Bucket for an old FEL
  • Thread Starter
#12  
Hi Matt,

Thanks for your interest in this project. I can hardly wait myself, I've been wanting to do this for almost 25 years. Better late than never I guess.

I made a little more progress this weekend machining pins and bushings. Two of the pins needed to be modified to accept grease fittings. Those pins are the ones to be installed into the FEL arms as the original FEL had no grease fittings at those pivot points. All the bushings will be welded to adapter brackets for the QA. The shoulders of the pins were turned off to give the pins a little more usable length and to use the pre-drilled holes for retaining the pins into the bushings.


The first step to make a grease-able pin was to bury a 3/16 drill bit 3-1/2" into the center of the pin, then tap for a 1/4-27 grease fittng after that drill an 1/8" exit hole for the grease in the center of the pin:


Larry
 
   / New Bucket for an old FEL
  • Thread Starter
#13  
Next was to cut all the bushings from DOM stock and transfer holes already drilled in the pins to the bushings. This shows how that was accomplished. Lynch pins will be used to retain the pins to the bushings:


Next is to weld all the bushings onto the QA FEL mounting brackets.

Larry
 
   / New Bucket for an old FEL
  • Thread Starter
#14  
Welding bushings onto the FEL QA adapter brackets required the bushings be clamped square and tight against the brackets. A couple of 8" long X 1" dia bolts came in handy for that.


After everything cooled to ambient temperature, the clamping bolts were removed to test fit the FEL arms. Everything seems to line up quite nicely. The FEL brackets still need welding to the QA adapter. I'll get to that later. The last pic on the left is a prototype bracket for attaching the base end of the cylinder to the FEL arms. That bracket was drawn up in auto-cad, printed out on four 8-1/2" x 11" sheets of paper, then transfered to some cardboard for a test fit. Once I finalize the size and shape. I'll get 4 of them plasma cut out of 3/8" plate steel.


Any suggestions on the bracket? should I punch some holes in it near the base end for additional welding points?


Larry
 
   / New Bucket for an old FEL #15  
Dang Larry...that's the prettiest fitting set of lynch pins I've ever seen.

I just love attention to detail.
 
   / New Bucket for an old FEL #16  
GuglioLS,
Don't know how I missed this thread. Very nice work can't wait to see it finished. I have customized and made many things and I can really see the amount of work in your project. Looking at a finished unit one cannot begin to imagine the amount of work, the what ifs, the oops and the rework that occurs doing something like this. Great project, now stop reading this and let's see some pictures of the finished unit.
 
   / New Bucket for an old FEL
  • Thread Starter
#17  
Thanks Matt, Gizmo2,

I'm finally done welding bushings and plates. Of course I only post close up pictures of the best of my welds :D


Here is a video clip showing the fitments of the pins after welding everything up. No doubt I would not have posted this if a sledge hammer was needed to get the pins in.


Now it's time to get the brackets plasma cut. I'm hoping to get that done tomorrow.

Larry
 
   / New Bucket for an old FEL #18  
Thanks Matt, Gizmo2,

Of course I only post close up pictures of the best of my welds:D

Isn't that what we all do? I certainly would not post any of my bad welds and the older I get the fewer and further apart the good ones are. Nice job.
 
   / New Bucket for an old FEL
  • Thread Starter
#19  
Yesterday morning I went to get the brackets cut. To my surprise I found out the only person who knows how the plasma cutter works left the shop for greener pastures. I was not going to let that small inconvenience stop progress. So lucky me got permission from Dorthy the widowed shop owner to figure it out. I got there at 9:30am and finally by 4:15 pm figured it out and got this by the end of the day:


I watched in awe as it effortlessly cut clean through 3/8" plate steel.
There is allot to plasma cutting and getting decent results such as cut speed, amps, punch through distance, torch gap to the surface, order of what gets cut first and I sure some other stuff. The plasma cam software is a frigging nightmare. In the end I was able to lick it good enough to get my brackets cut clean. Dorthy asked me to cut some parts for a customer waiting over a month. Luckily it was only 16 simple rectangles 6" X 18" X 1/8" thick, I spent another 3 hours figuring that out. Needless to say I got my brackets for "Free". And an invitation to come back and cut parts. If I ever loose my day job I can always work @ minimum wage as a "Plasma cutter" LOL.

Anyway here are the end results:


I got the balance of the hose for the new cylinders plumbed today. And cut the cross tubes on the cylinders a little shorter. Sorry no pictures of that because it's just boring detail stuff.

Larry
 
   / New Bucket for an old FEL #20  
The plasma cut parts look good Larry. That automated plasma cutter looks like it's been around a while. I would think most modern manufacturers of entry level robotic plasma cutters should be able to to take an AutoCAD DXF file and translate it at a bare minimum. If they could take SolidWorks and Inventor files too, that would be a plus.

The time you spent teaching yourself how to use the plasma-cam is still far less than what it would take to cut the parts out the old school way.

I wish I had cheap access to a PlasmaCam as I can draw the stuff up in AutoCAD relatively quickly and it would beat using my primitive method of hole saws, bandsaws, drill bits and grinders for some of my projects.
 

Marketplace Items

2017 JOHN DEERE 470G LC EXCAVATOR (A60429)
2017 JOHN DEERE...
2005 CHANDLER 500 BBL FRAC TANK (A58214)
2005 CHANDLER 500...
SWICT 72" SKID STEER BUCKET (A60430)
SWICT 72" SKID...
2018 Ram 1500 4x4 Crew Cab Pickup Truck (A59230)
2018 Ram 1500 4x4...
ELECTRIC GOLF CART (A58214)
ELECTRIC GOLF CART...
Classic 1969 Massey Ferguson 135, newly rebuilt engine, refurb front end, 3-pt blade.
Classic 1969...
 
Top