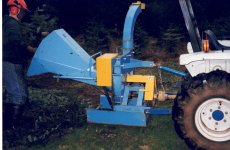
PTO chipper

   / PTO chipper
  • Thread Starter
#31  
I got some photos this morning.

Here's a view showing the zerks on the rear of the machine:
View attachment 693853

The two upper red arrows point to the zerks on the rear of the flywheel shaft and the jack shaft. I mis-remembered last night, it's the rear jack shaft bearing that easy, and the front one that's difficult. The green arrow points to the hole you are supposed to use to access the front bearing zerk. The lower red arrow points to my relocated zerk for that bearing.

Below is a closeup of the opening you are supposed to use to access the zerk on the front of the jack shaft. It looks pretty big, but there was an angle zerk there, and it was so close to the edge of the opening I couldn't get a grease gun on it. I didn't have any tools that could enlarge it with the zerk in place, and after taking it out I couldn't reach back behind the pulley to get it back in anyway. The shaft had rusted enough that moving the pulley seemed like a challenge I wasn't up to.

You can see here the adapter that replaced that zerk, with the end of the extension hose screwed in to it. I couldn't get a photo of the hose itself without removing the belt guards, but you can see again the zerk at the end of it at the lower right corner of the photo.

View attachment 693854

Below is a view of the extended zerk on the bearing on the front of the flywheel shaft. It pointed straight up, so straight pipe brings it up through the belt guard. The hard part was collecting nipples and couplers of the right length to come to the height I wanted. Local auto parts stores didn't have much selection, so I had to go to two of them to get the right length. It required an adapter to get from the 6mm threads on the bearing to the 1/8" nipples I could find. Locating the hole was "interesting," but it worked fine. I drilled a small hole, cut and X to the corners, then folded over the edges to avoid the raw sheet metal edges.

View attachment 693858
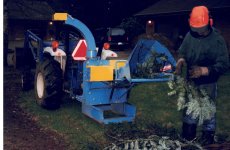
 
   / PTO chipper #32  
Yes, you have to remove the blades to sharpen. They are double-sided, so the first time you can just reverse them and re-install, after you scrape off the gunk that accumulates.

The gap is set on the anvil, not on the blades. They just mount hard to the flywheel.
 
   / PTO chipper #33  
I've never had my own chipper, so I'm new to this stuff.
Don't you have to remove the blades to sharpen them?
If you remove the blades, how do you know what gap to leave?
I guess I'll find out.
I've always sent my chipper blades to a shop. Don't think you can do them yourself without very special tools.

It will come with instructions on how to set the "bed plate" or "anvil", the stationary "blade" that the blades rub near to create the chips. Usually about a 1/16".

Some chippers come with hammers, if you want some to do leaves and very small brush that won't feed into a chipper. Had a TroyBilt Tomahawk and Mackissic TPH-122 for 10 years and 16 years, respectively for when I had small stuff and leaves to do.
 
   / PTO chipper #34  
I chip 900 to 1200 small pines every spring. Thinning my stands. I bought my Wallenstein BX62S brand new seven years ago. The blades are reversible but I'm still on the first side and they are still sharp as razors. I don't chip dirt, rocks or root material - just young, soft pine.

When needed I will get the blades sharpened thru the Kubota dealer. $45 for all blades/both sides.

The blades lock in to the rotor. Just be sure to clean the blade pockets well. The blade/anvil clearance is adjusted by moving the anvil. Instal all the blades. Gently rotate the rotor until you find "that" blade that is closest to the anvil. Make your blade/anvil adjustment based upon that specific clearance. The other blades will be just fine.
 
Last edited:
   / PTO chipper
  • Thread Starter
#35  
Hey Terry, I was able to greese the front of the Jack shaft by loosening the zerk one turn and using my Lock & Lube, it was bone dry it took many pumps with the DeWalt cordless to see greese start to come out. I never knew there was a zerk there and I have the manual.
So thanks again bro!✌🏻
 
   / PTO chipper #36  
I've had this S&R ProChip since about 1997 when I bought it used.
Based on my experience with this (and 8 hp Bearcat before this), a chipper should have a feeder instead of relying on so-called automatic feed.

The trouble with the "auto" feed is it does not work so well if the knives are not in top sharp condition!
The only downside with the feeder is the added cost, but it will more than pay for itself in the long run.

My two cents.


Here's photos on my sons running the chipper during summer 2000 when they were still teenagers:

Summer 2000.jpg

Summer 2000 II.jpg
 
   / PTO chipper #37  
I have an ECHO bear cat self feed , I mean yourself feed. Great for home owner use.
 
   / PTO chipper #38  
Hey Terry, I was able to greese the front of the Jack shaft by loosening the zerk one turn and using my Lock & Lube, it was bone dry it took many pumps with the DeWalt cordless to see greese start to come out. I never knew there was a zerk there and I have the manual.
So thanks again bro!✌🏻
You're welcome. :)

Manual on mine is pretty worthless. Seems to be designed for the engine-mounted version and gives short shift to the PTO model.
 
 
Top