Refurbishment of Case 1294

   / Refurbishment of Case 1294 #1  

voodoo

Silver Member
Joined
Feb 3, 2003
Messages
199
Location
N. Ireland (UK)
Tractor
Iseki TE 4270
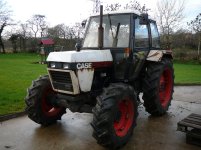
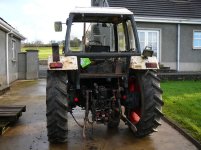
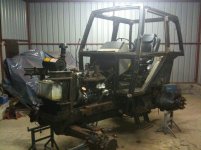
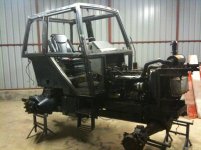
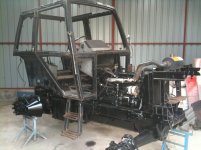
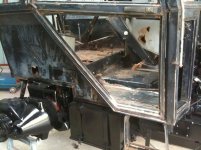
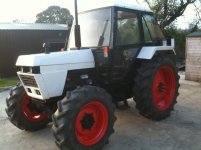
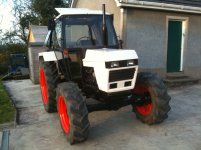
Thought I might show you guys my recent project just completed.
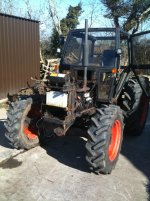
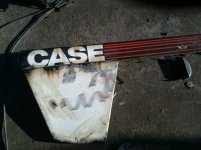
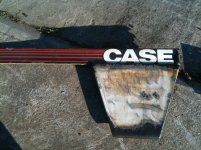
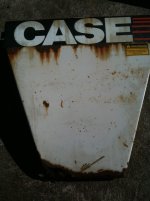
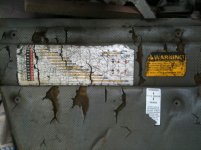
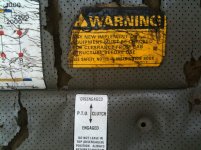
It is a Case (David Brown) 1294 FWD manufactured in 1985.
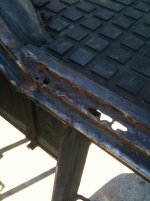
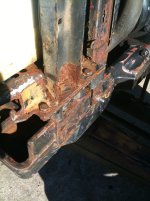
Purchased just over a year ago in reasonable mechanical order, but starting to get tatty after life on a mixed farm, last used as the yard scraper tractor, which usually translates to: - "it's on its last legs. If it dies it goes to big scrapyard in the sky"

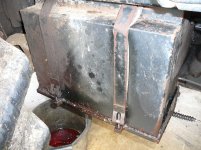
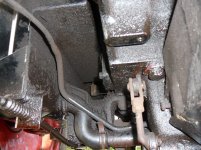
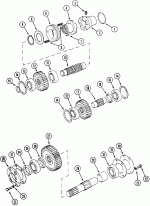
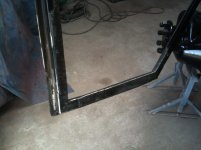
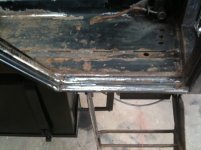
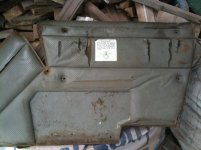
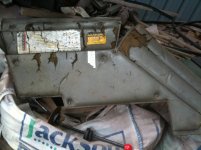
Anyway, these machines are becoming too rare to let rot away so decided on a complete strip down to bare cab and chassis and then reconstruction to the finished article.
Plenty of pics of the process along the way if interested.

Nigel
 

Attachments

  • P1050753-1.jpg
    P1050753-1.jpg
    588 KB · Views: 1,325
  • P1050751.jpg
    P1050751.jpg
    519.8 KB · Views: 818
  • P1050754.jpg
    P1050754.jpg
    507.7 KB · Views: 622
  • P1050755.jpg
    P1050755.jpg
    507.5 KB · Views: 658
   / Refurbishment of Case 1294
  • Thread Starter
#2  
First and most pressing repair was a leaking fuel tank.
All the grass and straw built up around the carrier bracket had formed a nice acidic compost to rot the edge seam, but also to prevent the fuel do more than weep. Of course, once pressure washed, extent of leak became readily apparent.

Stripped out tank and mig welded seam, stopping every 20secs to prevent a tank fire !!
I was told afterwards that the best way to do this would be to run a flexible pipe from a running exhaust to the tank, apparently the exhaust fumes will omit oxygen from the tank and prevent a fire. Oh well, will know for the next time.
 

Attachments

  • P1050762.jpg
    P1050762.jpg
    593.2 KB · Views: 375
  • P1050761.jpg
    P1050761.jpg
    516.5 KB · Views: 427
   / Refurbishment of Case 1294
  • Thread Starter
#3  
Strip down began properly at the start of March when I had a few days holiday leave due.
Weather was kind and much of the panelling could be removed outside in the spring sunshine.

Some of the photographs start to show the work ahead with holes at the door cills and rust to the cab frame.
 

Attachments

  • IMG_0078.jpg
    IMG_0078.jpg
    206.2 KB · Views: 319
  • IMG_0083.jpg
    IMG_0083.jpg
    275.8 KB · Views: 364
  • IMG_0098.jpg
    IMG_0098.jpg
    383.7 KB · Views: 863
  • IMG_0059.jpg
    IMG_0059.jpg
    360.9 KB · Views: 394
   / Refurbishment of Case 1294 #4  
Looks like you will have a nice little project for the next while. If you are taking it to that level of stripping down and repairing it, that should be a nice looking unit when you are done. Any concerns of getting parts for it in your area? That was one of the reasons we did not repair one of our loader tractors anymore a while back - parts were becoming a problem.

We also used to have a David Brown - pre-Case days and only 2WD but it was a tough tractor - either a 880 or a 990 if I recall. Was running fine when we traded it in - just was not big or heavy enough anymore for the loader work we needed.

Have fun!
 
   / Refurbishment of Case 1294 #5  
Big task but it will be a keeper when you are finished. Keep up the effort.
 
   / Refurbishment of Case 1294
  • Thread Starter
#6  
Unfortunately spring weather is never consistent enough to work outside, so the next stage was to complete the strip down of the panels and get them inside for preparation and spraying.
As you can see, some were not in great shape.
Panels were all stripped back down to bare metal, mainly using "Nitromors" paint stripper and wire cup and flap wheel on grinder. All remaining flash rust was then treated with rust converter preparation before welding, filling and sanding as required.
The bottom of the side panels was built up with glassfibre resin as the roll on the bottom edge made it impractical to weld in a patch.
 

Attachments

  • IMG_0096.jpg
    IMG_0096.jpg
    292.6 KB · Views: 303
  • IMG_0097.jpg
    IMG_0097.jpg
    396.3 KB · Views: 265
  • IMG_0089.jpg
    IMG_0089.jpg
    208.3 KB · Views: 210
  • IMG_0091.jpg
    IMG_0091.jpg
    255.7 KB · Views: 278
   / Refurbishment of Case 1294
  • Thread Starter
#7  
Next stage was complete strip to shell.
Four wheel drive had been poorly engaging and sometimes only operated in reverse.
Took the opportunity whilst on the stands to open up the drop box for the driveshaft to see what was the problem.
The drive is provided by a straight cut dog clutch from a cable operated lever. The cable had become stiff and partially seized, meaning that the clutch did not fully engage when lever applied. As a result the leading edge of the dog teeth were all worn back to a bevel and the shaft float was allowing the teeth to jump out on forward motion. In reverse, the teeth were being engaged on the reverse side which still had clean edges, hence drive was available.

Released the seizing cable and adjusted up the linkage mechanism so the clutch slide moved further onto the teeth and problem solved, fully operational 4wd again.
 

Attachments

  • 001CSIHE-165761.gif
    001CSIHE-165761.gif
    35.3 KB · Views: 323
  • IMG_0129.jpg
    IMG_0129.jpg
    294.7 KB · Views: 481
  • IMG_0128.jpg
    IMG_0128.jpg
    309.5 KB · Views: 335
  • IMG_0127.jpg
    IMG_0127.jpg
    295.7 KB · Views: 442
   / Refurbishment of Case 1294
  • Thread Starter
#8  
Cab stripped out and repair carried out to doors. New frame piece made and welded in to base of door skeleton frame and new section set in to cill of cab.
 

Attachments

  • IMG_0133.jpg
    IMG_0133.jpg
    268.3 KB · Views: 408
  • IMG_0138.jpg
    IMG_0138.jpg
    327.2 KB · Views: 316
  • IMG_0139.jpg
    IMG_0139.jpg
    200.2 KB · Views: 313
  • IMG_0140.jpg
    IMG_0140.jpg
    223 KB · Views: 271
   / Refurbishment of Case 1294
  • Thread Starter
#9  
Tractor repainted inside and out.

All panels twice primed and 3 coats of enamel to provide sufficient build up of white colour.
Wheels primed, and then top coated first with a darker red to provide base and two coats of David Brown power red. Darker coat will mean that any chips / scratches will not show through as white base primer so readily.
The chassis and cab has received two coats of gloss black tractor enamel.

The front grille was especially challenging. As you may ascertain from the earlier photographs the original was not in good shape. It had been split effectively into 3 pieces and previously been spliced together with tin backing plates and rivets.
Stripped apart and rebuilt with glassfibre resin and fillers.

Cab interior next on the list for an overhaul.
 

Attachments

  • IMG_0165.jpg
    IMG_0165.jpg
    209.1 KB · Views: 650
  • IMG_0163.jpg
    IMG_0163.jpg
    206.4 KB · Views: 1,041
  • IMG_0162.jpg
    IMG_0162.jpg
    279.9 KB · Views: 1,816
  • IMG_0161.jpg
    IMG_0161.jpg
    250.3 KB · Views: 699
   / Refurbishment of Case 1294
  • Thread Starter
#10  
As you can see, the original cab interior was very tatty and beyond reasonable repair.
Fortunately the David Brown Tractor Club The David Brown Tractor Club were able to point me in the right direction for replacement panels. Turns out that one of the main suppliers of vintage tractor cab linings, especially early Fords, lives about 15 miles from me.

Replacement floor and side panel linings were easily obtained, but unfortunately roof linings were no longer available. (the original was missing).
Managed to get foam backed lining sheets from the supplier and then made up and fabricated headlining myself. Wife was very surprised to find me sitting at the kitchen table one evening with a needle and thread sewing up foam lining panels.

Replacement decals for cab and bodywork were all obtainable through the David Brown club.
 

Attachments

  • IMG_0141.jpg
    IMG_0141.jpg
    246.2 KB · Views: 335
  • IMG_0142.jpg
    IMG_0142.jpg
    243.6 KB · Views: 305
  • IMG_0143.jpg
    IMG_0143.jpg
    264.5 KB · Views: 262
  • IMG_0144.jpg
    IMG_0144.jpg
    291.6 KB · Views: 264

Tractor & Equipment Auctions

2013 Chevrolet Cruze Sedan (A46684)
2013 Chevrolet...
Mack Day Cab Semi (A44502)
Mack Day Cab Semi...
2024 DR Pro 26 26in Walk-Behind Brush Cutter (A45336)
2024 DR Pro 26...
2013 UTILITY 53X102 DRY VAN TRAILER (A45677)
2013 UTILITY...
2019 KENWORTH DAY CAB T680 (A45677)
2019 KENWORTH DAY...
2025 Swict 72in Bucket Skid Steer Attachment (A46683)
2025 Swict 72in...
 
Top