Step by step photos of new garage

   / Step by step photos of new garage #11  
I have 12 walls in my shop with a 10x10 foot roll up door. If you put a garage type door in, you can get away with less height, but a rollup door will need at least 18 inches of clearance above the door. This usualy isn't aproblem if you leave the attic space open. If you want a ceiling in your shop, then you better figure out how much room your door will need when open.

If you center your door on the gable end of the roof and have a steep pitch, you can have a door taller than your side walls, or as tall. But remember that you will need a header over your door. The size depends on how wide your door is, but plan on 12 inches and know you can go smaller if you wanted to. Mine is 12 inches on my ten foot wide door.

If your door is going to be on a side wall, than you lose all your fudgeing ability. You will have to have it exact becaus the roof will be in the way if you're off.

Eddie
 
   / Step by step photos of new garage #12  
scott_vt said:
BTW, Im surprised you left your MMM on while moving rocks and soil, I would think it could get damaged easily !

ive drug/bashed my MMM on a bunch of crap while doing other chores with mine...

course my deck is fabed out of plate steel not stamped and weighs 8 million metric tones....

but not a single prob hear....
 
   / Step by step photos of new garage
  • Thread Starter
#13  
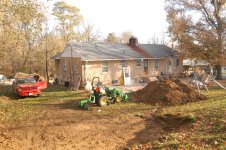
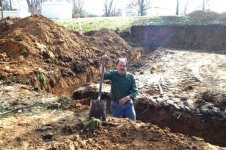
all good ideas, its killing me can not get the backhoe guy to commit: I might be out there digging my footing myself. Or better yet, by a b/h for my jd 4110.
few pic in better light with this post
Roger
 

Attachments

  • 2a.jpg
    2a.jpg
    399.8 KB · Views: 1,337
  • 3a.jpg
    3a.jpg
    371.3 KB · Views: 1,213
   / Step by step photos of new garage #14  
Depending on where you live, depends on depth of the footing. Once the footing is poured, the side walls are poured on top of that. Usually they make the side walls at least 12" higher than the surrounding ground. Personally, I like to have 18" so when you pour the floor at 4" depth, that will leave you 14". Then add to that the 10' side wall studs, the bottom plate (pressure treated), sill plate, and double top plate. This should bring you up to 10' 6" plus the 14" of concrete. At 11' 8", you should have plenty of height for all your needs. Some day in the future, you might want to add a car lift to the garage. Going up is relatively inexpensive compared to going out. I am not a fan of roof trusses, because they don't allow for valuable attic space. If you want the ideal situation, build the second floor with a 4' knee wall before you put the roof joists on. That way, you will gain a lot of second floor space. You could even make a mother in law apartment up there. Think this out carefully, because once you start building, it is too expensive to change plans and tear out work already done. A garage is like your home, you only get to do it once, unless you are extremely wealthy and like spending money to make changes. If you go with 2" x 6" wall studs, then you can space them every 24" (if building code allows). If you do the 24" stud spacing, then also consider let in bracing. If you are not familiar with some or all of these terms, go to the library and get a book on basic carpentry and learn. An evening with a good book can save you thousands in mistakes and help you erect a better building. Carpentry isn't rocket science, but poorly done, can and will come back to haunt you. Just don't let your friends push you in a direction that you are not comfortable. Remember, you will be living with this building a lot longer than the people that help to build it. Even it it takes you longer because you have to do a lot of the work yourself, you will feel a sense of pride knowing that it is exactly what you want. If I were closer, I would come over and help. Dusty
 
   / Step by step photos of new garage #15  
Defective said:
Heck Roger,

If you want to confuse it further, add a few inches so you can put in radiant floor heating later.

I second radiant heat if you will spend a lot of time in the shop during cold weather. If you are in and out for just short periods of time, don't bother with radiant. It takes a long time to heat up but is very nice once it does.
Bob
 
   / Step by step photos of new garage #16  
When I build things from scratch I always try to build in the lengths material comes in. usually in denominations of 2. I hate cutting off a foot of stock for the fire pit or having an odd length of plywood. When I build buildings I try to do them in dimensions divisible by 4. There is no sheathing waste that way. Same with building decks. There is no point cutting off 2 feet of stock for the burn pile.
 
   / Step by step photos of new garage #17  
Dusty is recomending that you pour sidewalls and then stick build up from there. I'm assuming this is to allow you to backfill your dirt up to the building?

I've never done this, but have seen it done on a few jobs that I came in later to do other things, and I've always been amazed at how much effort and expense went into just buidling up a small wall. It not only has to support the building, but hold back the hill and keep out moisture. Not a simple task and definately not a cheap way to go about it.

If you have the space, it would be allot cheaper and less complicated to just remove the dirt behind the buildng far enough to create good drainage. This means taking allot allot more dirt, but that should only cost you your time and fuel. Than you can either build up a retaining wall, or slope it back to create a grade that you can live with.

If it was me, I'd dig and grade it, than stick build your building on a cement foundation. Keep it simple and you save money. You also avoid problems down the road from having it leak. Assuming that it will never leak is a possiblity, but it's never 100 percent.

Eddie
 
   / Step by step photos of new garage
  • Thread Starter
#18  
thanks all for the the posts:

Eddiewalker: Your right about bringing the garage to a point you do not have to dig into the hill much better cost wise. This is what my brother in law was wanting to do. We staked out the the garage and it came out to where the garage was 20 feet along side of my house and only 6ft away, When you looked out my bedrooms windows you would only see a wall of siding 6ft away. I thought and thought about this and opted for moving the garage back 24 ft but it put it in the hill, I would rather spend the money and keep the view and I am in real estate, selling homes every day, one thing I learned is that buyers do not like small rooms or bunched up buildings. Not that I am going to seel my dream garage any time soon but it is always in the back of my mind. I whish I did not have to go into the hill but that seemed best for me.

Also with snow in the forcast tonight how cold do you all pour in. And what a mount of calcuim do you use when its in the low 40's. I plan on using 5 bag mix.

Thanks all

Roger
 
   / Step by step photos of new garage #19  
Roermo,
Concrete doesn't need any calcium unless the temp is going to drop to 20 degrees or less in a 24 hr period after pouring. It's best to stay away from calcium if it's not absolutely necessary, can make it really hard to finish well, especially on a large pour, can also lead to premature cracking from curing too fast. Concrete curing actually gives off heat (it's a chemical reaction, combining water into a hydrate). You can even pour concrete in colder temps with an insulation blanket and a recording thermometer under it to monitor temps.

Remember, the strongest concrete is that which is slowly cured and fully hydrated (like bridge piers), that's why you see water being sprayed for a day or two on commercial pours.
 
   / Step by step photos of new garage
  • Thread Starter
#20  
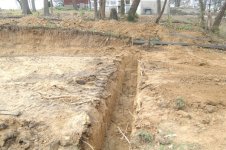
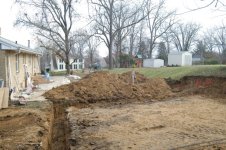
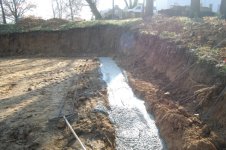
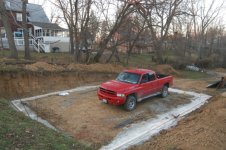
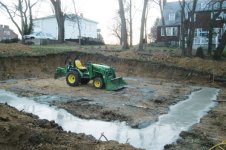
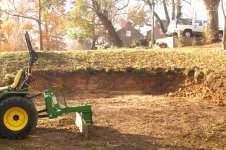
well the hill moved back footing dug and poured. On Monday we are setting walls and hope to pour the walls too.

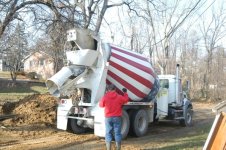
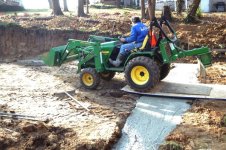
The garage is 26x34 and the cement truck shut would not reach so the tractor took the cement to back. could not ge above the hill as it is some ones eles yard.

Whish me luck in getting the walls set not the mentioned poured. I will have to find a pump truck.

Hope you all enjoy the pics.

Roger
 

Attachments

  • 1.jpg
    1.jpg
    150.5 KB · Views: 1,113
  • 2.jpg
    2.jpg
    133.4 KB · Views: 962
  • 3.jpg
    3.jpg
    134.8 KB · Views: 915
  • 4.jpg
    4.jpg
    139.8 KB · Views: 866
  • 5.jpg
    5.jpg
    148.9 KB · Views: 900
  • 6.jpg
    6.jpg
    132.9 KB · Views: 926
  • 7.jpg
    7.jpg
    123.7 KB · Views: 946
  • 8.jpg
    8.jpg
    131.1 KB · Views: 1,182

Tractor & Equipment Auctions

2016 KENWORTH T270 SERVICE TRUCK (A51406)
2016 KENWORTH T270...
We do NOT accept credit cards as payment. (A50123)
We do NOT accept...
2007 Reitnouer 40 Ton T/A Heavy Haul Flatbed Trailer (A52377)
2007 Reitnouer 40...
2015 Ford F-150 Ext. Cab Pickup Truck (A53422)
2015 Ford F-150...
2001 JOHN DEERE 310G BACKHOE (A52705)
2001 JOHN DEERE...
4 GOODRICH LT265/70R17 (A53843)
4 GOODRICH...
 
Top