Summer project, smaller bucket and manual thumb install E70B

   / Summer project, smaller bucket and manual thumb install E70B #1  

JerryK

Elite Member
Joined
Feb 21, 2004
Messages
3,266
Location
Vanderbilt, Michigan, USeh?
Tractor
Mahindra (2011)5035 HST TLB & (2016)2555 HST Cab & (2017)1526 HST(2018)Cub Cadet Pro Z 154L (1991) Caterpillar E70B
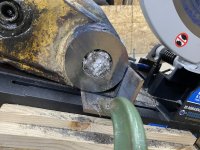
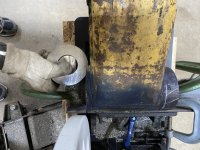
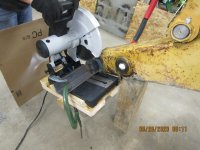
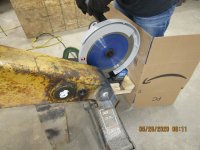
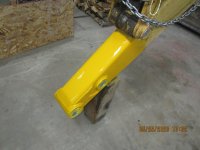
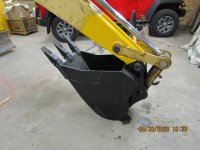
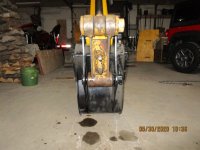
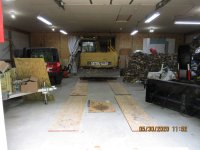
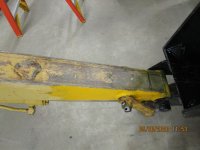
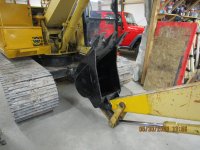
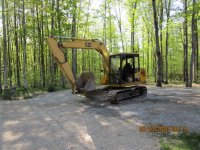
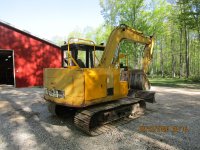
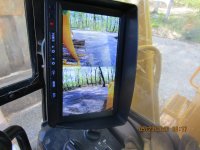
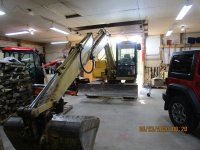
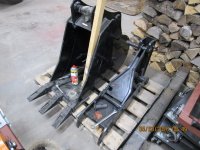
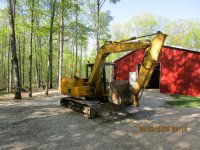
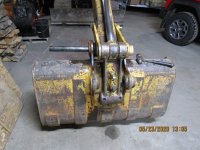
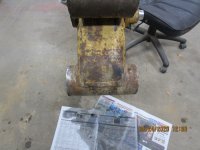
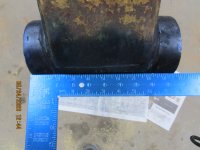
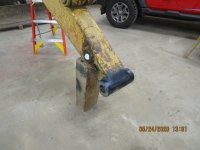
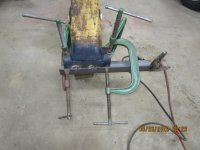
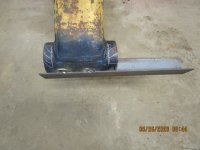
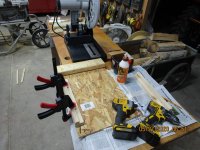
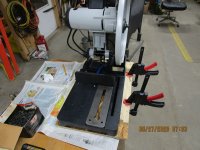
I have an old E70B. As a early summer project I am going to take the old 4' ditch bucket off and put on a 20" trench/stump digging bucket with a manual thumb. I have to rework the stick some, and plan on working on it if we get rainy days on and off. Moved stuff around in the back of the barn and put it out where I can work on it... The picture of the HD camera does not come close to the in person view, really sharp.
 

Attachments

  • IMG_0821 (Large).jpeg
    IMG_0821 (Large).jpeg
    749.9 KB · Views: 219
  • IMG_0823 (Large).jpeg
    IMG_0823 (Large).jpeg
    583.6 KB · Views: 209
  • IMG_0825 (Large).jpeg
    IMG_0825 (Large).jpeg
    335.8 KB · Views: 204
  • IMG_0827 (Large).jpeg
    IMG_0827 (Large).jpeg
    367.4 KB · Views: 225
  • IMG_0828 (Large).jpeg
    IMG_0828 (Large).jpeg
    391.2 KB · Views: 234
  • IMG_0822 (Large).jpeg
    IMG_0822 (Large).jpeg
    657.3 KB · Views: 241
   / Summer project, smaller bucket and manual thumb install E70B
  • Thread Starter
#2  
Got the pins out. Main pin is just sticking in the bucket. Will fire it up tomorrow maybe and pressure warsh it. Whoever owned it before me had went thru and replaced all the pins and bushings, and they are in good shape. Someone had modified the stick in the past and made the main bucket pin 'thimble thing' wider than stock. The part on the end of the stick where the stick bushings in is supposed to be a boot 7-1/4", just like the spacing on the cylinder pivot. I plan on removing the current stick bushings and cutting the width down to the stock 7-1/4" after I do a looksee what the stick end looks like after cleaned up/bushings removed. Second option is modify the new bucket. I am set up tool wise to go either way, since the Gov'ment sent me an extra $1200. But narrowing the stick is the way I want to go. That is the trouble with old machines, lots of people have had their say in what is done to it.
 

Attachments

  • IMG_0830 (Large).jpeg
    IMG_0830 (Large).jpeg
    392 KB · Views: 209
   / Summer project, smaller bucket and manual thumb install E70B
  • Thread Starter
#3  
Made pretty good progress today. All the bushings are out and she is a boot ready to cut. Going to try and cut it sometime next week. Once I got a good look at it, it looks like the thimble/barrel/whatever has been replaced. There were 4 hardened bushing in it, usually only 2. Probably was a farmer that decided that since he was only going to use the 4' ditch bucket [ over west of Alpena is where she came from ] ..... he probably decided to make it as wide as possible and still fit the Cat bucket he had. He torched/washed off the standard inner washers on the bucket and made it as wide as the ears would let him. Did a good job, but not much good if you want to put a standard E70B type bucket on it with the 7-1/4" spacing.
 

Attachments

  • IMG_0831 (Large).jpeg
    IMG_0831 (Large).jpeg
    322.6 KB · Views: 190
  • IMG_0833 (Large).jpeg
    IMG_0833 (Large).jpeg
    279.1 KB · Views: 177
  • IMG_0835 (Large).jpeg
    IMG_0835 (Large).jpeg
    304.1 KB · Views: 201
   / Summer project, smaller bucket and manual thumb install E70B #4  
Nice work!
 
   / Summer project, smaller bucket and manual thumb install E70B
  • Thread Starter
#5  
3" by 1/4" angle tack welded as a straight edge for the cutoff saw. Aligned to the bore..... Going to use a 15" Evolution cold cutoff saw to wack her...
 

Attachments

  • IMG_0836 (Large).jpeg
    IMG_0836 (Large).jpeg
    349.7 KB · Views: 184
  • IMG_0839 (Large).jpeg
    IMG_0839 (Large).jpeg
    315.7 KB · Views: 183
  • IMG_0840 (Large).jpeg
    IMG_0840 (Large).jpeg
    306.6 KB · Views: 175
   / Summer project, smaller bucket and manual thumb install E70B
  • Thread Starter
#6  
What a contraption...!!!!!!!! Made the boat [sled, or whatever you call it] to hold the saw in place whilst I cut. Once positioned in the proper place for the cut, the boat/saw will be C clamped in place onto the angle iron on both sides of the saw. The jack will remain in place during the cut to help hold the saw up against the angle iron. I squared up the fence on the saw and have is secured there by peg'n it with a 5/16" bolt... so it can't move.
 

Attachments

  • IMG_0842 (Large).jpeg
    IMG_0842 (Large).jpeg
    424.4 KB · Views: 186
  • IMG_0843 (Large).jpeg
    IMG_0843 (Large).jpeg
    351.8 KB · Views: 180
  • IMG_0844 (Large).jpeg
    IMG_0844 (Large).jpeg
    341.5 KB · Views: 181
  • IMG_0847 (Large).jpeg
    IMG_0847 (Large).jpeg
    321.7 KB · Views: 185
  • IMG_0848 (Large).jpeg
    IMG_0848 (Large).jpeg
    393.3 KB · Views: 192
  • IMG_0849 (Large).jpeg
    IMG_0849 (Large).jpeg
    341.8 KB · Views: 189
  • IMG_0850 (Large).jpeg
    IMG_0850 (Large).jpeg
    302 KB · Views: 188
Last edited:
   / Summer project, smaller bucket and manual thumb install E70B
  • Thread Starter
#7  
Buffalo Ranch neighbor came over today to help, mostly to see how the saw cut. He was pretty impressed. I cut the first one and let him do the second. Came out almost machine shop square, and I am happy. 'Posed to get rain all day today, but going to take it outside tomorrow, clean it up, and give her a little coat of Cat yellow. New bushing might be here Saturday, and I will maybe put the bucket on. Then start working on the thumb install. Plan on leaving the bucket and thumb semi-gloss black. May end up painting the whole bottom of the stick black Does not show rust/easy to touch up. But, excavators are supposed to look used. And using stuff shines up the metal like metal is supposed to look like, dirt polished.. LIFE IS GOOD !!!!!!!!!!!!!!! :)
 

Attachments

  • IMG_2116 (Large).jpg
    IMG_2116 (Large).jpg
    463.7 KB · Views: 190
  • IMG_2118 (Large).jpg
    IMG_2118 (Large).jpg
    453.4 KB · Views: 182
  • IMG_0851 (Large).jpeg
    IMG_0851 (Large).jpeg
    350.7 KB · Views: 180
  • IMG_0852 (Large).jpeg
    IMG_0852 (Large).jpeg
    374.7 KB · Views: 163
  • IMG_0853 (Large).jpeg
    IMG_0853 (Large).jpeg
    334 KB · Views: 185
  • IMG_0854 (Large).jpeg
    IMG_0854 (Large).jpeg
    266.7 KB · Views: 180
   / Summer project, smaller bucket and manual thumb install E70B #8  
Lookin Good Jerry!
 
   / Summer project, smaller bucket and manual thumb install E70B
  • Thread Starter
#9  
Forks ready... CHECK
Bucket ready... CHECK
Stick ready for bushings... CHECK

[ waiting on bushings ........... ] [ well, I guess I have to let the paint dry, too.... ]
 

Attachments

  • IMG_0859 (Large).jpeg
    IMG_0859 (Large).jpeg
    342 KB · Views: 193
  • IMG_0860 (Large).jpeg
    IMG_0860 (Large).jpeg
    331.2 KB · Views: 192
  • IMG_0861 (Large).jpeg
    IMG_0861 (Large).jpeg
    290.2 KB · Views: 180
   / Summer project, smaller bucket and manual thumb install E70B
  • Thread Starter
#10  
Got the bucket on this morning. Bucket pin went in 'fairly easily', in putting a bucket on terms. The curl link was a pain in the arse. It had been repaired/welded at some point in it's life and it must have a little twist to it. But it finally succumbed. Backed it outside and spun the undercarriage around so the blade was at the rear. Then tracked it backwards back into the center of the barn so I can start cleaning some stuff welded on stick that accumulated thru the years. Then, the thumb goes on.
 

Attachments

  • IMG_0863 (Large).jpeg
    IMG_0863 (Large).jpeg
    344.1 KB · Views: 185
  • IMG_0864 (Large).jpeg
    IMG_0864 (Large).jpeg
    335.3 KB · Views: 177
  • IMG_0868 (Large).jpeg
    IMG_0868 (Large).jpeg
    309 KB · Views: 177
  • IMG_0869 (Large).jpeg
    IMG_0869 (Large).jpeg
    288.2 KB · Views: 179
  • IMG_0870 (Large).jpeg
    IMG_0870 (Large).jpeg
    368.9 KB · Views: 169
 
Top