The Log house Project begins........

   / The Log house Project begins........
  • Thread Starter
#931  
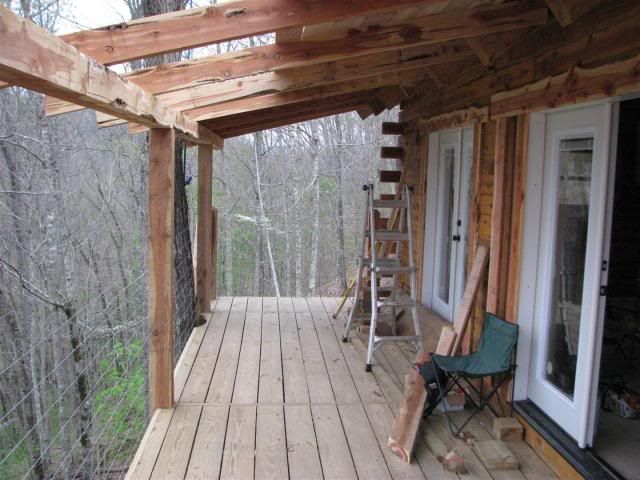
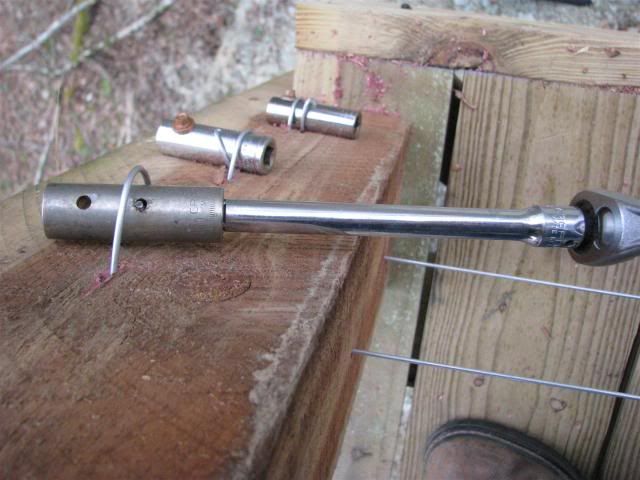
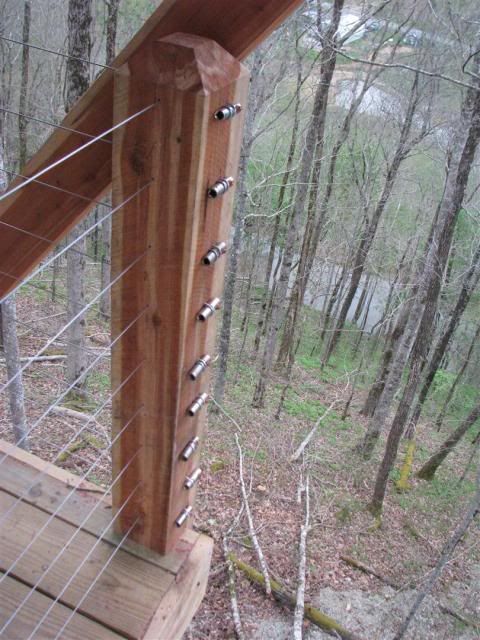
After all the holes were drilled, then I started stringing the wire. The wire goes through the post, then through the socket which I tighten with a ratchet> Once proper tension is reached, I put a screw through the socket into the post:
NorthPorchrailing007.jpg


Then repeat:
NorthPorchrailing009-1.jpg


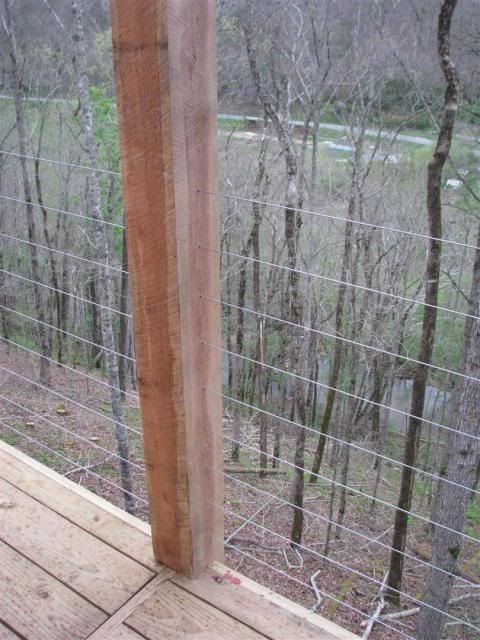
On the ends, I made a loop in the wire and secured it with a screw:
NorthPorchrailing014.jpg


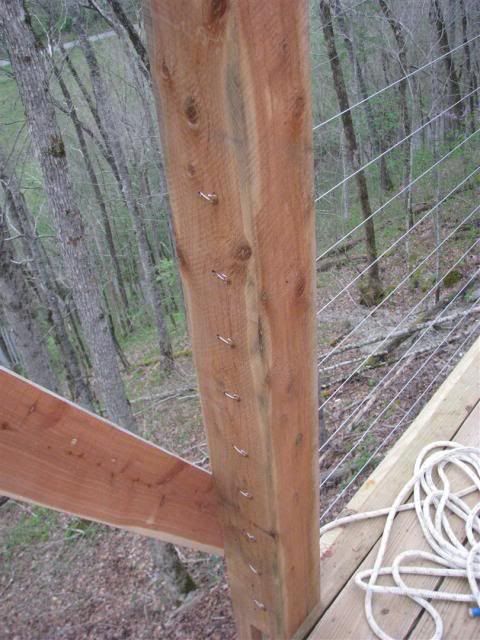
Once I started stringing it went pretty quick:
NorthPorchrailing013.jpg
 
   / The Log house Project begins........
  • Thread Starter
#932  
Can't even see the wire at the end:
NorthPorchrailing015.jpg


Inside view:
NorthPorchrailing016.jpg


Through post view:
NorthPorchrailing017.jpg
 
   / The Log house Project begins........
  • Thread Starter
#933  
This corner(right) is the end where all the line is tensioned:
NorthPorchrailing018.jpg


All in all I am pleased. I have to wait a bit to see if I really like it. I do like the open unrestricted feeling it allows. But, the "look" of the wire may need to grow on me a bit, and I might need t paint it flat black to make it really disappear. Either way I will feel a bit more secure going up and down a ladder 6" away from a 30' drop.
 
   / The Log house Project begins........
  • Thread Starter
#934  
Arrow, the 4 oak trees are all leaning away from the house. I am keeping a close eye on them for signs of stress from having the roots and trunk covered with fill(this summer is 3 years). I know that there is a good chance they will not make it, but I really like them, so I am going to let them stand as long as they are healthy.

Btw, I think you are 100% right.....I should, but I just can't bring myself to do it....yet.
 
   / The Log house Project begins........ #935  
Arrow, the 4 oak trees are all leaning away from the house. I am keeping a close eye on them for signs of stress from having the roots and trunk covered with fill(this summer is 3 years). I know that there is a good chance they will not make it, but I really like them, so I am going to let them stand as long as they are healthy.

Btw, I think you are 100% right.....I should, but I just can't bring myself to do it....yet.

I understand. Lets hope you are never troubled by them. Great job as usual with the deck fencing.
 
   / The Log house Project begins........ #936  
Don't wish to hijack but simply offering an alternate suggestion for followers,
I once needed to rail a porch in a similar elevation (22ft height) and had to meet insurance requirements.
We installed green 'frost fencing' that came in 36" height with a 2 X 4's for a top and bottom rails.
Problem solved and happy insurers.
The green 'frost fence' blends in without obstructing thw wiew!
Nice work, keep it up.
 
   / The Log house Project begins........ #937  
I like the wire. Are you going to put a wooden rail above the wire. I find I like stand by my rail and rest my elbows on the top. It also makes a great place to set your beer!
 
   / The Log house Project begins........ #938  
I like the wire. Are you going to put a wooden rail above the wire. I find I like stand by my rail and rest my elbows on the top. It also makes a great place to set your beer!

I agree with ruralruss on the rail at the top of the wire...maybe a 2X6 with nice mitered edges...nice hand and beer rest. Great job and accomplishment...sure is beautiful !:thumbsup:
 
   / The Log house Project begins........ #939  
I'm sure glad you posted the pics of those sockets. I didn't understand how you where going to use them to tighten the wire, and really like how they worked out.

Eddie
 
   / The Log house Project begins........ #940  
Eddie's right, very clever use of the sockets!! :thumbsup: One more vote for a top rail. Needs a bit more visual barrier and hand hold if someone were to take a fall. :drink::drink:

Nice job.
MarkV
 
 
Top