dfkrug
Super Member
- Joined
- Feb 3, 2004
- Messages
- 7,746
- Location
- Santa Cruz Mtns, CA
- Tractor
- 05 Kioti CK30HST w/ Prairie Dog backhoe, XN08 mini-X
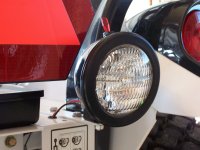
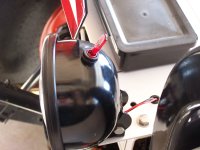
4. For the front work lights I installed a relay to a switch in the dash. The switch is located in the recess by the key. I ran a fuse holder and a positive and negative off of the battery to power the lights. The fuse panel has a spare circuit worked into it. You need to remove the fuse panel, then carefully remove the fuse holder connectors from the back of the fuse panel. The top three all need to come out as one unit since they are one piece jumpered together to a keyed source. You can power your switch off of this spare circuit. Just solder your wire onto this spare spot once you get it out of the circuit block, then run to the switch, then to the relay. This way your front work lights are able to handle whatever wattage you want, and your fuse panel won't burn out because of over amperage.
That's the best way to do it. Relays and a two wires (at least 16 guage) to
each light allows you to use 55W halogens.
In addition to 2 relays under the dash (one for fwd light, one for rear), I
adapted the turn signal switch so that one direction turns on rear light, and
the other, the front.