You are using an out of date browser. It may not display this or other websites correctly.
You should upgrade or use an alternative browser.
You should upgrade or use an alternative browser.
755 power beyond kit, with pictures
- Thread starter Kevin M
- Start date
/ 755 power beyond kit, with pictures
#1

OP
Kevin M
Gold Member
- Joined
- Nov 4, 2009
- Messages
- 415
- Location
- goshen NY
- Tractor
- 48" bobcat walk behind , 60" Dixie Chopper Classic , 755 John Deere 4x4 70 ldr belly mower etc etc , 7610 Ford 4x4 7412 ldr and 10 ft rhino hogg
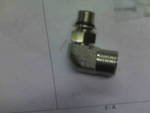
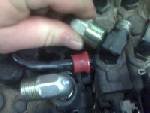
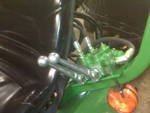
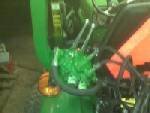
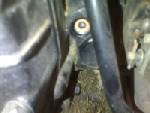
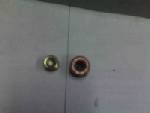
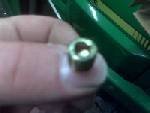
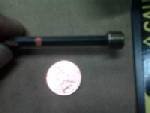
The first picture shows the plug i removed on right, the one on the left is the new plug to be installed , also shown in the second picture. The third shows how far into the hole you have to put this before you actually catch the smaller threads. Then reinstall the factory outer plug. PS install thread sealer on factory plug.
Attachments
OP
Kevin M
Gold Member
- Joined
- Nov 4, 2009
- Messages
- 415
- Location
- goshen NY
- Tractor
- 48" bobcat walk behind , 60" Dixie Chopper Classic , 755 John Deere 4x4 70 ldr belly mower etc etc , 7610 Ford 4x4 7412 ldr and 10 ft rhino hogg
The shiny glare in the third pic is a penny to show depth , the first part of the power beyond is done!
OP
Kevin M
Gold Member
- Joined
- Nov 4, 2009
- Messages
- 415
- Location
- goshen NY
- Tractor
- 48" bobcat walk behind , 60" Dixie Chopper Classic , 755 John Deere 4x4 70 ldr belly mower etc etc , 7610 Ford 4x4 7412 ldr and 10 ft rhino hogg
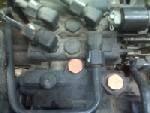
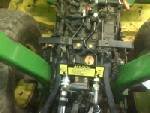
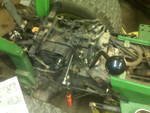
The next pictures show the two factory plugs that need to be removed, ( behind the loader valve) Again i colored them for the picture and the picture was taken from the rear of the tractor. The second picture shows the new O-ring boss 90 degree fittings to be installed where you remove the plugs.