LED light install... BUT look mom, no holes!

   / LED light install... BUT look mom, no holes!
  • Thread Starter
#21  
What holds the PAF to the ROPS while the adhesive sets?
I could see using these studs to clamp third function hoses to a loader boom.

Yes boom applications are ideal for CB parts. Large cranes are using them to attach lighting. Anywhere you don't want to upset the integrity of the design. It is almost always the case that a crack will originate at a hole. The other big benefit besides fatigue is corrosion prevention, especially when you bond directly to the paint.

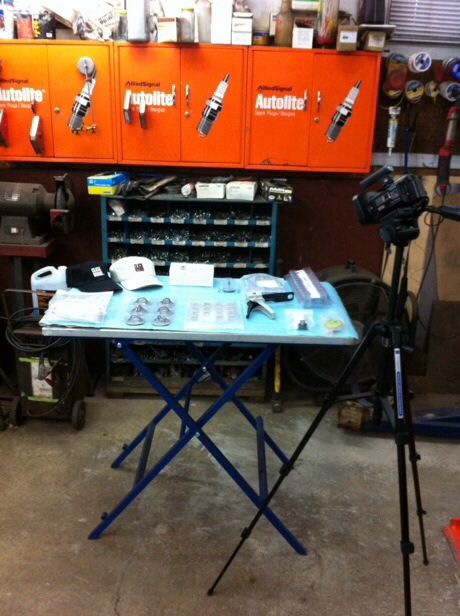
The PAFs have some 3M double back tape on the two 'feet' the old the fixture to the substrate. Here are a a couple of close up pics of the fixture. Note the over centering cam springs that actuate on pressing.

IMG_0473.jpg IMG_0474.jpg
 
   / LED light install... BUT look mom, no holes!
  • Thread Starter
#22  
Thank you all for you compliments... a fun project! I was kind of expecting reactions like "Oh crap another light install... boring". :laughing:
 
   / LED light install... BUT look mom, no holes! #23  
Thank you all for you compliments... a fun project! I was kind of expecting reactions like "Oh crap another light install... boring". :laughing:

Yours was different because of the hi-tech fasteners.. not magnets and tye-wraps:)
 
   / LED light install... BUT look mom, no holes! #24  
The last step was to tie into the ignition switch so the lights would need a key. It was bit of a struggle but once done I can't believe I spent so much time screwing around. Really pretty simple once I got the ignition switch pulled so I could access a switched wire. Then I pulled the trigger and wallah!!! Let there be light!... :cool2:

When I've worked installs on my Goldwing I've never wanted to cut into the wiring harness so for switched power I made the connection at the relay by inserting a spade terminal into the socket beside the relay pin I needed. Works great.
 
   / LED light install... BUT look mom, no holes!
  • Thread Starter
#25  
When I've worked installs on my Goldwing I've never wanted to cut into the wiring harness so for switched power I made the connection at the relay by inserting a spade terminal into the socket beside the relay pin I needed. Works great.
Yeah, I used one of those clamp splices so I didn't have to sever the wire. It just bites through the insulation. If I removed it you would be hard pressed to know i was there. Not sure your method is an option on my switch/relay. I will have to take a look.
 
   / LED light install... BUT look mom, no holes! #26  
Dragoneggs, how about a link to the specific Click Bond fastener you used? Where did you buy them (or were these gratis from your employer?). By the way, your BX comes with a relayed wire at the rear for auxiliary work lights which I assume you didn't use since you installed your own relay. No big deal, but I wasn't sure if you were aware of the spare wire they provide. It's usually taped up to the wiring loom right under the top link bracket and is hot whenever the machine is running, so you'd still need to locate/install switches. Anyway, I installed my lights using U-bolts, but the CB mounting would be a lot cleaner.
 
   / LED light install... BUT look mom, no holes! #27  
nice job dragoneggs! i also would be interested in which particular click bond items used in the project because santa is bringing my led lights tonight.:licking:
 
   / LED light install... BUT look mom, no holes!
  • Thread Starter
#28  
Dragoneggs, how about a link to the specific Click Bond fastener you used? Where did you buy them (or were these gratis from your employer?). By the way, your BX comes with a relayed wire at the rear for auxiliary work lights which I assume you didn't use since you installed your own relay. No big deal, but I wasn't sure if you were aware of the spare wire they provide. It's usually taped up to the wiring loom right under the top link bracket and is hot whenever the machine is running, so you'd still need to locate/install switches. Anyway, I installed my lights using U-bolts, but the CB mounting would be a lot cleaner.
Hi Chris, yeah I saw the spare wire once I got into it but decided I wanted dedicated circuits and fuses. This gives me expansion capability and I can increase wattage if desired. Not sure what are the limitations of the existing wiring.

PM me for CB info.
 
   / LED light install... BUT look mom, no holes!
  • Thread Starter
#29  
nice job dragoneggs! i also would be interested in which particular click bond items used in the project because santa is bringing my led lights tonight.:licking:
Thanks Steve... hey have you been snooping under the tree? :D PM me.
 
   / LED light install... BUT look mom, no holes! #30  
Well I'm using the Click Bond product today and I'm impressed! I'm also doing a video on it and the use I have for it.


image_zps756698d7.jpg
 
 
Top