New Mods to Loretta's 284 Jinma

   / New Mods to Loretta's 284 Jinma #41  
Thanks Chris,
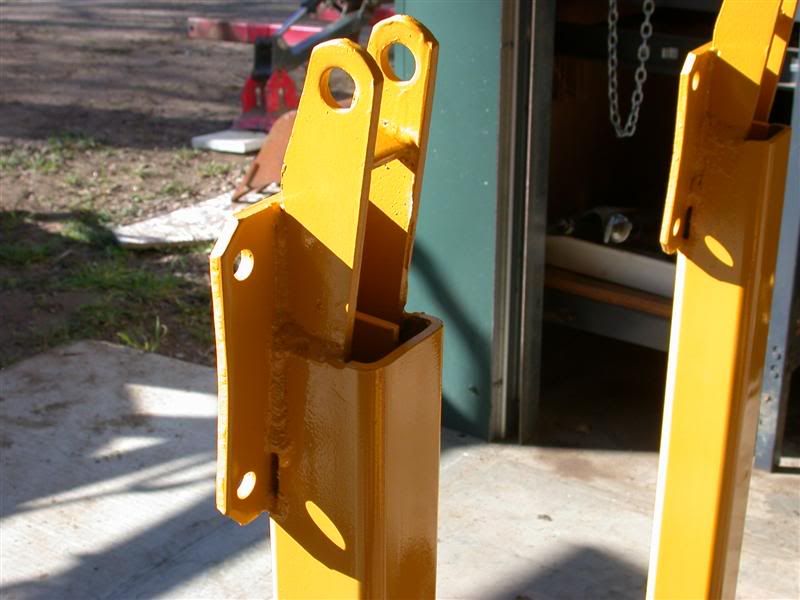
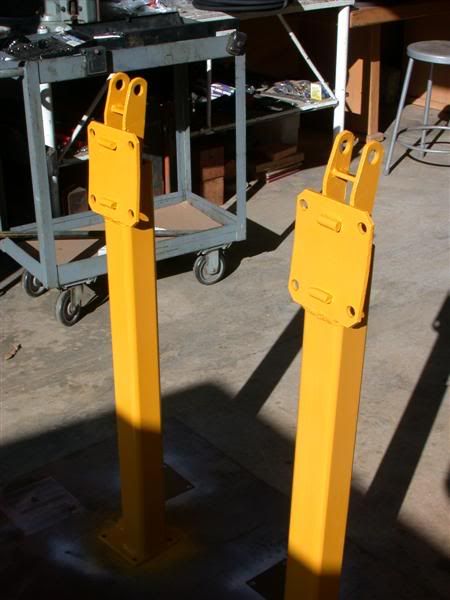
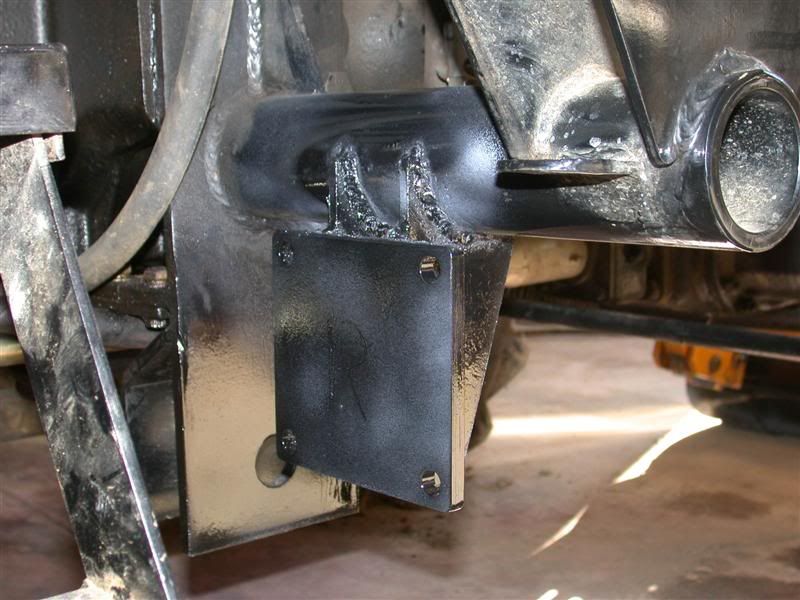
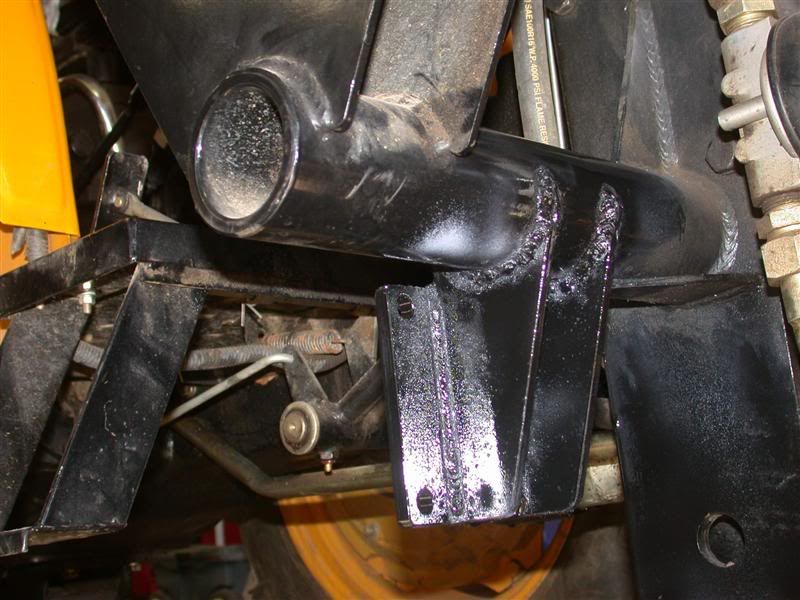
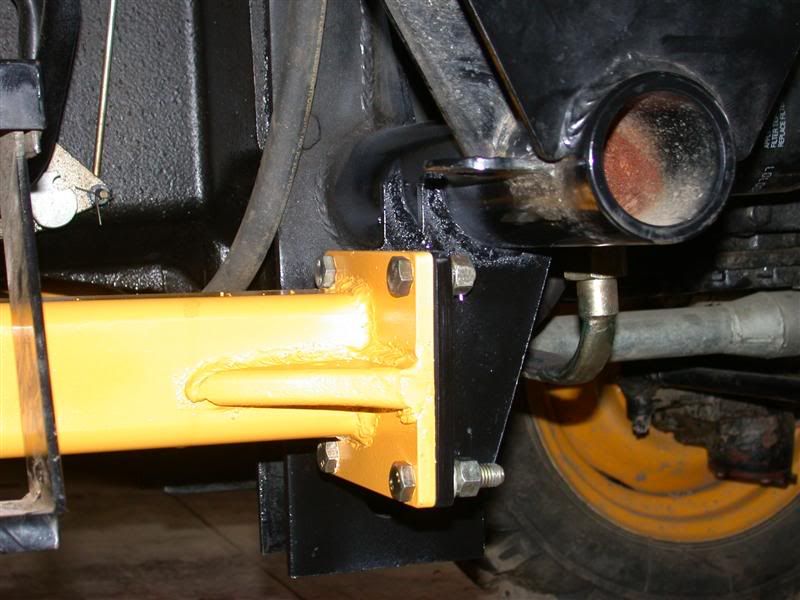
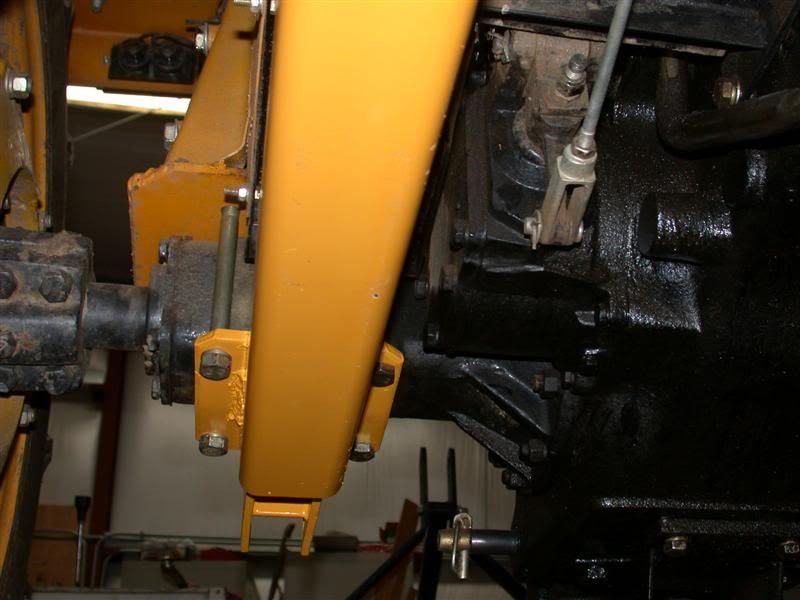
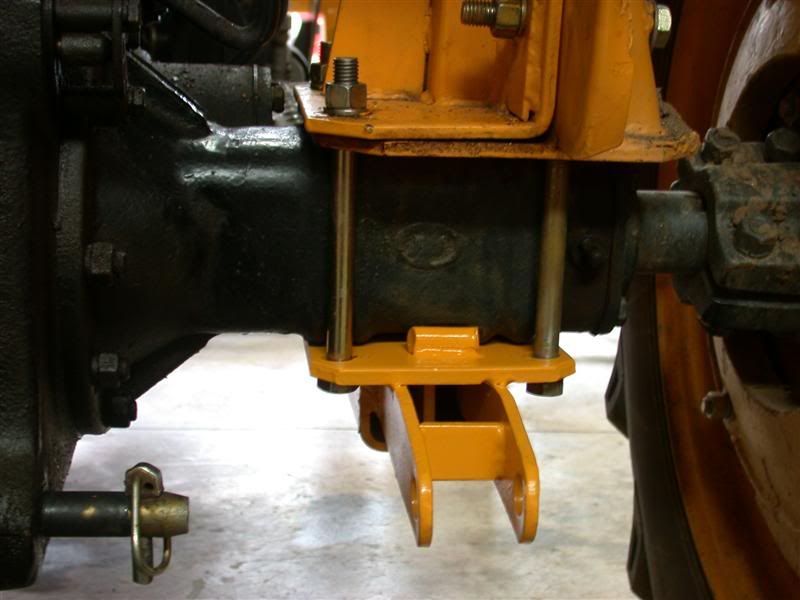
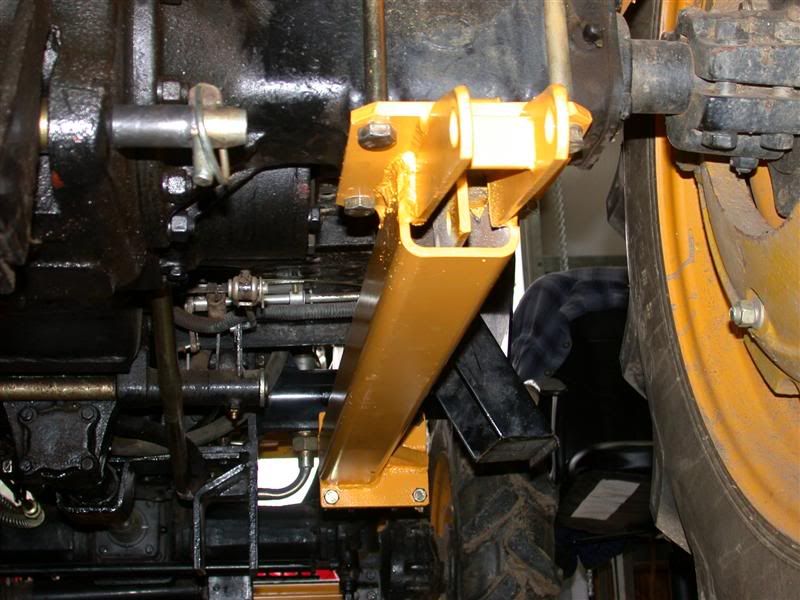
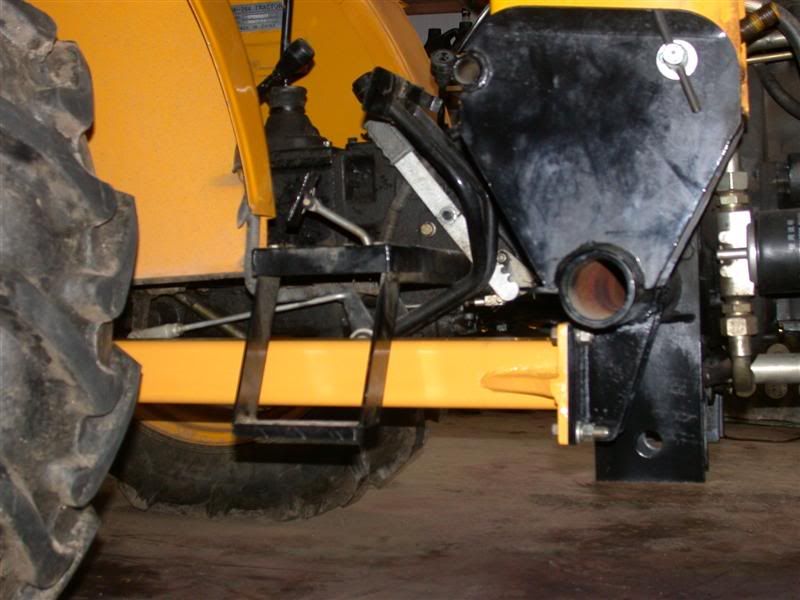
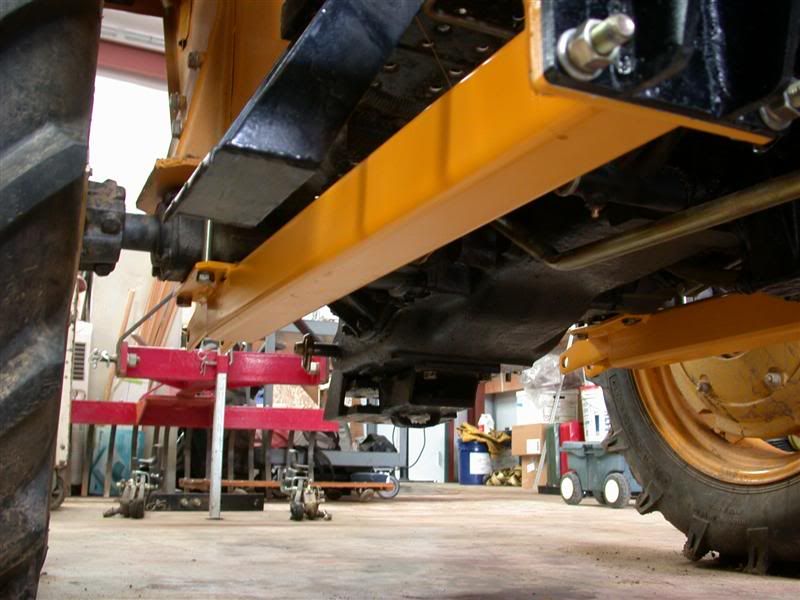
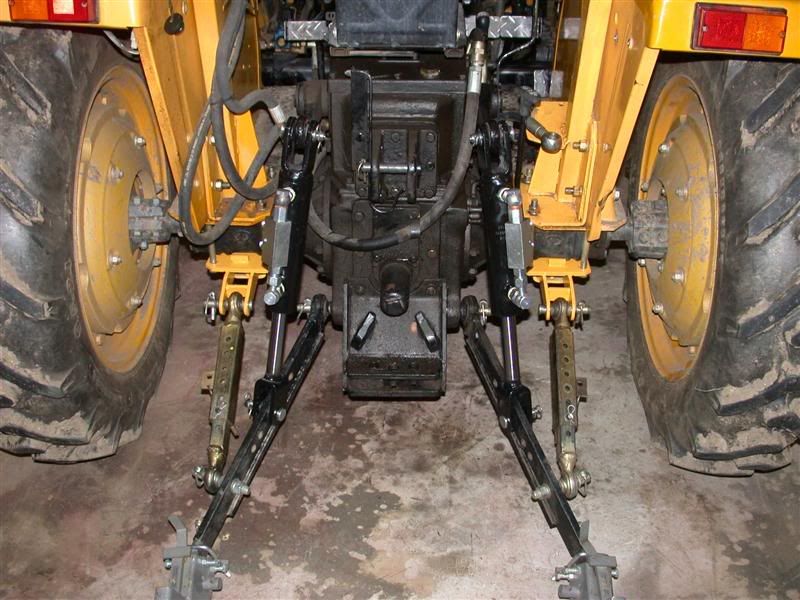
Those stabilizer braces to rear end are super beefy and robust.
Even more so than what is on the Kama with the Koyker loader. There is always more than one way to do something. I chose this way but your way works too, of course. I copied what Koyker had done for their loader stabilizers to the rear end except did not make the additional plate to sandwich in between.

One thing I wanted was to have the rear section be separate from the loader arm tube for disassembly purposes. But any surface that was to be bolted, I wanted the butt plates to take the stress... butting up to each other in the direction of the load. There is no chance of bolts sliding out of position that way even if they loosen slightly. They only hold the plates in positon and are not used to hold the force or stress themselves.
Thanks for your keen observation.
Rob-

Yea, got you on the removal thing. Mine are totally removable also. I like yours much better than mine, they are twice as nice. I built mine with very little tools at the time. All I had for a welder was a little HF 110 Volt Flux unit. If I were to do it over I would make something similar to the ones you made. I have since gotten a Hobart 187 Mig and a Miller AC/DC Stick Welder so I have more choice.

Either way, nice job. You really need to be loaned out to Jinma for a few weeks.

Chris
 
   / New Mods to Loretta's 284 Jinma
  • Thread Starter
#42  
I got a lot of work done today so I'm pretty pleased with the way things are shaping up.
I finished the rear FEL braces completely and got them installed back onto the tractor today. Those stabilizer braces to rear end came out really sweet and I'm very happy with them. I had to paint everything in the morning first though. Here are some shots of the painted braces. You were wanting to see what the other side looks like. The welds on the front round tube still don't look that good ... dang.

 
   / New Mods to Loretta's 284 Jinma
  • Thread Starter
#43  
I loosened the bolts holding the ROPS and fender together so the rear plate would install easier.
I also hung the front connection with bolts loose. Once I got those heavy suckers suspended, I torqued it all down again. They fit in there great! Here are some shots of them installed. Shown are the rears bolted to the front, underneath and shots from the rear underneath.
Notice the scrap scarifier gussets on the bolt plate.


Finally, a couple side views.
All in all, this mod came out very good and should do a lot for the stability of FEL use. I recommend adding these rear FEL braces if your loader is not equipped with them.
Rob-

 
   / New Mods to Loretta's 284 Jinma
  • Thread Starter
#44  
That's not all I got done today though.
I opened the box from Discount hydraulics and laid out all the fittings and such.


Not all the fittings are there yet so I can't complete the plumbing part yet.
But I was able to finalize how to make those DPOCV's attach to the side link cylinders. I needed a male 1/2NPT to female BSPP for the cylinder port on one port of the cylinder. I got a couple 1/2NPT reducers and drilled out the inside to go in the other port. I made a fixture so they would be straight when I drilled the hole in them. The hole will fit the 12mm banjo fitting.

 
   / New Mods to Loretta's 284 Jinma
  • Thread Starter
#45  
You can see what I did.
I have one of the banjo fittings going vertical into the left port. I will weld that fitting to the 1/2NPT reducer I drilled out. The other banjo fitting is horizontal into the check valve (as designed) with the banjo bolt going into the adapter (into the cylinder port). This way I was able to complete my hard line bridge. I did have to assemble it once to determine where to position the banjo fitting which was going to be welded. I also had to get it facing the correct way to meet up with the check valve. I did that by tightening it without tape and then added several layers of Teflon tape to be sure to get a good seal when facing the correct way. Second photo shows the banjo fittings welded to the 1/2NPT reducers. Also shown are the BSP taper going into the check valve to JIC 6 for my hydraulic hose ends.
This was a big step for me and I'm glad I got it figured out.


Last today was to turn up some pins to fit the tractor swivel balls.
I couldn't use the original pins because I used reducer bushings that Tim gave me about 2 years ago. The bushings stick out a little so they had to be longer. Thanks Tim, I finally put them to good use. You can see them in the first photo above and below. I used the 1" diameter pins that came with the cylinders and turned them down. Then I drilled a lynch pin hole in them. The last photo shows the side link cylinders (with DPOCV's) on the tractor ready to get plumbed up.
Maybe I can start on some of that tomorrow?
Rob-

 
   / New Mods to Loretta's 284 Jinma #46  
Rob:
I haven't seen traction bars like that since drag racing in the 70's.
I didn't see an engine swap on your todo list. How much power has Loretta talked you into ?
 
   / New Mods to Loretta's 284 Jinma #47  
Rob

Why do you need the valve on top of the hydraulic cylinder? What does that do differently then just hooking up directly to the cylinder?

Shane
 
   / New Mods to Loretta's 284 Jinma #48  
Why do you need the valve on top of the hydraulic cylinder? What does that do differently then just hooking up directly to the cylinder?
Dual Pilot Operated Check Valves. They meter hydraulic flow in and out of the cylinder to control systemic leakdown. On a new or well-maintained tractor, they're just "nice to have". Where they come in handy is on older machines with weak/leaky hydraulic systems. Sometimes it's cheaper to install check valves, than it is to overhaul the hydraulic system.

What impresses me more, is Rob's investigatory prowess - in being able to actually find a domestic source for DOPCVs that small.

//greg//
 
   / New Mods to Loretta's 284 Jinma
  • Thread Starter
#49  
Shane,
Greg explained most of it. (Thanks for your input Greg!)
I explained in a previous post some of the things double pilot operated check valves do. Like Greg said, they hold the cylinder in the position you put it. There is no (or very little if any) leak down at all. There is no movement in the hydraulic cylinder once you set it's position. Leak down is caused by small leaks in the valve or even in the cylinder itself where fluid seeps by the seals and lets the cylinder move. I've found that most cylinders are very good but the valves let fluid pass a little, so I like using the check valves. If the cylinders themselves leak, the check valves won't help... but generally it's the valve controlling the cylinders where the problem is.

Another benefit from hard plumbing them onto the cylinder like I did is that if a hose ever ruptures, the cylinder will still stay in it's position ... it won't collapse. It's also a "safety" feature in that respect. One drawback is you can't "float" a cylinder with DPOCV's on it because it stays locked until you move it. Some guys don't like them for that reason. But that is no reason not like or dislike the check valve ... it's just another feature that may not apply to your kind of cylinder use.

For me, I do a lot of grading and road work around my place with the boxblade.
After hours of dragging the boxblade, the setting never changes. That's important to me so I don't need to constantly adjust the cylinder to get the boxblade back to where it was a perfect setting. It takes some fiddling around to get the desired levelness and tilt of the box for crowning or smoothing, so it's a benefit for me. I don't use float in the top link or side link cylinders, I use the float from the 3pt to get that. I can see where float on a top link would be desirable when mowing with a rotary cutter though. But I have a slot for my mower that provides some float so the mower can flex back and forth.
Some have flexible links.

I installed them (dpocv's) on my backhoe stabilizer legs because they were constantly leaking down when I was digging. I was constantly "bumping" the stabilizers to keep the backhoe up. It was a small annoyance but more so, not good to operate the backhoe when it was not stable on the ground. After I added them they don't leak down at all. Another thing is when I park the 3pt backhoe, it stays up in the exact position where I set the legs. It's stayed in the same position for up to six months before I used it again. Before, I would come back to the property and it was flat on the ground! I bought these DPOCV's fro Mark at CCM.
 
   / New Mods to Loretta's 284 Jinma #50  
Got it thanks Rob and Greg.

Shane
 
 
Top