RDrancher's Photo Thread

   / RDrancher's Photo Thread
  • Thread Starter
#671  
Post some pics here when you're done. My Case idler just arrived, so I know what I'm doing for the rest of the day.
 
   / RDrancher's Photo Thread #672  
As luck would have it, it started raining as soon as I got out there. Supposed to rain all night and most of the day tomorrow. It will now take several days to be dry enough to move dirt.
 
   / RDrancher's Photo Thread
  • Thread Starter
#673  
My method of easy track removal and front idler replacement. We all know that working with machinery is dangerous, therefor I suggest that everyone besides me take their machine to the dealer and have it repaired.

For those unfamiliar with track adjustment on a ctl, it's simply grease pressure that pushes a piston forward on the front idler and yoke assembly. Loosening the fitting a bit allows the port to be exposed (In this case loosened with a 3/4" wrench.) Pushing back against the track / front idler pushes the grease out of the port. I turn the bucket cutting edge down and place a 4x4 between the bottom of the bucket and the center of the track at the front of the idler. Uncurling the bucket pushes the idler back in it's slot.
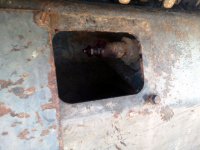
IDLER01.jpg

To get pressure off of the tracks for removal, I place some cribbing under the rear of the machine. I carry the cribbing on my trailer, but I've heard pf guys using a rock or stump for this if the machine loses a track in the field. With the cribbing in place, uncurling the bucket edge against the ground lifts the machine (tracks) off of the ground.
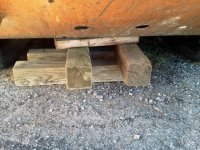
IDLER02.jpg

THE PIPE TRICK
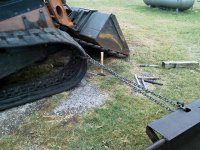
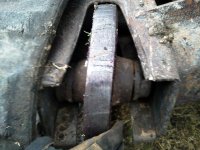
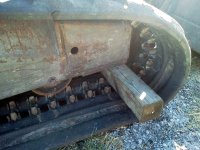
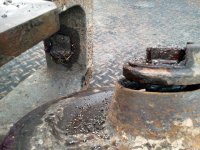
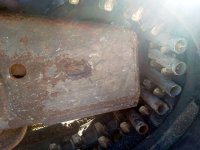
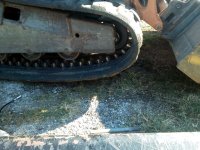
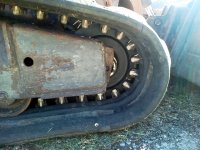
I failed to take a photo of track removal, so this pic is in here twice. I learned this trick from Willie over on HEF and it works slicker than snot on a doorknob. Place a few pieces of pipe between the track lugs on the bottom near the idler. Get in the machine and reverse travel to get the pipes up on the idler so that the track lugs clear the idler. It works just fine with pipes between every other track lug, but I have extra pipe so I use them. At this point I use my tractor and a chain to slide the track clear of the idler track. I've heard that this can also be done with a couple of cheater bars in a pinch. In the last pic you can see that the bearing is long gone.
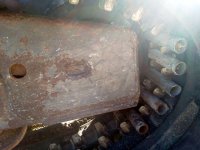
IDLER12.jpg IDLER03.jpg IDLER04.jpg

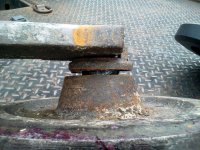
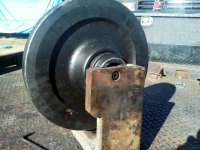
With the track out of the way, the idler/yoke assembly slides right out. (If I were changing out the track adjust assembly, it slides out next.) I don't know how much the idler/yoke actually weighs, but it's upwards of 150lbs. It's heavy. On the bench (my flatbed) you can see how bad the bearing actually is.
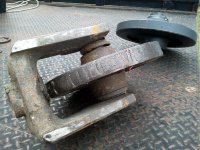
IDLER05.jpg IDLER06.jpg

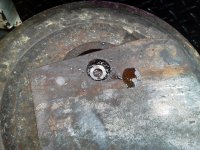
The idler sits in a slot in the yoke and is located by socket head cap screws on each side. The flats were rusted out and gone on the inside screw, so I had to drill it out far enough to slide the idler out of the yoke. Since I knew (from previous experience) that my hydraulics may bleed down enough for the bucket cylinders to block opening the door, I placed a 4x4 in there to spread out pressure on the track lugs and lowered the machine.
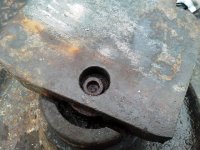
IDLER07.jpg IDLER09.jpg IDLER08.jpg
 
   / RDrancher's Photo Thread
  • Thread Starter
#674  
With the idler removed you can see where it was grinding into the yoke. It only took a couple of minutes of operating for the groove to happen. It was pretty noisy, but I was more worried about breaking the track than anything.
IDLER10.jpg

Here's the new idler installed along with new socket head cap screws. I used medium threadlocker on the threads just for insurance.
IDLER11.jpg

Installation is pretty simple. Slide the assembly back into the undercarriage and place the pipes at the bottom and behind the new idler, and roll the pipes up on the idler again using reverse. With the pipes up on the roller, I use the tractor's bucket to gently nudge the track so that the lugs line up on either side of the idler. Final centering adjustment is easy by hand. Now running the tracks forward spits out the pipes and viola!...the track is back on.
IDLER12.jpg IDLER13.jpg

Adjusting the track is as simple as pumping it up with grease.
IDLER14.jpg

I purchased an aftermarket idler from Prowler. Their shipped price is $329...the dealer's drive an hour each way price is $660. Since both warranties are the same and the repair is fairly simple, it was a no-brainer for me.
 
   / RDrancher's Photo Thread
  • Thread Starter
#675  
Back at the never ending mud pit. I'm not very fond of this builder's subs...
Cannon38.jpg

Fixed
Cannon39.jpg

I started the road base at the entrance so the loaded trucks could pack it down. In between loads I graded and crowned the straight stretch.
Cannon40.jpg Cannon41.jpg Cannon42.jpg Cannon43.jpg Cannon44.jpg
 
   / RDrancher's Photo Thread #677  
Where in Texas do you have black dirt ? Perfect edges on the drive as usual !
 
   / RDrancher's Photo Thread
  • Thread Starter
#678  
Thanks guys.

You'll find black dirt here everywhere in the Barnett Shale. It's not that nice fertile black dirt like the Midwest though...this stuff is nasty expansive clay.
 
   / RDrancher's Photo Thread #679  
I like the pipe trick. My dozer is ready for a new sprocket, but it's sectional so I wont have to take off the track. Thank God!!! I broke a track once and never want to go through that again.

Eddie
 
   / RDrancher's Photo Thread
  • Thread Starter
#680  
I like the pipe trick. My dozer is ready for a new sprocket, but it's sectional so I wont have to take off the track. Thank God!!! I broke a track once and never want to go through that again.

Eddie

Yeah, even the little stuff on a dozer is pretty dang heavy.
 
 
Top