YM336D Restoration thread

   / YM336D Restoration thread
  • Thread Starter
#21  
I am having some what I call extra noise from my final drive so if you end tearing yours down I will be watching how it all goes parts wise etc.

Car doc, I wouldn't worry about tearing into your final drive assembly. So far working on this tractor has been no more difficult than working on a typical lawn mower, just heavier. Yanmar really did their homework in making this thing easy to work on.

In a quick summary, this is how you remove the rear axles to access the final drive:

- Jack up the rear end using the the draw bar brackets as a lift point. This will cause the tractor to become tipsy.. don't worry.
- Remove the rear tire (this will shift the weight onto the opposing side, stabilizing the jack point)
- Remove the 7-8 bolts of the rear axle housing (whichever side you are removing)
- Place two of the long bolts you just removed into the holes which have rubber plugs in them (one top, one bottom)
- Screw the bolts in. This will help separate the axle housing, which is **** near crazy glued into place.
- Before you completely slide off the axle housing, place a winch or similar lift above the housing, as it weighs a lot (more than you can manage, I assure you)
- Strap one strap near the base of the housing (you will see divots where the strap should go) and another smaller strap holding the outside of the axle level with the inside housing.
- Slide off the housing and pivot in place in order to gain access to the final drive assembly. No need to lower onto the ground, as it should pivot in place quite easily.

That's it. Not very tough once you get things in place. The service manual recommends removing the brake, but I don't see why it is needed, as it didn't seem to hold anything together.

There may be a hydraulic thing or two in the way of removing the housing, which means it will also need removal. Mine has the PTO lift lever assembly blocking the path, which was easily removed via 3 bolts and a hydraulic intake line removal.

Good luck!
 
   / YM336D Restoration thread
  • Thread Starter
#22  
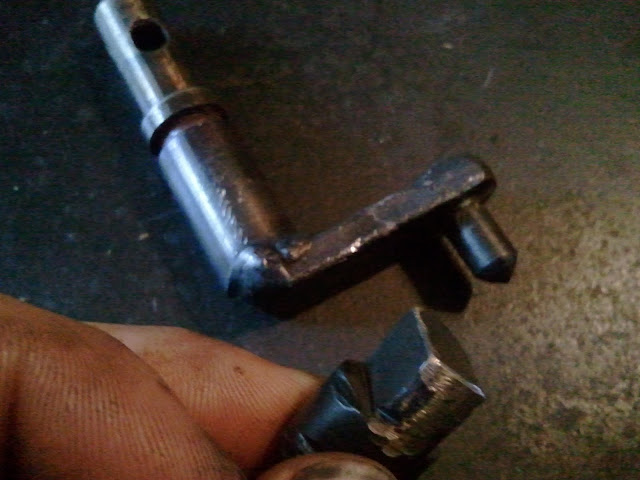
Things went quite well with the 4WD shift repair. Thanks to some guidance by a friend I managed to fully repair both the shift arm and the clutch dog.

2011-08-11%25252018.28.51.jpg

2011-08-11%25252018.30.05.jpg

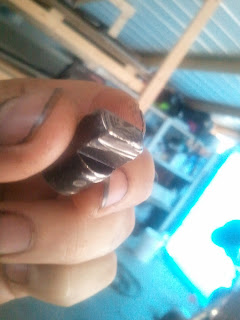
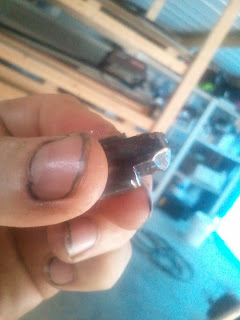
I managed to realign the arm, remove the old protrusion and TIG a new one in its place. The clutch dog was built up and reshaped to fit the 3/10" engagement gear channel.

As a bonus, I found a replacement oil seal (had to destroy the old one in order to remove the gear assemblies) at a local auto store for $5! Hoye is a great place for yanmar parts, but their $13 minimum shipping fee leaves a bit to be desired.

Although everything will likely work as is, I think I'm going to go back to the shop tomorrow and make the clutch dog more form fitting to the gear channel, opting against the basic square form of the Yanmar oem part.

The oil seal comes in Sat morning, so I should be ready for another test run by late Saturday afternoon. I'll be sure to post some photos of the finished parts before installing them. Maybe this time I'll make a video for posterity's sake. :)
 
   / YM336D Restoration thread #23  
great post Domush, appreciate the pics and the info,looking forward to your report on the 4wd operation, what will you do next..........
 
   / YM336D Restoration thread
  • Thread Starter
#24  
Nice report. Looks like you got your fingernails dirty. :D

I'm happy to have fingernails after sanding my thumbnail (and a bit beyond) off this spring while using a 3 phase 14" disc sander. A piece I was sanding on the table was sucked into the gap between the tray and the disc and my thumb was sucked in between the two :eek:. First time I've ever come close to passing out from pain, seeing as I did the first aid on myself. Gives new meaning to doctor-patient relationship :laughing:

Amazing how the body remembers what it looked like and grows it all back. :thumbsup:

If you're morbidly curious (or just like metal sculpture), I have a photo of it in my metal sculpture section on Picasa.
 
Last edited:
   / YM336D Restoration thread #25  
Hey Domush thanks for the well written run down that sure makes me feel better and it doesn't surprise me a bit about the take down holes Yanmar engineers put in to separate the housings that is smart!

That is the same kind of great engineering Toyota has been famous for they take care of the guy who comes along later and has to work on it! :thumbsup:

I am hoping your 4wd works as expected it looks like you are doing a real good job so far on everything else also! :thumbsup:
 
   / YM336D Restoration thread #26  
I'm happy to have fingernails after sanding my thumbnail (and a bit beyond) off this spring while using a 3 phase 14" disc sander. A piece I was sanding on the table was sucked into the gap between the tray and the disc and my thumb was sucked in between the two :eek:. First time I've ever come close to passing out from pain, seeing as I did the first aid on myself. Gives new meaning to doctor-patient relationship :laughing:

Amazing how the body remembers what it looked like and grows it all back. :thumbsup:

If you're morbidly curious (or just like metal sculpture), I have a photo of it in my metal sculpture section on Picasa.

Won't let me view your album for some reason. Probably because I don't know how.
 
   / YM336D Restoration thread #27  
Oops... there's nothing to see here. Either you do not have access to these photos, or they don't exist at this web address. Please contact the owner directly to gain access.

Same here.
 
   / YM336D Restoration thread
  • Thread Starter
#29  
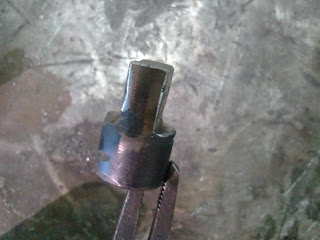
Alrighty! Finished rebuilding the rebuild of my clutch dog. As I mentioned earlier, I wasn't happy with the design of Yanmar's OEM clutch dog, so I decided to add a bit more material and add a slight conforming curve to mine.

Here is the before and after. I'll let you guess which is which :D

2011-08-10%25252016.05.32.jpg
2011-08-12%25252012.00.22.jpg

2011-08-10%25252016.05.49.jpg
2011-08-12%25252012.01.03.jpg

Adding this material made the final dog position perfectly snug with the clutch gear's channel. No more slippy-snakey, clutch-dog-escapey for this hound. Stay boy! :cool: Good dog. :thumbsup:

Tomorrow morning this bad boy gets remounted and we proceed with test #2, hereby dubbed The Extra Special Tractor Trial Without Obstacles.. or T.E.S.T. T.W.O.. Sorry, I couldn't help myself.. The US Senate taught me all acronyms must be long, stupid and spell something. :laughing:

Till tomorrow!
 
Last edited:
   / YM336D Restoration thread
  • Thread Starter
#30  
Success! Well, sort of..

I installed the new oil seal in the 4WD housing and reinstalled everything. Fired it up and it still clanked and ground and went nowhere. I tried second gear and it moved, but ground every foot or so. Afraid a higher gear would simply spin the grinding faster, I slowly tried 3rd gear and.. it went flawlessly! It appears the loose bolt heads floating around ripped quite a few teeth from 1st gear, a few teeth from 2nd gear and left 3rd and 4th alone, as they work like a dream.

So, for now I have a fully working tractor, with 4wd, only lacking 1st and 2nd until I either rebuild the gears or buy replacements. I'll see what they cost tonight and go from there. I wish there was someone parting out a 336 transmission I could steal a couple gears from. I have a feeling they will too expensive to buy new, and I'm not too sure of my fabricating skills to weld and grind perfect gear teeth.

BUT, for now I have my first tractor, which runs fine with the exception of a bit of white smoke (likely from the previous owner running it with no filter :thumbdown:). I have no new picture or video, as I wanted it running and was at my last drop of energy for today.

Next comes making a gravel drag and a means to drag trees for clearing some woods for pasture. You know, the reason I bought a tractor in the first place. I didn't just buy it to suck away all my time and money :p

Now I have to make a few websites to help pay for all of this out-go :cool:

I want to thank those of you who gave their encouragement in fixing up this beast. I was certainly intimidated once I found those loose parts floating around in the transmission. The level heads and helpful advice here are a big part of my choosing to tackle this project instead of ditching it at a loss. As a result, I've learned a ton, have had great satisfaction and have a decently working tractor. All from the help I've found here.

Thank you all.

Till next project.. I'll add to this thread once I begin the gear replacement/rebuild. After I find out where they are..
 
Last edited:
 
Top