Chipper WC-6 Chipper Photos

   / WC-6 Chipper Photos #21  
One suggestion/tip I have found with using my chipper - you will be happier if you chip materials as soon as possible after being cut! Once they are well-dried, they become MUCH harder which results in more noise, is harder on the chipper blades, and hurts a lot more when one whips around while being fed in and smacks you!!

- Jay
 
   / WC-6 Chipper Photos
  • Thread Starter
#22  
One suggestion/tip I have found with using my chipper - you will be happier if you chip materials as soon as possible after being cut! Once they are well-dried, they become MUCH harder which results in more noise, is harder on the chipper blades, and hurts a lot more when one whips around while being fed in and smacks you!!

- Jay

That is a good point Jay,
We have some very old brush and limbs that we will burn instead of chip.
Was going to burn some today but Loretta drove over one of the clean outs of the septic tank and busted it off. She was on her way to grapple some of that old brush to move it to a burn location. So we spent the rest of the afternoon fixing that and then it started pouring just as we were finishing up. I have some freshly downed trees to chip and that should happen next week ...lol ... if no other emergencies come up.
 
   / WC-6 Chipper Photos #23  
One idea for the grease fittings that are hard to get at. Run a grease fitting line from an easier place to get at.
 
   / WC-6 Chipper Photos
  • Thread Starter
#24  
One idea for the grease fittings that are hard to get at. Run a grease fitting line from an easier place to get at.

Yes, that's a good idea.
I did that just a couple weeks ago on my Kama when I had it split apart. I put a flexible grease line to the throw out bearing and a grease nipple on the bell housing.
 
   / WC-6 Chipper Photos #25  
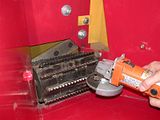
One thing I forgot to post is that the first thing we did is sharpen the feed roller teeth.
Loretta was able to get the 4" angle grinder inside and put a sharp edge on every row of teeth. No need to take the roller out on this model. It was easy to do. I rotated the flywheel using the PTO drive until each row was in the same place. We got the same angle on each row that way. Plus, the roller itself was held steady for grinding purpose.


Did you run your chipper before? How much did shapening do for you?
Thanks
 
   / WC-6 Chipper Photos
  • Thread Starter
#26  
Did you run your chipper before? How much did shapening do for you?
Thanks

Hi Bill,
No I didn't run it before sharpening.
I had read a couple other threads that suggested doing that from guys who did run it before they sharpened the feed roller. They all stated that smaller diameter branches were now pulled in much better than before.
So I figured to do it right off. Several rows on my feed roller were dull ... they were not all sharp. I sharpened them so the tip had about 1/32" of land left on them. And indeed, you saw that small pile of branches I had, they were all pulled in nicely when I did run it.
 
   / WC-6 Chipper Photos #27  
Did a little chipping this weekend and I can only say it is great to take the entire arsenal to the work area (versus draging debris to a burn area) and "git-er-done"

My efforts are to focus on "parking out" the south border with a road cut on the property line. I also needed more firewood due to some colder than normal temps this year and the SWBO's need for a warm (can you say 75º:() house when she comes in from tending the horses.

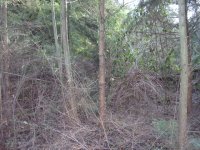
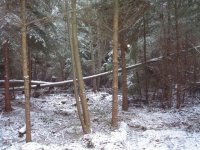
I knew the trees in the photos fell a couple years ago so I diverted from the SW corner where I started from to the SE corner. I just spread all the chips around to compost. Only got one tree out today but I'm not in any hurry. It was nice to buck-up the tree at chest level for the first 2/3 of the length.:)
 

Attachments

  • P1240008.JPG
    P1240008.JPG
    73.9 KB · Views: 157
  • P1250012.JPG
    P1250012.JPG
    74.1 KB · Views: 169
   / WC-6 Chipper Photos
  • Thread Starter
#29  
Looks good Rob. You and Loretta get some ear protection for running that thing.

MarkV

Thanks Mark,
Hadn't thought about the ear protection so that is a good warning.
Later this week we'll start on the downed trees so it will be a much bigger job that that little pile of twigs we practiced on.
Thanks!

Larry D,
Thanks for sharing the photos. I know what you mean what a mess and what a job it is to work the burn pile. We just went through that during a rain and it was a mess.
BTw ... love your signature!
 
   / WC-6 Chipper Photos #30  
Rob the Gear box is under the yellow cover. the clutch mechanism is on the output of the gear reduction. Mine didn't have any oil in it..... 80W gear oil.

I'll be interested to see your solution for keeping the debri from fouling the small belt under the yellow cover. Mine still has the duct tape/cardboard. If the feed roller stops you will smell the rubber from this little belt!

I must get some cable like yours. Mine has a very clunky mechanism on top of the chute to operate the clutch.

Mine handles stuff up to 6" no problem. Mostly fir though not real hardwood stuff like it looks like you have.

We use the chips for trails and covering up the mud after I've chewed up the ground with the tractor.


Top