mjncad
Super Member
I need to make some modifications to the tractor's hydraulic system due to interference problems. The space is so tight that hydraulic hoses are out of the question. This leaves hard-lines. There are two ways to terminate the ends; one is to have them flared for a special sleeve for the tube nut, or to braze on a sleeve for the tube nut. The local Parker hydraulics shop flares the tubing; but at $17.50 per end makes it cost prohibitive for the number I need done (~24). The tools to do the flaring run into the thousands, so that is out as far as me owning the tools. They do not do brazing. Fortunately a neighborhood friend loaned me a small plumber's oxy/acetylene torch for me to try my hand at brazing. So after cleaning out a Parker store of six 3/8 and five 1/2 brazing sleeves, and they gave me a couple scraps of tubing to play with, I present to you my attempts for your comments. I had to make my own braze rings as the Parker store didn稚 carry those. Making the braze rings was the most time consuming part; but they worked slick. Stick one in the sleeve, put in the tubing, heat to brazing temperature and the sleeve settles onto the tube end thanks to gravity.
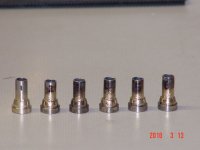
I numbered them in order of completion. I cleaned up the first one with an aggressive knot wire cup brush; but it tears up the sleeve too much. The rest were cleaned up with a soft brass or brass plated wire brush in the drill press set to maximum speed. I cut them down to length after cleaning them up.
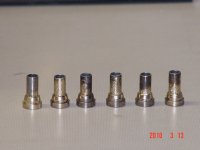
The back side.
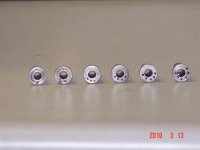
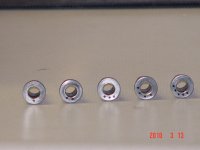
The sleeve face that the O-rings seal too. The first one was cleaned up as best as possible with emery cloth. The rest were cleaned up with the drill press mounted wire brush. Note the mottled appearance of the faces, which is similar to the texture of hot rolled steel. This was I believe caused by too much heat. Through my Shade-5 welding goggles, I couldn't tell if the filler metal melted until the steel was bright orange.
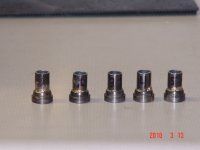
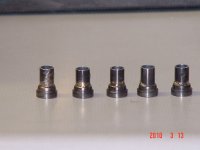
Here are the 1/2 tubing tests.
The back side of the 1/2 tests.
Notice that Number-1 has the mottled hot-rolled steel texture on the face. For the rest, I took off my welding goggles (I know, I'm bad), and I was able to clearly see when the filler metal melted, which was at a dull red color in the steel.
The sleeves were $13 with tax, and the brazing wire and flux was $21 due to the 45% silver content of the wire; however, this was money well spent to see if I can actually braze the sleeves on before investing in a bunch stuff.
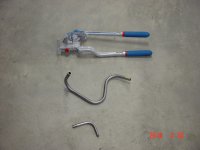
Next step is to acquire a tubing bender capable of bending 1/4? 3/8? and 1/2 tubing to see if I can successfully bend the tubing. I have some leads on a handheld one.
Thanks!
I numbered them in order of completion. I cleaned up the first one with an aggressive knot wire cup brush; but it tears up the sleeve too much. The rest were cleaned up with a soft brass or brass plated wire brush in the drill press set to maximum speed. I cut them down to length after cleaning them up.
The back side.
The sleeve face that the O-rings seal too. The first one was cleaned up as best as possible with emery cloth. The rest were cleaned up with the drill press mounted wire brush. Note the mottled appearance of the faces, which is similar to the texture of hot rolled steel. This was I believe caused by too much heat. Through my Shade-5 welding goggles, I couldn't tell if the filler metal melted until the steel was bright orange.
Here are the 1/2 tubing tests.
The back side of the 1/2 tests.
Notice that Number-1 has the mottled hot-rolled steel texture on the face. For the rest, I took off my welding goggles (I know, I'm bad), and I was able to clearly see when the filler metal melted, which was at a dull red color in the steel.
The sleeves were $13 with tax, and the brazing wire and flux was $21 due to the 45% silver content of the wire; however, this was money well spent to see if I can actually braze the sleeves on before investing in a bunch stuff.
Next step is to acquire a tubing bender capable of bending 1/4? 3/8? and 1/2 tubing to see if I can successfully bend the tubing. I have some leads on a handheld one.
Thanks!