2305 PTO not engaging

   / 2305 PTO not engaging #1  

Kyle_in_Tex

Super Star Member
Joined
Oct 24, 2002
Messages
12,658
Location
East Central, Texas
Tractor
JD 4310,JD5420
First off, this is not my tractor. It belongs to the company I work for. They have a guy who uses it regularly. He is not mechanically inclined. The tractor will start and run fine. The operator said that the PTO worked intermittently and now not at all. The tractor is only used with a belly mower and has not used the rear PTO.

I searched for this problem but as you all know if you search for 2305 and PTO you get hundreds of threads.....

I checked the seat switch and it is working. I am familiarizing myself with it and starting to check things out with a voltmeter.

It might just be the yellow switch. If anyone knows anything, I appreciate your help!
 
   / 2305 PTO not engaging
  • Thread Starter
#2  
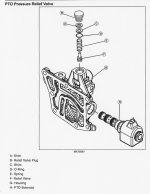
The switch is working, I am getting 12 volts all the way down to the solenoid at the bottom rear of the tranny.
 
   / 2305 PTO not engaging #3  
Maybe the solenoid has failed or is sticking. Not to be insulting, but I assume you made sure the selector was set for the mid PTO.
 

Attachments

  • 2305 PTO3.JPG
    2305 PTO3.JPG
    87.4 KB · Views: 3,134
   / 2305 PTO not engaging
  • Thread Starter
#4  
Maybe the solenoid has failed or is sticking. Not to be insulting, but I assume you made sure the selector was set for the mid PTO.

Yes, tried all 3 positions. We actually took the magnet end of the solenoid off and it is working, so we are hoping that a new one will fix it.

Also, has anyone had to replace the plastic fan that is inline with the drive shaft between the motor and tranny? This one doesn't have a single blade left on it. I know the tranny needs it for cooling. Can you get at it good enough by taking off the operator's foot platform? BTW, 471 hours on the machine.
 
   / 2305 PTO not engaging #5  
The fan is a common failure on the 2305. I think its a four hour repair job for the dealer, the part isn't very expensive though. I was told by a dealer mechanic not to worry about replacing mine as they don't last anyway and he's never heard of the trany heating issues as long as the case is kept relatively clean.


Does the rear pto work? Did the operator hit anything with the mower.....worst case scenario it could be a case failure.
 
   / 2305 PTO not engaging #6  
Can you turn the pto by hand , with the engine off . If so the shaft is broken . Next remove the solenoid and bench test it .if you have an ohmeter , it should read between 4 to 9 ohms .anything more is probably bad . Plus dble ck the rest of the hydraulic system , you may not have enough hyd pressure to engage the pto . If so it won't turn under a load . Try it without an implement .
 
   / 2305 PTO not engaging
  • Thread Starter
#7  
The fan is a common failure on the 2305. I think its a four hour repair job for the dealer, the part isn't very expensive though. I was told by a dealer mechanic not to worry about replacing mine as they don't last anyway and he's never heard of the trany heating issues as long as the case is kept relatively clean.


Does the rear pto work? Did the operator hit anything with the mower.....worst case scenario it could be a case failure.

Rear PTO does not engage either. Don't know if operator hit anything. He says it started working intermittently, then just stopped altogether. I would say that this tractor falls into the "severe" duty category due to the common usage in 100 degree plus weather.
 
   / 2305 PTO not engaging
  • Thread Starter
#8  
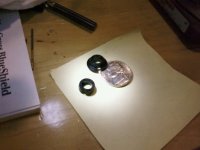
Ok it's fixed, but it wasn't easy as we had to make some small plastic parts to replace the ones that broke. These are internal on the solenoid valve. They basically encapsulate a spring to return the internal stem to its native position. Deere doesn't sell these parts except with the whole solenoid which is a Kanzaki (sp?). I guess if someone needed some, they could take the broken pieces to a shop and have them make them some. We used a high end plastic called PEEK which would be expensive to use but since we had some laying around, we used it. Plus, I guess I should have said that I work in a machine shop to start with. I guess if anyone needed some, I could maybe make them some for a small fee plus shipping.
brokenplasticpieces.jpg
Old broken piece and 1 good piece.
 
   / 2305 PTO not engaging #9  
Glad to hear you have the PTO problem repaired. If you haven't replaced the fan I would recommend doing so. This is from another forum, the instructions are straight forward and clear. The poster advises one hour to remove and replace fan. He also gives another area to examine.

(Mark Meyer)Postings from another forum:
---------------------------------------
I've read a few posts including the sticky about people having trouble with replacing the hydrostatic fan, and I'm a little confused as to why it's such an issue.

I didn't have to remove any hardware to get access other than the shaft itself, and it was quite easy.
Just slip the snap ring at the front forward, drive out the springpins (note that there are two; one inside the other), and then the shaft comes right off.
R&R the plastic fan, reverse the above, and you're done.
Probably the hardest part is to find an over long punch that has some reach to it to get to the pins. I cheated and used a gentle nudge from an impact gun to help the punch along so I wouldn't skin up my knuckles swinging a hammer under there.

The only thing I thought of changing (but didn't) was maybe replacing the pins with a grade-8 bolt and nylon insert locknut. A 6mm bolt 40mm long should do the trick and be a perfect fit. The nylon insert locknut would keep it from loosening up. If doing that, forget the snap ring because it just wouldn't be needed. On a subsequent fan change, undoing the bolt and nut would probably be much simpler and easier to get to than having to drive out the pins again.
I think the next time I have to replace the fan, I most certainly will go back with a nut and bolt.

Just thinkin' out loud.

------------------------------------------------------------------------------------------------------------------------
Well, no, but I couldn't figure out why other people appeared to have such trouble with changing out the fan. I certainly wouldn't cut the fan to install it.

For people doing it for the first time, I'll point out a few things to watch for:

1. I'll restate again that there are not one, but two roll pins to drive out on the front collar. I haven't yet figured out the "why" of the engineering, but if you drive out the inside one, you might think you're ready to slip the collar off... but you're not. Be sure to drive out the second (outside) pin using something around a 6mm straight punch.
Of course, the rear collar at the fan has no retention scheme whatsoever (even though the 2305 Manual suggests that there is). Just slip it forward and it's off.

2. While you're under there, take a close look at the rubber coupler at the front end that's bolted to the flywheel. It's designed to fail "gently" by the bolt sleeves sliding out, so just take a look as long as you're getting dirty.

3. There's a bearing inside a cup that is inside that rubber couple. If your tractor is low time, the bearing is probably in fine shape. But if you have lots of hours on your tractor, it's not that hard to unbolt the coupler from the flywheel and remove and inspect the bearing for smooth operation. A new one is only $6 (greenfarmparts) so if you doubt the condition of the bearing at all, just slip in a new one.

4. By the way, don't even think of smacking the driveshaft where the spider bearings are to knock it off. There should be no reason to force it all, and if you must, spray some WD40 on both ends of the shaft to loosen it up if it's a little "rusty stuck". A gentle tap is all you should need (if at all). While doing this, do not forget that the shaft assemble ONLY comes as an assembly, so if you knock one of the bearing cup holders out of whack, it won't last long before the bearing is destroyed and you'll need a new shaft assembly (somewhere around $550 or so... I checked).

5. You don't have to remove the gold crossbar just in front of the fan to install it, but you of course have to loosen the two fan shield bolts and slip the shield off (just loosen those bolts because the fan shield attach points are slotted).
The fan's blades are very flexible, so what you do is slip it up from behind the crossbar at an angle, bend the blades at the top back a little to clear the underside of the floorboard until the shaft hole of the fan just slips over the shaft. You'll have to bend the blades at the bottom a little as well where they contact the gold crossbar. That's it, you're on.

6. Naturally, grease the spiders on both ends of the shaft while it's out.

I'd like to make it sound more difficult but I can't. If it takes you more than an hour or so to change out the fan, then you're drinking too much beer during the process. With the beer and chatting with friends and changing out the music CD's, it took me about 3 hours this first time.

I might take 4 hours the next time I do it because I ran out of beer this time way too early.
 

Tractor & Equipment Auctions

2010 MACK MRU613 GARBAGE TRUCK (A51243)
2010 MACK MRU613...
2023 CATERPILLAR 299D3 XE SKID STEER (A51242)
2023 CATERPILLAR...
2012 JOHN DEERE 350G LC EXCAVATOR (A51242)
2012 JOHN DEERE...
2017 GENIE GTH-636 TELESCOPIC FORKLIFT (A51242)
2017 GENIE GTH-636...
2011 International WorkStar 7400 Chassis Truck, VIN # 1HTWGAAR1BJ325796 (A51572)
2011 International...
John Deere 300 Tractor W/Loader (RUNS) (A50774)
John Deere 300...
 
Top