Tiller Tarter Rotary Tiller

   / Tarter Rotary Tiller
  • Thread Starter
#11  
Curious if you went by Southern Tractor in Summit to price a Deere 673 tiller? I think that would be a good match for your tractor as I can pull mine at the higher speeds of your transmission.

If you have the older 5105 make sure you get a 6 tine per rotor tiller because your lowest gear is 1.9mph. Should work okay if your topsoil is thick enough. The red clay beneath your topsoil would require multiple passes to get to depth.

I do plan to go buy Southern Tractor. I have bought several attachments from them already. I was just passing through Columbia and stopped to see what they had and saw a Tarter. I had never heard of Tarter before. My tractor is a 2003 5105.

Thanks for all the comments.
 
   / Tarter Rotary Tiller #12  
Well, I purchased the 60" from Tractor Supply and the folks there couldn't have been nicer. They set it on the trailer for me facing just as I asked so I could just back up and hook up to it once I completed the assembly. It was still in a galvanized shipping crate. When I got home I discovered I couldn't complete the assembly until I got it out of the crate. Lucked out with my neighbor helping sling it with chains off his FEL and set it off in my barn floor. The adding fluids and greasing at the zerk fittings was a useful excercise so you become familiar with where routine service takes place. That said, this cutting the PTO shaft stuff puts me off. So far I was able to avoid doing that by inserting a quick-hitch between my 3-pt hitch and the tiller. Otherwise I'd have had to cut 4"-6" out of the shaft. Even the shaft manufacturer tells you they recommend not making any modifications to their products.

So far I've taken it slow as I'm a little weak myself and am unfamiliar with using a PTO driven item. (I did operate a shredder over 40 years ago but everything was already set up.) Finally managed to get everything hooked up and pulled out of the barn to engage the PTO on my tractor for the very first time since I acquired it. Everything turned beautifully!

Began to ease the throttle up until I reached the mark on the tach indicating 540 rpm for the PTO. No vibration, everything turning smooth!

Then it stopped turning. I look down to the PTO shaft and its pulled away at the rear and is just sitting there. Well, I disengaged it and pulled back into the barn. Its too crowded to tell for sure what happened but my initial inspection suggests the rear connection between the PTO shaft slip clutch and the tiller pulled free and just rested on the safety shroud. No light in the barn and its getting late so I won't know until I can get in there tomorrow. I know it was a royal pain to push the slip clutch up on the spline and feel the bolt engage the groove around the PTO spline but when I did it it wouldn't pull off so I presumed all was well. I found the push button arrangement at the other end difficult but much preferrable and wonder why they don't include it at both ends. Oh well. Hope to get it all undone and then back together so I can actually give the tiller a whirl. Will report back when I do.

Suggestions welcomed.

Clay
 
   / Tarter Rotary Tiller #13  
That said, this cutting the PTO shaft stuff puts me off. So far I was able to avoid doing that by inserting a quick-hitch between my 3-pt hitch and the tiller. Otherwise I'd have had to cut 4"-6" out of the shaft. Even the shaft manufacturer tells you they recommend not making any modifications to their products.

That's simply how PTO shafts work. The manufacturer expects and has no problem with you cutting the shaft, if necessary, to fit your tractor... that is how they are designed.

You would be more put off if you got it home and the PTO shaft they included was too short, so you had to go out and buy another!

Then it stopped turning. I look down to the PTO shaft and its pulled away at the rear and is just sitting there. Well, I disengaged it and pulled back into the barn. Its too crowded to tell for sure what happened but my initial inspection suggests the rear connection between the PTO shaft slip clutch and the tiller pulled free and just rested on the safety shroud. No light in the barn and its getting late so I won't know until I can get in there tomorrow. I know it was a royal pain to push the slip clutch up on the spline and feel the bolt engage the groove around the PTO spline but when I did it it wouldn't pull off so I presumed all was well. I found the push button arrangement at the other end difficult but much preferrable and wonder why they don't include it at both ends. Oh well. Hope to get it all undone and then back together so I can actually give the tiller a whirl. Will report back when I do.

Suggestions welcomed.

Clay

I think it is simply not attached correctly. Most people do not remove the PTO shaft from the implement except to repair/replace it, so the implement end often does not have a "quick attach" feature. Just take your time tomorrow during the light and make sure it's connected properly. On some you need to remove a bolt/pin, put it on, and then put that back in.
 
   / Tarter Rotary Tiller #14  
That's simply how PTO shafts work. The manufacturer expects and has no problem with you cutting the shaft, if necessary, to fit your tractor... that is how they are designed.


Understood. Not only did the tiller come with a manual, it also came with a booklet from the PTO manufacturer. The booklet explains that they don't recommend modification.

You would be more put off if you got it home and the PTO shaft they included was too short, so you had to go out and buy another!

You're right about that but I now can see where it might happen.

I think it is simply not attached correctly. Most people do not remove the PTO shaft from the implement except to repair/replace it, so the implement end often does not have a "quick attach" feature. Just take your time tomorrow during the light and make sure it's connected properly. On some you need to remove a bolt/pin, put it on, and then put that back in.

Yesterday I removed the nut, lock washer and bolt, slipped it on the spline of the tiller and once it slid back real well I inserted the bolt and slowly pulled forward until the bolt found the groove and I inserted it fully. I couldn't pull it off so I put on the lockwasher and nut and began the struggle to get a wrench on each end and tighten it up. This is all cramped inside the PTO schroud. Finally as luck would have it a cover that I didn't know was there popped up on the top which made it easier to put a backup wrench on one side to accomplish this.

I had greased it all up really well too. But I hope all I need to do is remove the bolt again and put it back on and make certain it engages the groove.
 
   / Tarter Rotary Tiller #15  
Update:

I've spent a bunch of energy getting this puppy set up. First: The adapter for the quick-hitch did permit me to install without cutting the PTO shaft but whenever I hit a root or good sized rock it would hop so violently the pin would jump out of the top hook of the quick-hitch. After spending a couple of hours with it I finally pulled back to the barn, disconnected everything and followed the procedure for marking and cutting the PTO shaft step by step. Shortened the shaft 3". But that steel was hard! Ruined my saw blade. Wound up taking me half a day to get this done but 2 hrs of trouble free use once hooked up directly to my 3-pt hitch was simply wonderful. And this puppy is leaving a beautiful tilled soil with just two passes for each row.
 
   / Tarter Rotary Tiller #16  
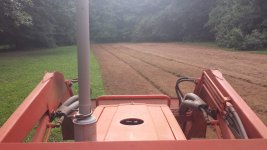
Thought the pic might be nice.
 

Attachments

  • 20150802_192247.jpg
    20150802_192247.jpg
    766.5 KB · Views: 333
   / Tarter Rotary Tiller #17  
I looking as well and won't hesitate when buying the KK ..... I just sold my 60" and will be getting the 72" as soon as I can. My debate right now is getting the RTG-72 or the TG-72.... I thinks that's the numbers.... It's $200 more for the reverse tine .... Anyone know how much of a benifit it is? This will be used on all sorts of soils including hard parked. The regular tiller worked fantastic
 
   / Tarter Rotary Tiller #18  
Update:

I've spent a bunch of energy getting this puppy set up. First: The adapter for the quick-hitch did permit me to install without cutting the PTO shaft but whenever I hit a root or good sized rock it would hop so violently the pin would jump out of the top hook of the quick-hitch. .

Do you have pictures of this hooked up? There is something wrong with your set up if an implement can jump out of the top hook on your quick hitch. I use a quick hitch with my tiller and other implements and have had no problems.
 
   / Tarter Rotary Tiller #19  
Do you have pictures of this hooked up? There is something wrong with your set up if an implement can jump out of the top hook on your quick hitch. I use a quick hitch with my tiller and other implements and have had no problems.

I only have one photo that shows this and I've attached it for your review. I don't need an adapter for anything else and have no trouble with my middle buster, rake, or haul around attachments. The tiller is the first thing I've had with PTO power. I cut the shaft and will use the tiller direct connected to the 3-pt arms now. Very stable this way.
 

Attachments

  • 20150801_122736.jpg
    20150801_122736.jpg
    1,011.2 KB · Views: 278
   / Tarter Rotary Tiller #20  
FWIW, you would need the proper lower bushings on the hitch pins to change them from cat 1 to cat 3 to fit the quick hitch properly. The top hook should fit the lower cross bolt on the top mast without the adaptor you have in place now. This would also allow you to unwind your top link to level the tiller properly.

While it may not matter to you now I can tell you that having a multitude of implements in later years it will. With lots of implements I can change them on a whim from the tractor seat. A properly set up implement and quick hitch means I don't have to be reluctant to change them out. It takes less than a minute to hitch up then raise parking stands and hook up the pto if it applies.

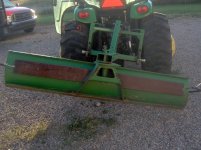
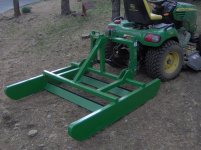
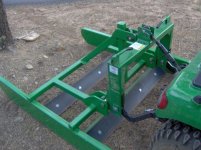
Here are some pics of implements set up for quick hitch. Notice the adaptors for the lower link pins on the 3pt harrow in the 4th picture. Also notice that if the lower bushings are in place and locked in there is no way for any of these implements to become unhooked at the top.
 

Attachments

  • Deere 45 rearb;ade mods 001.jpg
    Deere 45 rearb;ade mods 001.jpg
    358.6 KB · Views: 220
  • Butch W  new lawn work 002.jpg
    Butch W new lawn work 002.jpg
    379.8 KB · Views: 252
  • Butch W  new lawn work 003.jpg
    Butch W new lawn work 003.jpg
    342.1 KB · Views: 183
  • 3pt harrow 8' 006.jpg
    3pt harrow 8' 006.jpg
    575.2 KB · Views: 209
  • landplane 001.jpg
    landplane 001.jpg
    409.3 KB · Views: 216
  • 673 tiller and IMatch 002.jpg
    673 tiller and IMatch 002.jpg
    253.1 KB · Views: 226
  • 673 tiller and IMatch 001.jpg
    673 tiller and IMatch 001.jpg
    210.9 KB · Views: 192
Last edited:
 

Tractor & Equipment Auctions

1979 LUFKIN TRAILER (A50854)
1979 LUFKIN...
Vermeer SC802 (A50322)
2005 Big Tex 10PI 16ft. T/A Utility Trailer (A49461)
2005 Big Tex 10PI...
10 LUG ALUMINUM RIM (A50854)
10 LUG ALUMINUM...
2022 Cat 420 4x4 Backhoe (A49461)
2022 Cat 420 4x4...
(2) 300 GAL WATER TANKS (A50854)
(2) 300 GAL WATER...
 
Top