Adding Tabs to a Snowblower Auger to make it serrated.

   / Adding Tabs to a Snowblower Auger to make it serrated. #11  
I would think that the tabs / teeth would need to extend past the outer edge of the auger or they would bit into the snow, to break it up. I could be wrong though.

You may be right, I had looked at the angle as a method of breaking up the clumps before they reach the impeller/fan. To bite into the snow a simple notch ground into the auger with an angle grinder may be all that is needed. Like I mentioned, this is a thought in progress for me until I actually get some time to do something about it.
 
   / Adding Tabs to a Snowblower Auger to make it serrated. #12  
Agree with Wyobuckaroo - break up the pile with the FEL and the blow the pieces away....
 
   / Adding Tabs to a Snowblower Auger to make it serrated.
  • Thread Starter
#13  
Agree with Wyobuckaroo - break up the pile with the FEL and the blow the pieces away....

That's certainly an option but a slow process. Which is fine if you don't have a lot to move. I'm looking for a better, more efficient way, since I have a lot to move.

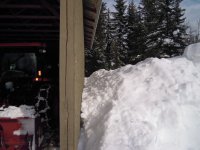
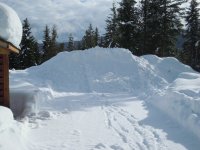
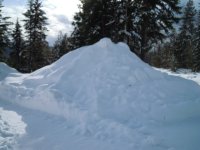
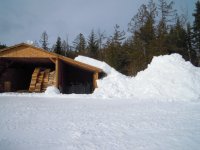
Today I blew a pile from one side of my equipment shelter. The pile was about 2 1/2' to 3' deep and about 10' wide. This is the amount that came off half the roof the last time,which was not very much. This stuff was so hard I could walk on top of it without sinking in. I didn't think the blower would work but it did and quite well. But there are other piles that are much bigger and harder. I tried the method you described and found it to be too time consuming because of the constant need to pick away at the pile, then turn around and blow it, then turn around again to chip it back. That's OK for a small job.

I'm going to go ahead with welding some tabs to the auger and see if that makes a difference. First I need to get some time and then I need to find some steel under all the snow we still have.

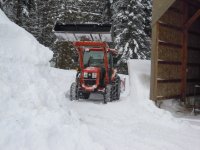
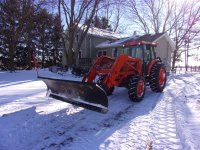
Some pics from today.

DSCN3113.JPGDSCN3115.JPGDSCN3118.JPGDSCN3119.JPG

and some from about a month ago.

DSCN3045.JPGDSCN3082.JPGDSCN3083.JPGDSCN3085.JPG
 
   / Adding Tabs to a Snowblower Auger to make it serrated. #14  
That's certainly an option but a slow process. Which is fine if you don't have a lot to move. I'm looking for a better, more efficient way, since I have a lot to move.

Today I blew a pile from one side of my equipment shelter. The pile was about 2 1/2' to 3' deep and about 10' wide. This is the amount that came off half the roof the last time,which was not very much. This stuff was so hard I could walk on top of it without sinking in. I didn't think the blower would work but it did and quite well. But there are other piles that are much bigger and harder. I tried the method you described and found it to be too time consuming because of the constant need to pick away at the pile, then turn around and blow it, then turn around again to chip it back. That's OK for a small job.

I'm going to go ahead with welding some tabs to the auger and see if that makes a difference. First I need to get some time and then I need to find some steel under all the snow we still have.

Some pics from today.

View attachment 641177View attachment 641178View attachment 641179View attachment 641180

and some from about a month ago.

View attachment 641182View attachment 641183View attachment 641184View attachment 641185
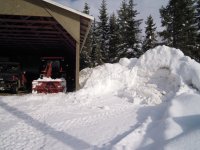
You need a bigger Kubota....

More like this.....
 

Attachments

  • 100_0008.JPG
    100_0008.JPG
    503.1 KB · Views: 182
   / Adding Tabs to a Snowblower Auger to make it serrated.
  • Thread Starter
#15  
You need a bigger Kubota....

More like this.....

Some days, I would have to agree. Oh and if you're offering, I'll take it, lol.
 
   / Adding Tabs to a Snowblower Auger to make it serrated. #16  
Hello Hillbilly,

The more I think about this your steel is thick enough. You could just clamp a short piece angle iron to the auger flight and then
grind a notch in the flight every foot or so and then try cutting up the piles that way and if that works well you could add new notches
every six inches to help the cross augers cut the snow pack up even more.
 
   / Adding Tabs to a Snowblower Auger to make it serrated. #17  
Teeth on the auger will help. The important thing about putting them on it to put them on the side of the flighting toward the outside of the blower. If they are one the side of the flighting toward the center then snow can no longer slide along the auger and that will cause a lot of trouble.

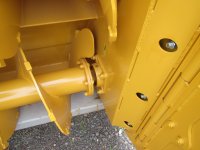
I looked at a fellows old McKee snowblower with a solid auger that are notorious for being bad in wet snow and ice. He had put teeth on the back of the auger extending about 1 1/2 past the original auger edge and said it made a huge difference. The theeth were I think about 1/4 X 1 1/2 strap about about 3 inches long.

The other thing that makes a bigger difference to how well a blower goes into hard snow than teeth is how close the auger is to the ground. On a lot of low grade blowers there is often 3 to 4 inches between the bottom of the auger and the ground. That makes it very hard to push the blower in to hard snow. Good blowers have an inch between the bottom of the auger and the ground. There was one blower that I lowered the auger on and it made a very big difference in how well it worked.

Here is a photo of the teeth on the auger of a Normand heavy duty snowblower.
 

Attachments

  • IMG_0423.JPG
    IMG_0423.JPG
    2.4 MB · Views: 251
   / Adding Tabs to a Snowblower Auger to make it serrated.
  • Thread Starter
#18  
Teeth on the auger will help. The important thing about putting them on it to put them on the side of the flighting toward the outside of the blower. If they are one the side of the flighting toward the center then snow can no longer slide along the auger and that will cause a lot of trouble.

I looked at a fellows old McKee snowblower with a solid auger that are notorious for being bad in wet snow and ice. He had put teeth on the back of the auger extending about 1 1/2 past the original auger edge and said it made a huge difference. The theeth were I think about 1/4 X 1 1/2 strap about about 3 inches long.

The other thing that makes a bigger difference to how well a blower goes into hard snow than teeth is how close the auger is to the ground. On a lot of low grade blowers there is often 3 to 4 inches between the bottom of the auger and the ground. That makes it very hard to push the blower in to hard snow. Good blowers have an inch between the bottom of the auger and the ground. There was one blower that I lowered the auger on and it made a very big difference in how well it worked.

Here is a photo of the teeth on the auger of a Normand heavy duty snowblower.

That's some very helpful information and thanks for that.

My intention is to weld the tabs to the outside (circumferential) edge of the flights, not to the outboard or inboard faces. I appreciate the info about the clearance between the bottom of the auger and the blower housing. That makes a lot of sense to me and I can see that with the auger sitting higher, I would end up trying to force the bottom of the blower housing into the snow, as well as the sides. I'll check my blower to see how much is exposed below the auger. I'm guessing it will be quite a bit. As I recall there is at least 2", maybe 3" behind the auger and the housing. I note the Normand auger looks to be very close to the bottom and the rear of the blower housing.

Not sure I want to get into lowering the auger but will see how the blower performs with just adding the tabs.
'
 
   / Adding Tabs to a Snowblower Auger to make it serrated.
  • Thread Starter
#19  
I checked the Meteor blower and the distance from the auger to the rear of the housing is 2". The distance from the bottom of the auger to the ground is 5". This essentially means that there is 5" x 75" of blower housing that has to be forced in the snow bank because the auger is not in front of that area, cutting the snow. The other thing I noticed is, that on this blower, it would be very easy to lower the auger. It is held in place by a bearing on each end of the auger and that bearing is mounted flush, on the inside of the end plates. Lowering it would simply involve drilling 4 new bearing mounting holes on each side plate. My Farm King blower would not be as simple, since the ends of the auger shaft protrude through the side plates.
 
   / Adding Tabs to a Snowblower Auger to make it serrated. #20  
Teeth on the auger will help. The important thing about putting them on it to put them on the side of the flighting toward the outside of the blower. If they are one the side of the flighting toward the center then snow can no longer slide along the auger and that will cause a lot of trouble.

I looked at a fellows old McKee snowblower with a solid auger that are notorious for being bad in wet snow and ice. He had put teeth on the back of the auger extending about 1 1/2 past the original auger edge and said it made a huge difference. The theeth were I think about 1/4 X 1 1/2 strap about about 3 inches long.

The other thing that makes a bigger difference to how well a blower goes into hard snow than teeth is how close the auger is to the ground. On a lot of low grade blowers there is often 3 to 4 inches between the bottom of the auger and the ground. That makes it very hard to push the blower in to hard snow. Good blowers have an inch between the bottom of the auger and the ground. There was one blower that I lowered the auger on and it made a very big difference in how well it worked.

Here is a photo of the teeth on the auger of a Normand heavy duty snowblower.

Thank you. What I will do to my 80" Lucknow. I'll cut teeth from high carbon plate, mill a slot in them and weld them on the auger.
 

Tractor & Equipment Auctions

Future Excavator Ripper (A47809)
Future Excavator...
(10) 24' Free Standing Panels w/ 11' 10" Gate (A46443)
(10) 24' Free...
2020 VOLVO VNR DAY CAB TRACTOR (A43005)
2020 VOLVO VNR DAY...
2016 W.W.Trailer All Around Aluminum T/A Livestock Trailer (A45336)
2016 W.W.Trailer...
10ft Brillion Packer (A47809)
10ft Brillion...
2020 INTERNATIONAL MV607 BOX TRUCK (A43005)
2020 INTERNATIONAL...
 
Top