1stDeuce
Gold Member
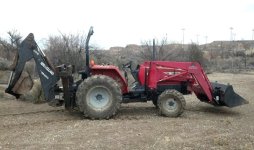
Well, it's done, so I thought I'd post a thread. I wanted a BH for my tractor, and wanted something fairly powerful, since we have a lot of clay where we're building. I ended up finding a Bradco 609 in Florida for a good price, and had it shipped to me for less than I'd seen anything semi-local. It's not perfect, but it's powerful, and it's all there.
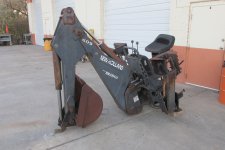
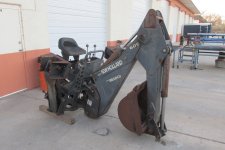
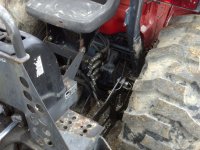
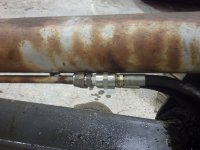
Right away after getting the hydraulics plumbed in on my tractor and hooking them to the BH, I discovered that that cylinder fittings on both stabilizers had rotted off the tube they were welded to, and would spray hydraulic fluid out instead of extending the ram...
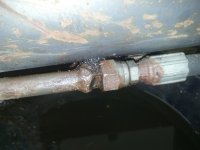
I opted to cut the tubes back and clean them, then use some crimp-on style fittings. Parker calls them Ferulok, but I think the ones I used this time were from another supplier. Same but different... Unfortunately, they only offered them in pipe, and the local shop didn't have a pipe to JIC adapter, so I had to go with pipe on one end of the new hoses instead of my preference to always use to JIC on both ends.
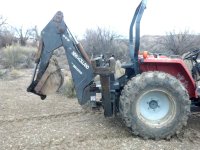
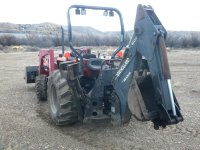
How to mount it?? I contacted Bradco, but they didn't offer a mount kit for my tractor. We thought the one for the previous gen might work, but it was going to be ~$1200 for the system... I surfed around on TBN and looked at some mount styles, and visited the Kubota and LS dealer to look at theirs. Came to the conclusion that a 4pt mount was indeed ideal. Bradco was nice enough to send the instructions for the mount they thought might work, and I used the illustrations of their setup as my inspiration to design my mount in CAD.
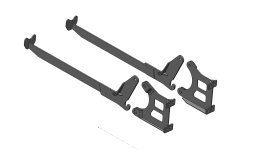
The tractor side is 5/8" plate, welded to 1/2" plate braces that bolt to the loader mount. The backhoe side is 3/8" plate, with 1/2" plate bolt tabs and 1/4" lower stiffeners and double shear tabs. 1.25" Cold Rolled round for the upper and lower pins, with the lowers being welded into the BH mount. The holes on the BH plates were just for show, and because the thing already weighs ~1750lbs...
I had a local place cut the BH and loader bolt plates, and both parts of the 4pt mount on their CNC plasma table. In hindsight, I should have asked for the tractor plates to be cut on the waterjet, as they would have been much cleaner, but were going to do it all on the waterjet for an extra $100, and I was being too cheap... I paid $440 for the plasma parts, and about $70 for the round and plate steel.
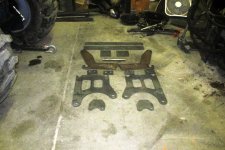
I first built the BH half of the mount, so I could use it to get the tractor plates to fit, and then for fixturing so I could weld the tractor side up... I got the tractor plates to fit the BH mount with some ambitious die grinder work...
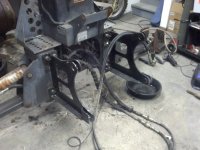

I used the BH to position itself vertically, and backed the tractor around until it was all centered. Then I tack welded the 5/8" plates to the lower ROPS plates. Welded all that up off the tractor...
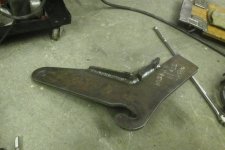
Then I bolted the welded parts back onto the tractor, and tacked the chassis stiffeners in place. I ended up using a bit of 2x3/16" square tube at the front to get it to fit a little better...
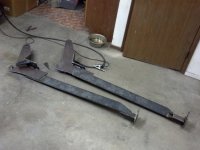
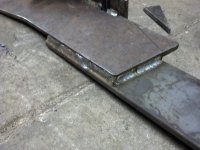
I fully welded every joint, since that will keep water from getting between the plates and causing rust, and stressing things further. It all bolted back up, and fit perfectly. Well, except that to get both upper pins in, you have to pin the right side, then relax the boom a little till the left side lines up... It's not off by more than 1/16", so it'll be OK.


Right away after getting the hydraulics plumbed in on my tractor and hooking them to the BH, I discovered that that cylinder fittings on both stabilizers had rotted off the tube they were welded to, and would spray hydraulic fluid out instead of extending the ram...

I opted to cut the tubes back and clean them, then use some crimp-on style fittings. Parker calls them Ferulok, but I think the ones I used this time were from another supplier. Same but different... Unfortunately, they only offered them in pipe, and the local shop didn't have a pipe to JIC adapter, so I had to go with pipe on one end of the new hoses instead of my preference to always use to JIC on both ends.

How to mount it?? I contacted Bradco, but they didn't offer a mount kit for my tractor. We thought the one for the previous gen might work, but it was going to be ~$1200 for the system... I surfed around on TBN and looked at some mount styles, and visited the Kubota and LS dealer to look at theirs. Came to the conclusion that a 4pt mount was indeed ideal. Bradco was nice enough to send the instructions for the mount they thought might work, and I used the illustrations of their setup as my inspiration to design my mount in CAD.

The tractor side is 5/8" plate, welded to 1/2" plate braces that bolt to the loader mount. The backhoe side is 3/8" plate, with 1/2" plate bolt tabs and 1/4" lower stiffeners and double shear tabs. 1.25" Cold Rolled round for the upper and lower pins, with the lowers being welded into the BH mount. The holes on the BH plates were just for show, and because the thing already weighs ~1750lbs...
I had a local place cut the BH and loader bolt plates, and both parts of the 4pt mount on their CNC plasma table. In hindsight, I should have asked for the tractor plates to be cut on the waterjet, as they would have been much cleaner, but were going to do it all on the waterjet for an extra $100, and I was being too cheap... I paid $440 for the plasma parts, and about $70 for the round and plate steel.

I first built the BH half of the mount, so I could use it to get the tractor plates to fit, and then for fixturing so I could weld the tractor side up... I got the tractor plates to fit the BH mount with some ambitious die grinder work...


I used the BH to position itself vertically, and backed the tractor around until it was all centered. Then I tack welded the 5/8" plates to the lower ROPS plates. Welded all that up off the tractor...

Then I bolted the welded parts back onto the tractor, and tacked the chassis stiffeners in place. I ended up using a bit of 2x3/16" square tube at the front to get it to fit a little better...


I fully welded every joint, since that will keep water from getting between the plates and causing rust, and stressing things further. It all bolted back up, and fit perfectly. Well, except that to get both upper pins in, you have to pin the right side, then relax the boom a little till the left side lines up... It's not off by more than 1/16", so it'll be OK.
