Al B's House rework

   / Al B's House rework #131  
Al,

I'm glad you had a good experience with them. Quick question if their ad said the windows were $187 each. By the time they were done what was the true cost per window? $200...$225...$250....

I have 6) 30 year old average size Malta windows that I need to replace.
 
   / Al B's House rework
  • Thread Starter
#132  
I may have my numbers a little shaky here, so bear with me if I am off by a smidge.

The $189 window was without tax, ended up being $205 each.

I upgraded to the better quality window, which I think was $260 a window with tax. That was Argon filled better grade of window, I think it was thicker glass but I am not positive at this moment, it also was the lifetime warrantied one.

Then there was an additonal $50 a peice I think to trim out the windows in Aluminum.

Then it was an additional $150 each (I think) to do two "shadow boxes" under my two front bedroom windows in Aluminum and soffit materials.

Total bill for the 12 windows with all the trim done was right at $4K.

I think I had to have a minimum of 8 to make it worth them coming out to Clarksville from Nashville, about an hour drive.

I chose to do the basement windows myself. I put in Pella's from Lowes I bought for $72 each with coupon and a bit of lumber. Not half the window that the WW ones are, but all I need down there in my opinion.

If they would have done the basement windows, I think it was an extra $50 each to remove the metal frames.

We did not go with the "grates" in the windows, wanted clear view, but I think that was an extra $30 each or so.

I did not feel at all like they were "pulling" anything on me, I bet you can point to the windows you want changed, and they will get changed at that price, but like everything else I do, I wanted more then the "base" I wanted the loaded edition :)

Here is the picture from a couple pages ago,

http://www.tractorbynet.com/forums/...99d1175826792-al-bs-house-rework-dscn2085.jpg

The shadow box is that thing under the window too the left.
 
   / Al B's House rework #133  
That's not a bad number...I'm looking for low E Glass with the argon center as well. It gets a little colder here in New Hampshire than in your corner of the world. As a matter of fact it's snowing right now. I haven't looked back at the whole post yet but do you have a picture of your cellar windows with the new Pella's in? I am going to do mine myself and am looking for ideas on how to mount them in place. I have the 2 pane cheesy steel framed windows.
 
   / Al B's House rework
  • Thread Starter
#134  
http://www.tractorbynet.com/forums/projects/95654-al-bs-house-rework-8.html
Post # 73 pictures # 2054, 2055, 2057

2 X 8 PT trimmed to about 7" I think on edge, Tapcon'd into the well, Then WW 2 X 4 trimmed to about 2 x 2 to fill the gap.

Roofing nails holding the windows in.

Caulk or construction adhesive everywhere. Still need to insulate the gaps and trim out the interior and paint.

Think I will have the sub from Window World come back and do my metal (yep, I think highly of his work) he will do the other windows, the doors, and the soffits and eaves. I just need to put in another door, and change the front if that is how we are going.

I think the Low E and Argon puts you at about $260 each. The danger for me is I keep looking at "base" prices on windows etc. but when you compare apples to apples the Window world deal was great IMO.

You have snow? That is why I live down south :)
 
   / Al B's House rework #135  
Well I have been reading this thread from page one for the past hour and a half while at work and finally bumped into your pictures of the basement windows. Mine are the small hopper type and I have a couple of ideas on how o get replacements put in. You guys have done one heck of a job so far and wish you the best of luck with this project. My house is just about to turn 30 and I have to start on my roofs, as well as putting up vinyl siding. The roofs will happen this year for sure but I will do the siding next year as well as change out a sliding glass door.
 
   / Al B's House rework
  • Thread Starter
#136  
Thanks for the compliment Ruglad, my buddy Kevin came over and summed it up pretty well yesterday I think.

From my perspective in the middle of the thing, it looks like we are staying stationary, from his perspective, not seeing it for a while, then coming in, it is HOLY COW, look at all you guys have done.

Seems like everything I do, I second guess, and think about too much, then again, when I just press forward, I seem to find an easier way immedieatly upon completion. :confused:

We hit a couple good licks at it yesterday though, never as much as I would like to get done, but none the less, progress gets made.

Had a bunch of freinds over lending a hand, which makes it go. If nothing else, it is just always nicer having someone to hold the other end while putting in the tub :D

My bedroom is now painted, the ceiling fan needs to be bought, and the floors done, and that should be it for this room.

Dean's room is now painted, he bought his ceiling fan so it may get hung today, then his room will be complete short of floors.

Christina's room got the ceiling painted and the walls all primed, the ceiling fan got hung, but got wired incorrectly. Hopefully get that straight today.

Got backer boards screwed in behind the ceiling boxes on the 3 bedrooms and the kitchen and dining room. Took light fixtures out of the kitchen and dining room.

Started framing for the kitchen door entry to the outside.

Georg got the big concrete mixer going.

Lil had a dead battery, that is a concern as that was the original problem it had gone into the shop for when the guy traded it in.

We removed the studs, to put the tub in place. Thought I could move two and pivot it in,,,, yeah right............. So, 6 studs later...........:D

Got the hole cut for the drain area under the tub.

Trying to understand the order for putting in the water parts for the tub. They are made to go in first, be hard mounted, then have the tub slid over them, or the wall built on top of them. Well, I cannot do that. Got to spend some more time studying on that one.... I did find it humourous that the instructions said it would take 85 minutes to install. Heck, I looked at the instructions and scratched my head for 85 minutes and I just dont think that was what they had in mind :confused:

MikeB44 is coming up today, so we will be doing ceiling fans and electrical I think.

I think I will keep looking at shower installations for a bit, before I cut and doo too much more work along those lines. I really want to get this one right the first time, pulling that shower in and out is no fun and all I can think about is Lucky #7 would be the NEXT one.... I want to make it with Lucky #6 ;)

I put in another condensate pump. The one that was in the house I broke when servicing it...........:eek: The second one a Wayne, bought new from Lowes, the float would stick when the water went in slowly (like from my dehumidifier) and would not turn on till you shook it.....:mad: #3 another flotec, seems to be working right now... It is stuff like this that just kills me. I bought new, high quality stuff, and still had to jack with it, two trips too the store, 15 minutes on the phone with tech services (that told me I needed to clean the pump, yes, the brand new pump I just took out of the box.....) I cannot seem to just buy the piece, and put it in and be done. But probably more what it is, is that I do not notice it when it all goes smooth, becuase that is what I expect to happen.

Basement is still leaking water in from outside at the joint. Probably going to end up digging. :eek: But at least I got a hoe that will help me out :D
 

Attachments

  • DSCN2104.JPG
    DSCN2104.JPG
    393.7 KB · Views: 220
  • DSCN2105.JPG
    DSCN2105.JPG
    346.9 KB · Views: 204
  • DSCN2106.JPG
    DSCN2106.JPG
    394.5 KB · Views: 203
  • DSCN2107.JPG
    DSCN2107.JPG
    365.9 KB · Views: 195
  • DSCN2108.JPG
    DSCN2108.JPG
    340.2 KB · Views: 225
   / Al B's House rework
  • Thread Starter
#137  
Some more pics, not sure how it will come out, but if you can see the dehumidifier, they kind of say it all when percent of humidity says

HI

It was pouring rain and the door was open, but a good test of the condensate pump...
 

Attachments

  • DSCN2109.JPG
    DSCN2109.JPG
    357.3 KB · Views: 218
  • DSCN2110.JPG
    DSCN2110.JPG
    390.4 KB · Views: 198
  • DSCN2111.JPG
    DSCN2111.JPG
    373.1 KB · Views: 187
  • DSCN2115.JPG
    DSCN2115.JPG
    387.5 KB · Views: 186
  • DSCN2116.JPG
    DSCN2116.JPG
    372.5 KB · Views: 198
   / Al B's House rework #138  
Alan, you bring back such memories of work we did both in our own home, and my property trailer/hunting lodge. Here's 3 before and after shots of the same trailer that came with the property.

PICT2557.jpg


My wife at work
PICT2563.jpg


A year later, we're not completely finished but it's looking better
IMG_1666.jpg


I fully well recognize what an extensive effort it is that you have undertaken but the rewards upon completion make all the work worth while. Keep up your spirits, and the good work bud!
 
   / Al B's House rework #139  
Keep up the good work. I have a new project to start this summer. After a 2nd year of 8"+ of rain in one day I'm going to have to jackhammer a hole in my cellar floor and install a sump pump. Last year we had 12" of rain in a 24 hour period and I came home to 6" of water on my cellar floor. Yesterday It was only 2" but enuf is enuf. Thankfully I remembered last years episode and purchased a small low flow pump when the weathermen screamed nor'easter.
 
   / Al B's House rework
  • Thread Starter
#140  
That looks sweet GCP, I hope mine can come out as nicely. Seems a long way off at present :)

So Sunday MikeB44 from here on TBN and his dad came up to give me a hand getting some stuff done on the house.

Folks like that make this such a nice place, and make this project work.

They were the Fan hanging crew I can tell you.

Course I must admit, I layed out a bit not feeling too peppy Sunday morning, and ran a bit late :( but I don't think they had to wait too long:)

So they started by rewiring and straightening out the fan that the hired help had installed....... it was the last thing I checked Sat evening, and it was wrong :( but mike got it wired correctly lickety split and going just fine.

We then noticed that the brace under the fan in Dean's room was holding the box down and crooked, so on closer inspection, realized there was problems with the blocking the hired help had put in :( So I got to drag my fat butt up into the attic and rework some ceiling fan braces. (NOT FUN) but needed to be done, on closer inspection of the others, I was sure not happy, but there was so much goofy stuff (bent nails, bent half installed screw's broken screws) in there that I felt they were "secure enough" and that I would do more damage fixing it, then it was worth.

So Mike and his dad smoothly moved through the fans as I corrected errors from the previous day, or worked other issues, I stared at my tub for a while and decided how to make my water valves work, I need to add some nailing studs in as well so that I have good places to attach too.

They did the fan in Christina's room, then moved to Dean's room, then to my room as I fixed the bracing in Dean's room, then back to Dean's room and finished in the kitchen. Man those guys knocked a big dent in the project and lent me a huge hand.

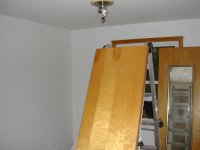
I worked on putting a box in the middle of the living room, and got the box in place, and braced. Had to cut through the drywall of the ceiling and realized why I was not finding the wires for the in the ceiling heat. I guess what they do is put down one layer of 1/2" drywall, then put in the heating wires, then put another layer of 1/2" drywall over that. Makes cutting that drywall with embedded wires in it fun.

Tried to sneak another wire down through an existing hole with wire through the cap plate on the stud's,,,, think that worked?????????? Borrowed my buddy Mark's right angle drill so I can drill to fish another wire in to power my new ceiling fan.

Seems like I did not accomplish much, but hit a couple small licks at it.

I have a question / problem for you knowledgable folks there.

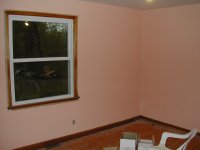
I am adding in an exterior door in the kitchen, I figured I would leave the sill plate in place and go over top of it. There will be additional Hardwood flooring laid in the kitchen which will bring floor level about even (1/4" or so) with the sill plate, and I will be building the steps outside, so can make them any height I desire. Am I messing up by not removing that sill plate?

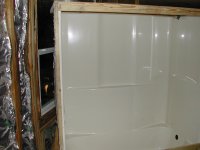
I have a picture in my mind finally of how to install the shower control that I like. Everything I read shows the shower control all mounted then the shower sliding into place over top of it, but the way my shower must come in, and how far the nose of the valve sticks forward will not allow that to happen.

What I am going to do is assemble it all on a board, or probably a grid of 2X4's and then pivot it into place from behind in the closet, after I have the tub in place.

I will not have tested all my connections, but it should be easy enough to take apart if need be and rework installed this way.

My toilet tank decided to leak now at the tank to bowl junction..... darn, snugged the bolts a tad more, and everything seemed ok, but need to check agian tonight.

Hanna got the bath walls painted, so now I need to hang the bath light.

Need to decide on the trim over the trim tiles, if we do anything at all. Probably a little quarter round of oak or somethign.

The project keeps going, albeit much slower then I would like, but folks like Mikeb44 and his dad lending a hand sure make it go a lot smoother.

Thanks Mike.
 

Tractor & Equipment Auctions

HYUNDAI 30D-9 STRAIGHT MAST FORKLIFT (A51246)
HYUNDAI 30D-9...
378661 (A51573)
378661 (A51573)
2015 DODGE RAM 1500 CREW CAB TRUCK (A51406)
2015 DODGE RAM...
NEW 78'' Wolverine Skid Steer Land Leveler (A53002)
NEW 78'' Wolverine...
2011 Ford F-550 Iowa 1015 3,200LB Crane Mechanics Truck (A51692)
2011 Ford F-550...
2024 Kubota RTV-X (A51573)
2024 Kubota RTV-X...
 
Top