Building a flail mower

   / Building a flail mower #1  

Renze

Super Member
Joined
Oct 24, 2003
Messages
6,252
Location
the Steernbos (Holland)
Tractor
Zetor 3011, Zetor 5718
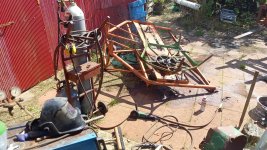
It was 8 years ago that i bought a municipal heavy duty flail mower, from a guy who mounted it on his wheeled 13 ton excavator but took it off again when it turned out to be so heavy that it kept pulling him towards the ditch. He bought a much lighter model on his excavator, so i got the mowing unit for 250 euro.

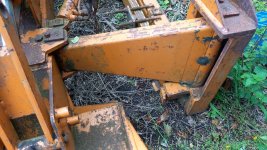
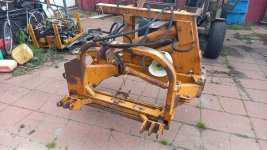
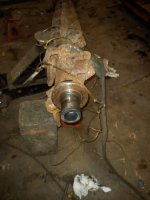
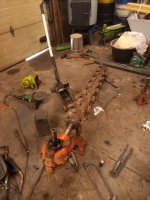
Several projects later, 5 weeks ago my friend saw a flail mower headstock on Marketplace, which i bought for 350 euro. It had all the parts i needed: Side swing, lift, and a jackshaft with 280mm 4x SPB belt pulley.

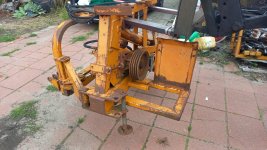
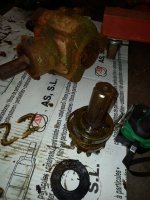
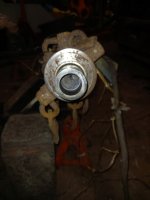
Last Wednesday i picked up a Holaras silage spreader for 250 euro, which has heavy duty gearboxes with 1.69 reduction. Off course these can also speed up 1.69 and together with a 125mm pulley on the gearbox speeding up another 2.2 will give me 2000rpm on the shaft.

I dismantled the silage spreader right away, cut out a few lengths of rectangular tubing for future projects, and loaded it back up for scrapping. Even though i'll get 25 euro less for it because its summer holiday (no demand from the industry) i wont load it up another time.

So i'm 850 euro in, will get some scrap money back, have a center gearbox to sell, and have a spare gearbox.

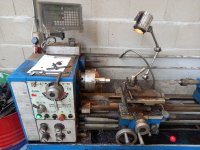
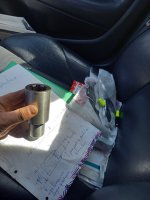
My neighbour is a machinist and has a lathe at home, he will lathe some bushings and pins, i must have some scrap laying around to make some hinge ears, so then i need some rolled bronze bushings and a taperlock 4x SPB 125mm pulley.

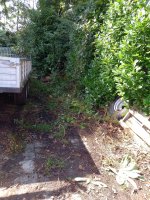
Later on i want to extend the swing arms, 60cm (two feet) of offset is fine to mow around street signs on the verge, but not enough to stick it underneath the barbed wire into the ditch along the field..

I have a three week holiday so i hope to get something done. Oh and my tractor will need an extra hydraulic valve to operate both side swing and tilt... Anyways, i can test without it.. tidying up is for later.
 

Attachments

  • IMG-20230809-WA0004.jpeg
    IMG-20230809-WA0004.jpeg
    2.5 MB · Views: 269
  • IMG-20230730-WA0007.jpeg
    IMG-20230730-WA0007.jpeg
    2.1 MB · Views: 264
  • IMG-20230729-WA0004.jpeg
    IMG-20230729-WA0004.jpeg
    2.1 MB · Views: 253
  • IMG-20230729-WA0002.jpeg
    IMG-20230729-WA0002.jpeg
    1.9 MB · Views: 299
   / Building a flail mower #2  
Thanks for sharing. This will be an interesting project.
 
   / Building a flail mower
  • Thread Starter
#3  
Picked it out of the nettles, put it in the shop and put the least noisy angle gearbox next to it. Before sunday i want to know the splines of the rotor, whether i can slide the 6 spline PTO shaft right in, or that i will have to make an adapter from 6 spline farm shaft to single key industrial...

I opened the noisy angle gearbox for an autopsy, and found that someone put sealed bearings in an oil bath angle gearbox.... gears were fine, so i suspect the bearings are bad. I counted teeth (22 as you can see written in stinky old gear oil on the cardboard) 12 on 22 which means 1.83 gear ratio. With a 2 to 1 pulley ratio i will get 1976 rpm at 540 PTO which my tractor does at 2000 engine rpm. 2000rpm was the goal.

Its allmost 5 o clock here, which means beer time...
 

Attachments

  • 20230812_161110.jpg
    20230812_161110.jpg
    4.3 MB · Views: 233
  • 20230812_133324.jpg
    20230812_133324.jpg
    1.7 MB · Views: 227
  • 20230812_165155.jpg
    20230812_165155.jpg
    1.8 MB · Views: 230
Last edited:
   / Building a flail mower #4  
Your helper looks like he wants a beer too! :ROFLMAO:
 
   / Building a flail mower
  • Thread Starter
#6  
So... after grinding the weld off the spline sleeve to which the previous owner attached the hydraulic motor, welding an M16 nut to it and screwing an M16 rod in it to push the sleeve out, i found that they had it drilled out so there is no splines of any sort to work with.

Also, the bearing inner race rotated on the shaft stub, probably because it shrunk when they drilled the core out.

So i'm going to order a 6 spline PTO sleeve, have my neighbour lathe it out a little for centering, then weld a 35mm shaft to it. Once cooled, my neighbour can lathe the 35mm shaft down to true alignment at 34.1mm shrink fit. Then i can heat the shaft stub, throw the 6 spline sleeve with 34.1mm centering stub in the workshop freezer (with the BBQ meat) tap it in the flail shaft bore, and when its all the same temperature again, hopefully my bearing fit is restored... Then i weld once more around it for good measure (it cant distort much from welding when its shrink fit) and ive killed two birds with one stone...
 

Attachments

  • 20230812_204936.jpg
    20230812_204936.jpg
    1.2 MB · Views: 173
  • 20230812_204941.jpg
    20230812_204941.jpg
    979.4 KB · Views: 177
   / Building a flail mower
  • Thread Starter
#7  
Because of town fair, my shop neighbour (who lives in town) didnt pick up his phone so i had to get my lathe work done elsewhere.

When i picked up an arm full of bearings and seals, i asked the young self employed farm equipment repairman if i could rent his lathe. He said 30 euro an hour. I agreed. But then he asked: "Can you REALLY lathe ? Cause ive had them who thought they could, and they allmost broke my lathe"
I said sure, with an unfamiliar lathe you just have to turn some air to see what it does before yanking the auto feed in gear. He smiled which meant we were cool šŸ˜…šŸ‘Œ

Anyways, i lathed the press fit into a rattle fit so i had to find another mop of steel before i could press in one end in the recess i lathed into the 6 splined sleeve, then welded it, then lathed the pressfit to go into the rotor shaft at home. And i lathed down the sleeve half a millimeter to prevent problems when i ever have to change the bearings and the sleeve is painted or rusty.

The press fit will hopefully restore the bearing inner diameter because the previous bearing spun loose on the shaft. It was next to nothing so a hair should do the trick.

Tonight i'll go to the fair where in cafe "Marketview" (half of the villages over here have a pub or cafe called Marketview that you'd allmost think its a franchise) two of my neighbours will play rock and roll on guitar and accordeon in the band "Shot through the crappers window"
 

Attachments

  • 20230816_152624.jpg
    20230816_152624.jpg
    1.8 MB · Views: 190
  • 20230816_153014.jpg
    20230816_153014.jpg
    1.6 MB · Views: 179
  • 20230816_165915.jpg
    20230816_165915.jpg
    1.4 MB · Views: 180
   / Building a flail mower #8  
Subbed to see the progress of this nice build!
 
   / Building a flail mower
  • Thread Starter
#9  
Subbed to see the progress of this nice build!
Not much progress. Last week i put a new garden gate in my friend and his neighbours garden wall, but in the 60s they put the foundation less than a foot deep and 8 inches wide. Now we cut the 1960s door opening of 3 feet to 4 feet, the T part of the wall isnt stabile enough and shakes, so early this week i welded two 4" cross tubes to be mounted between both sheds with provisions to bolt wood to so next year they can build a platform to mount some more solar panels on top, while the tubes are bolted with chemical anchor bolts to the wall.

Today i mounted the rotor back with new bearings and slid the gearbox onto it to decide the material i need to make the frame hinges on the center of the gearbox pulley...

20230902_114945.jpg
 
   / Building a flail mower
  • Thread Starter
#10  
The only progress so far: My neighbour lathed some hinges and pins, and i welded the head plates to it. June 6th 2022 i broke my skull and incurred a brain injury, which is VERY slow to heal and i barely manage to spend half days at work. It has its constant ups and downs.

But rest assured, i am like Bitterdock: You can knock me down, you can poison me, but in time, i will always crop up again šŸ˜‚šŸ˜‚

20230930_180417.jpg
 
   / Building a flail mower
  • Thread Starter
#11  
Last Wednesday (my "resting day" because of my head injury) i put the headstock in the shop, so i can look at it when im drinking a beer in the shop when i cant sleep at night
20231005_163336.jpg
 
   / Building a flail mower
  • Thread Starter
#12  
Got a little progress last saturday. My coworker milled the radius in the 2 by 4 tubes so i didnt have to do it with an angle grinder, creating large gaps that need to be welded and distort uneven.

This still needs some gusseting, and once those welds are cold i will weld the bushings in the tubes at the exact location. It doesnt make sense to be precise when theres lots of welding to be done that distorts my fit.
20231104_161153.jpg
20231104_115515.jpg
 
   / Building a flail mower
  • Thread Starter
#14  
Another saturday of slow progress: after i welded the arms, i welded the bushes on their ends. Whatever the arms would warp during welding wont effect the bushing alignment when i weld them last.

Pins installed, the trolley crane is pure joy, even when its only two directional because this old chicken barn doesnt have more headroom to make it three directional
IMG-20231111-WA0008.jpeg

IMG-20231111-WA0020.jpeg

IMG-20231111-WA0014.jpeg
 
   / Building a flail mower
  • Thread Starter
#15  
The drawback of long drawn out jobs is that you forget the plan:
2 months ago i figured the rearmost arm should be welded against the backside of the existing vertical C channel reinforcement so the gearbox will line up to the pulley.
2 weeks ago i started fabricating, saw that the flail housing was too short to weld both tubes to its side so i moved them back so both would fit.

When putting the gearbox on the 6 splined sleeve i noticed that my input shaft wouldnt line up to the pulley on the headstock. After a week of making myself feel like doing so i cut up my work to move both arms an inch forward.

Last saturday i welded it back in the right position, tomorrow i will offset the other arm.

20231118_154910.jpg
20231123_212543.jpg
 
   / Building a flail mower
  • Thread Starter
#17  
Ya, I do the same the same thing. I have parts and forget where they are!
I am an engineer, others work by my plans. And sometimes they think theres an easier way and deviate from the plan, to discover later on that things dont work out in the end. I shared my fault in the WhatsApp group from work, admitting that even an engineer should stick to the plan when hes executing one šŸ˜…šŸ™ƒ

Theres no better way to illustrate that a drawn out execution phase of a plan often doesnt mix well with the planning phase, resulting in oversights šŸ˜³šŸ˜…
 
Last edited:
   / Building a flail mower
  • Thread Starter
#18  
....so i cut the rearmost arm off to move it 1 1/4 inch forward, and chamfered the forward arm because it was already on the front edge of the mower body... This time the shaft lines up nicely.
20231125_120624.jpg
20231125_152221.jpg
20231125_163511.jpg
 
   / Building a flail mower
  • Thread Starter
#19  
My colleague at work milled a hole in the gearbox mounting bracket. Or milled it clean after i torched the center out.

Then i had to torch another hole in the mounting plate so i could undo the bearing clamp in the future.
IMG-20231209-WA0001.jpeg
IMG-20231209-WA0007.jpeg
 
   / Building a flail mower
  • Thread Starter
#20  
Because i use a smaller diameter pulley, the belts are going to get too close for comfort, to the bolt heads of the guard bracket. I was thinking of machining down a drill shaft so i could drive it through the M8 hole, or lathing an adapter with thin shaft which clamps the drill with a bolt.

Eventually i just beat it out of the way with a sledge, countersunk the holes, mounted it back the other way around and beat it back straight šŸ˜„šŸ‘Œ


IMG-20231209-WA0009.jpeg
IMG-20231209-WA0011.jpeg
IMG-20231209-WA0013.jpeg
 

Tractor & Equipment Auctions

Mini Jack Daniels Truck (A55853)
Mini Jack Daniels...
John Deere 6110M (A60462)
John Deere 6110M...
20 UTILITY TRAILER (A55745)
20 UTILITY TRAILER...
2014 CATERPILLAR 627K SCRAPER (A60429)
2014 CATERPILLAR...
2016 Ram 4500 Chassis Ambulance (A59230)
2016 Ram 4500...
Bobcat 863 Compact Wheel Loader Skid Steer (A59228)
Bobcat 863 Compact...
 
Top