Building a Shop / Weld Table

   / Building a Shop / Weld Table #111  
I use these for pins
5/8 in. Easy Grip Hitch Pin

Personally I wouldn't use anything lighter. I have receivers all over, hitch pin holes always within 2" of the OUTER end - I doubt you'll enjoy reaching that far under your table to pin/un-pin (especially as you get older) - Main reason for the heavier pins - you never know when you're gonna want to BASH on something that's in the receiver - one example: a simple hitch ball in a receiver can double as a quickie "dimpler" sometimes - a piece of railroad rail welded onto a piece of heavy wall 2" tube can be a makeshift anvil, etc...

For "un-sloppers" I stay with 5/8 nuts - be aware that this method can allow metal shavings into the threads on the INSIDE of the welded nut, and too many in/outs can take out the threads -

two ways I get around this -
One, before I insert a different "tool" in the ones with welded nuts, I use the air hose and blow out that area, or

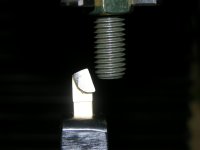
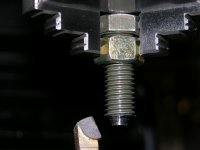
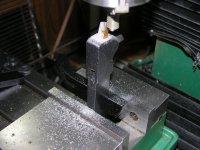
Two, I'll sometimes make my own "dog point set screw" out of a grade 5 short bolt -
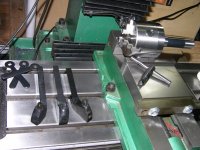
DSCN1901.JPG DSCN1903.JPG DSCN1904.JPG DSCN1905.JPG DSCN1906.JPG DSCN1908.JPG DSCN1911.JPG

I'd have done that on my lathe, but it doesn't exist (yet) - so I found that little 3" chuck with an R8 shank, works for small/simple stuff - the other tooling shown is just a basic set of brazed carbide lathe tools and a vise...

If you're not familiar with "dog-point" screws, they're normally used for set screws and usually only available in allen head - purpose is to NOT have threads at the end, so they don't get "smushed" and ruin the female threads when backed out...

If you mount your electrical box where you show it, it'll probably interfere with pin insertion/removal - I'd consider moving it down (up in your pic) the leg 2-3", and you may later wanna add another box for more/different plugs - if that happens, search for "chase nipple", they're available in all knockout sizes. With one of those, 2 conduit nuts and 2 plastic "caps", you can safely run wiring thru to the second box - TWO of those at the outside corners of a box is sturdy enough NOT to need the second box attached to the table leg... I wouldn't weld the box, a couple of #10 metal screws should do.

Lookin' real good so far, you're gonna really enjoy that table... Steve
 
   / Building a Shop / Weld Table #113  
I never realized the additional value of 'dog point' screws. Thought they were made like that for the extra "bite". I'll take mine out and cut a point on each.

Thanks for the insight, Steve!
 
   / Building a Shop / Weld Table
  • Thread Starter
#114  
I use these for pins
5/8 in. Easy Grip Hitch Pin

Personally I wouldn't use anything lighter. I have receivers all over, hitch pin holes always within 2" of the OUTER end - I doubt you'll enjoy reaching that far under your table to pin/un-pin (especially as you get older) - Main reason for the heavier pins - you never know when you're gonna want to BASH on something that's in the receiver - one example: a simple hitch ball in a receiver can double as a quickie "dimpler" sometimes - a piece of railroad rail welded onto a piece of heavy wall 2" tube can be a makeshift anvil, etc...

For "un-sloppers" I stay with 5/8 nuts - be aware that this method can allow metal shavings into the threads on the INSIDE of the welded nut, and too many in/outs can take out the threads -

two ways I get around this -
One, before I insert a different "tool" in the ones with welded nuts, I use the air hose and blow out that area, or

Two, I'll sometimes make my own "dog point set screw" out of a grade 5 short bolt -
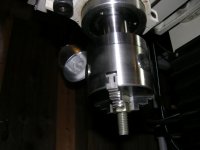
I'd have done that on my lathe, but it doesn't exist (yet) - so I found that little 3" chuck with an R8 shank, works for small/simple stuff - the other tooling shown is just a basic set of brazed carbide lathe tools and a vise...

If you're not familiar with "dog-point" screws, they're normally used for set screws and usually only available in allen head - purpose is to NOT have threads at the end, so they don't get "smushed" and ruin the female threads when backed out...

If you mount your electrical box where you show it, it'll probably interfere with pin insertion/removal - I'd consider moving it down (up in your pic) the leg 2-3", and you may later wanna add another box for more/different plugs - if that happens, search for "chase nipple", they're available in all knockout sizes. With one of those, 2 conduit nuts and 2 plastic "caps", you can safely run wiring thru to the second box - TWO of those at the outside corners of a box is sturdy enough NOT to need the second box attached to the table leg... I wouldn't weld the box, a couple of #10 metal screws should do.

Lookin' real good so far, you're gonna really enjoy that table... Steve
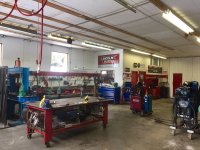
I like your mill. Some day :)

I like the dog point screw idea, the McMaster-Carr price was a bit of a shock. Great tip on cleaning threads.

It took me a minute to figure out what you meant by "that far under the table" - The holes you see in the ends of the receiver tubes will not be used, they were not in the right spot for me to be able to cut the angle at the front of the receiver tube. I will be drilling new ones.

Good call on the positioning of the electrical box I will drop it down to allow easier assess to the side of the hitch. There will be two boxes, one on each end of the bench.

Thanks!
 
   / Building a Shop / Weld Table #115  
Just a thought concerning wiring in that electrical box under your table. I too went to a bit of trouble to neatly tuck one in on the inside leg of mine. I found I NEVER used it and eventually removed it.

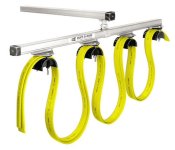
I have a 25 foot festoon system for my air line which covers the area the welding table usually occupies which works well. For electrical I am using an overhead reel at the moment.

IMG_1633.JPG.
Since this pic was taken the air coupler height has been lowered to approximately waist height. I clued in after smacking myself in the face 10 or twelve times.....

I have a 4 wire electrical setup from a closed local Rona Hardware that that I haven't had time to install yet.IMG_2328.JPG
 
Last edited:
   / Building a Shop / Weld Table #116  
I never realized the additional value of 'dog point' screws. Thought they were made like that for the extra "bite". I'll take mine out and cut a point on each.
Thanks for the insight, Steve!
Our Tractor Supply has those for much less per bolt.

Aaron Z
 
   / Building a Shop / Weld Table #117  
Another advantage of "dog point" fasteners is they help self-align the fastener with the threads...helps with automated assembly to reduce cross threading.
 
   / Building a Shop / Weld Table #118  
"Our Tractor Supply has those for much less per bolt."
Aaron, Saks fifth avenue probably has 'em in PLATINUM for less than McMaster Carr(nage) :rolleyes:

(but that's the site I show "Mrs. Bukit" when we're talkin' 'bout shop machine costs) :D:D:laughing::laughing::licking: ...Steve

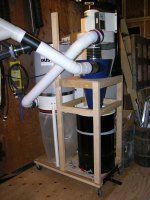
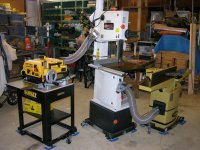
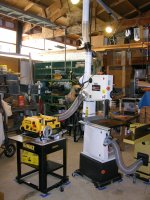
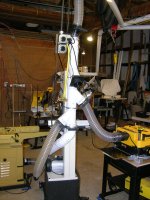
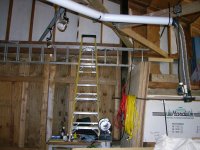
Re: head thumpers - my rule on that is "MY head height, MY rules" - IOW, I have overhead "drops" for air, dust collection, 120 and 240 volt at "strategic" locations - NONE of 'em are lower than 6'4" when not in use (I'm 6'0") UNLESS they're where I won't walk :eek:
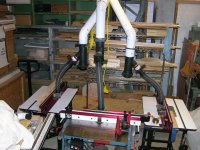
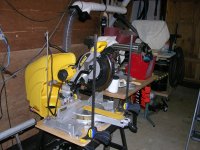
Some older shots of my woodwork area...
 

Attachments

  • DSCN0781.JPG
    DSCN0781.JPG
    1.2 MB · Views: 130
  • DSCN0794.JPG
    DSCN0794.JPG
    1.3 MB · Views: 142
  • DSCN0795.JPG
    DSCN0795.JPG
    1.3 MB · Views: 115
  • DSCN0796.JPG
    DSCN0796.JPG
    1.2 MB · Views: 120
  • DSCN0800.JPG
    DSCN0800.JPG
    1.3 MB · Views: 163
  • DSCN0803.JPG
    DSCN0803.JPG
    1.3 MB · Views: 125
  • DSCN0805.JPG
    DSCN0805.JPG
    1.2 MB · Views: 123
   / Building a Shop / Weld Table
  • Thread Starter
#119  
Bukit Case: I love the router table and dust collection setup!
 
   / Building a Shop / Weld Table #120  
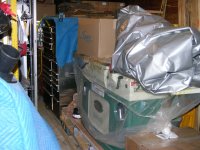
Thanks; I still have a few "minor tweaks" I wanna do, but those will hafta wait til I clear a bit more "inventory" out of that area - those two full units of T1-11 siding are already in one of the containers, still to go are piles of tan oak, oak, beech and cedar that're taking up about 200 square feet of floor space - once that stuff is in containers along with the mill and 3 44" top/bottom tool rollaways, I'll have enough space to set up the 12" helical head jointer
DSCN0820.JPG
and 15" helical head planer (still in its crate after 3 years or so, BEHIND that "aircraft carrier" in the pic), and then EVERY tool in there will have AT LEAST 10' of in AND outfeed, likely more.

All the NON-woodworking tools will end up in one of the containers in my "container weld shop build" thread, with "inventory" going in the two OTHER 40' containers located behind the wood shop.

May never actually GET there, but anticipation's fun TOO :D... Steve

BTW, the main reason for 3 router tables - I can set up one for stiles, one for rails and the cast iron one (3 horse Freud) for raised panels, and make all my cabinet doors without ever having to change setups til I'm done...
 

Tractor & Equipment Auctions

2014 CATERPILLAR 277D SKID STEER LOADER (A51222)
2014 CATERPILLAR...
RoGator 844 sprayer (A50490)
RoGator 844...
2017 Harley-Davidson FLHTP Police Electra Glide Motorcycle (A49461)
2017...
PAIR OF 29 FT PIPE RACKS (A50854)
PAIR OF 29 FT PIPE...
2016 WITZCO RG-35 RGN LOWBOY TRAILER (A50459)
2016 WITZCO RG-35...
71065 (A49346)
71065 (A49346)
 
Top