Building a Shop / Weld Table

   / Building a Shop / Weld Table
  • Thread Starter
#121  
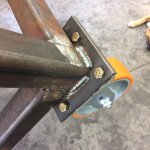
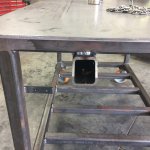
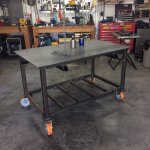
It rolls, and it rolls easy!! My son came over on Saturday and did a lot of welding. My neighbor helped me flip it over and install casters late that afternoon. I've already gotten it dirty, had to work on a couple PTO shafts on Sunday.

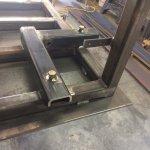
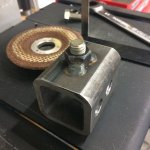
We did a bunch of practice on the 1/2 nuts before we welded them on the receivers. I drilled 9/16 holes in the tube and inserted the bolt from inside the tube, nut on the outside, tightened it while keeping it centered. I covered the exposed threads with nozzle gel. We did 3 very small tacks to start, then we welded. We did not start the weld at the junction of nut and tube, instead started it on the tube about 1/4 - 3/8 away, and walked it up the side of the nut. We welded every other flat. Let it air cool and then used a box end (12pt) to the get bolt out. Since I had it, I ran a thread chaser / cleaner through them. They can out great, the nuts are level, centered on the hole, the bolts thread in easily by hand.

The casters were worth every penny I can roll the table using 2 fingers. I really have to get the floor locks on!

It was a good weekend! It's not done, have a lot of small things to do: Clamp racks, grinder rack, electrical outlets, expanded metal on bottom shelf, mig gun holders, paint, floor locks... The first receiver attachment project - the vise.
IMG_7108.JPG IMG_7118.JPG IMG_7097.JPG IMG_7105.JPG IMG_7107.JPG IMG_7111.JPG
 
   / Building a Shop / Weld Table #122  
Looking good!
 
   / Building a Shop / Weld Table
  • Thread Starter
#123  
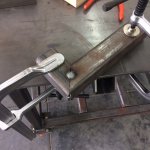
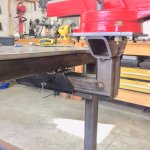
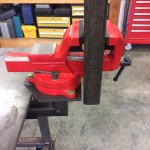
Worked on the vise mount for the receiver tube this last weekend. None of it is "welded" yet, just tacked together to see if I like the height and positioning away from the table. And of course I was supervised by Bella the shop dog...

Anyone see anything that jumps out at them about the design - input always welcome.

This weekend I will adjust it if needed and weld it up. Next is the expanded metal bottom shelf and electrical outlets.

IMG_7167.JPG IMG_7160.JPG IMG_7161.JPG IMG_7165.jpg IMG_7168.JPG IMG_7176.JPG
 
   / Building a Shop / Weld Table #124  
- - - STOP - - -

If you haven't already welded your vise insert yet, I would STRONGLY recommend one of three things -
Either vee out everywhere the tacks are NOT before welding it up, or

Cut those tacks out, and either

fit the pieces back up, but space them apart (washers work good, keep the weld lines parallel but with a gap), or

Bevel at least 2/3 of the material thickness on all edges... (my preferred method)

THEN re-tack and weld it up - (you can pry the washers out AFTER tacking and BEFORE weld, if you used 'em)

Reason for this - it's a VISE. Unless you're only EVER gonna use it to work on jewelry or watch repair, sooner or later you're gonna want to clamp something HARD and grab a big hammer (or cheater bar) - when that happens, it would be nice if your welds had good penetration...

If you were already gonna do something like the above, then don't bother reading this :D ...Steve
 
   / Building a Shop / Weld Table
  • Thread Starter
#125  
- - - STOP - - -

Snip

Bevel at least 2/3 of the material thickness on all edges... (my preferred method)

If you were already gonna do something like the above, then don't bother reading this :D ...Steve

I almost missed this, you were to subtle :laughing:

I was not going to do that, but it makes sense... I will cut it apart and bevel the edges, re-tack and then weld. I might get my son to weld it for me, he is a much better welder, I am still a newby. Thanks for the advice!

I plan on making a few knives, but no watch repair :laughing:
 
   / Building a Shop / Weld Table #126  
Good plan - I woulda been more brazen with the warning, but that's the biggest text size they offer :laughing:

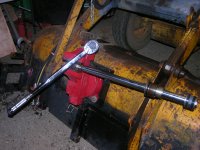
Example of building things stronger than you "think" you need - this DSCN3280.JPG

is my 6" vise - 1/4"wall receiver tube welded thru the 1/2" thick flat bar that's welded across both ends of a piece of 10" heavy channel with the 6" vise bolted to the channel - whole thing weighs just under 100 lbs; that small chain above the vise is hooked to a bar above so I can get the vise into/out of its receiver on the bucket.

The hydraulic cylinder rod clamped in the vise needs its piston bolt (far right in the pic) torqued to 300 foot pounds (the torque wrench in the pic is 32" long, and my shoulder STILL hurts from pulling on it til it clicked :rolleyes:)

The NEXT cylinder I need to do requires that bolt (but bigger) torqued to 1000-1200 foot pounds, and will involve a 6' cheater bar on a 1" drive breaker bar (didn't wanna spend over $1000 for a torque wrench I'd use ONCE, and even RENTING one cost as much as the 3/4" drive wrench in the pic) -

Point is, I'm pretty sure the vise/mount won't go anywhere - that can really be unpleasant with that kind of forces at work... Steve
 
   / Building a Shop / Weld Table #127  
Looking at what these guys used to break their piston nut free, I'm thinking you might have gotten off easy...

 
Last edited:
   / Building a Shop / Weld Table #128  
Actually, those JD cylinders look a LOT easier to get the glands off than Case - I watched that whole thing thinking "Logger Wade" needed to get a 1" impact, then AFTER they "shade treed" everything, they spun the nut off with the tool I woulda grabbed FIRST :confused:

On the one cylnder I have to do that's torqued over 1000 lbs, I'll probably pull the barrel and leave the rod on the hoe, that'll be as good an anchor for the rod end as any vise - my 1" impact's good for about 1800 lbs, so taking it apart might not be too bad. I'll just need to think it ALL the way thru so I end up torquing the piston bolt back in a position that lets me use a 6' cheater - that way I can just sit near the end of the cheater and it's DONE (maybe bounce a little too :D) ...Steve
 
   / Building a Shop / Weld Table #129  
I think he mentioned in the comments that the impact wasn't a great unit and wasn't up to it by itself...
 
   / Building a Shop / Weld Table
  • Thread Starter
#130  
I have no frame of reference, but a 1 impact that delivers 1800 lbs torque sounds like a - hold my beer, watch this moment :)
 
Last edited:

Tractor & Equipment Auctions

2007 Ingersoll Rand P185WJD Towable Diesel Air Compressor (A49461)
2007 Ingersoll...
BLAST SHIELD (A50854)
HONDA EU2200EI INVERTER GENERATOR (A50854)
HONDA EU2200EI...
2013 KENWORTH T370 DUMP TRUCK (A51406)
2013 KENWORTH T370...
TRUCKING INFO (A50774)
2016 Ford Explorer AWD SUV (A50324)
2016 Ford Explorer...
 
Top