Container Weld Shop build -

   / Container Weld Shop build - #271  
I marked mine with a big flat stone, flush with the ground and almost resting on the lid, mine is not deep. I can find it easy, don't think anyone has even noticed it in the yard,
 
   / Container Weld Shop build - #272  
"The gal told me they could dig it if I knew where it was (I do, to the nearest inch)">>>>>>>>

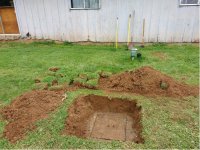
Last fall I thought I knew where my tank was to the nearest 12" since it was only 9 years ago which I thought was 20 years ago till I accidentally found the 2008 receipt. I ended up being 8' off, I dug down with my FEL 2', wondering WHY in hades haven't I found it yet, walked back and forth, looked in the cellar where the pipe went out, twice, then I set over 8' and finally found it less than 12" down, an hour job took 4 hr. A guy at work after he got done laughing told me about the two piece string method, just have to remember where the the string is stored, the septic people came out the next day, around $175.00.
 
   / Container Weld Shop build -
  • Thread Starter
#273  
"told me about the two piece string method, just have to remember where the the string is stored"

I've tried things like that, either can't find the string or don't remember WHICH "really important" thing it was for :confused:

So in my case it's a good thing I've been working on/with computers since a hard drive was actually the size of your washing machine, and cost about $40,000 (and OK, I might be just a TEENSY bit OCD :D)

Septic-4318sm.jpg

(just in case ya thought I wuz BS'ing about that 1 inch thang:rolleyes:)... Steve (BTW, the cad file name is "septic-loc.gcd" :thumbsup: )

Oh, and YES I know the "cracker box palace" needs new siding; there's two full units of the stuff in one of the containers, looks like this summer might be a good time to think about that along with a new sliding glass door - that's the WEATHER side; the North side still looks new...
 
   / Container Weld Shop build -
  • Thread Starter
#274  
Well, it only took about 4 days of "general malingering" to recover from that little dab of actual work :rolleyes: so I finally got around to doin' some more on the crane braces -
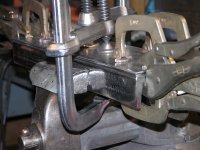
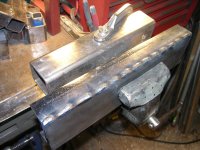
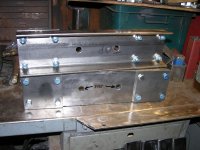
First "spreader" ready to tack - (I wanted a thicker web, didn't have that size, so "winged" it)

DSCN3179.JPG

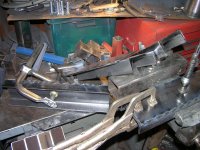
Various stages of the process -

DSCN3180.JPG

On the left, next in line - on the right, done ready for drilling -

DSCN3181.JPG

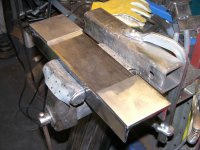
Next one in the vise, ready to smooth out -

DSCN3182.JPG

Next couple of days I MIGHT get far enough along to get a couple pics so ANY of this makes SENSE :confused: ...Steve
 
   / Container Weld Shop build - #275  
I'm all caught up with the shiny metal fabrication from the shiny metal fabricator SMF, ready for some more pictures when you get done doing some more>>>"general malingering"
 
   / Container Weld Shop build -
  • Thread Starter
#276  
My "general malingering" today involved some fence repair (dobermans tend to get sidetracked away from wantin' to chomp on trailer trash neighbors when they can get into the lower pastures and chase Bambi and Thumper) - also, put a couple tarps back where I wanted 'em, instead of where Ma Nature thought they should be - tried that yesterday, but turned out she wuz WATCHIN' me - old broad still has a sense of (perverse) humor...

Gonna shoot for a vague resemblance of some actual progress in a bit, keepin' fingers/eyes/toes crossed :rolleyes: ...Steve
 
   / Container Weld Shop build -
  • Thread Starter
#277  
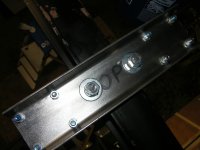
Got some more done on the HF crane mod today, these pieces will clamp crossways to the top flange of the bigger I beam - there will be another pair that're similar, that clamp across the INSIDE surface of the vertical posts - then each end will get 2 45 degree gussets (2" square tube" welded near the outer ends of the channel pieces, leaving a 10" wide gap BETWEEN the gussets so they don't restrict travel of the trolley/hoist -

In order that the braces can be removed or adjusted WITHOUT taking the legs clear off of the I beam (a royal PITA), the ones in the pics will get the angle tubes welded ONLY to those 4" square (BOLTED on) pieces of 1/4" flat bar - that way, the braces can get unbolted at those 4" square pieces, and that will leave everything ELSE on the INSIDE CORNER between post and beam so it can be adjusted OR removed.

I should get enough done in the next day or two so the pics will be self-explanatory... Steve

DSCN3183.JPGDSCN3184.JPGDSCN3185.JPGDSCN3186.JPGDSCN3187.JPG
 
   / Container Weld Shop build -
  • Thread Starter
#278  
Sort of a "sneak preview", I got just enough done to see where the previous parts will go;

Left and right ends, from below -
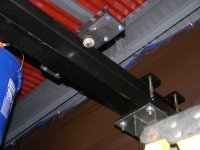
DSCN3188.JPGDSCN3189.JPG

Top view, from above the I beam -

DSCN3190.JPG

One of the post-mounted spreaders drilled -
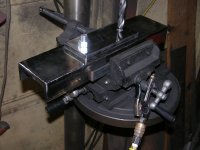
DSCN3191.JPG

One of the diagonal tube gussets ALMOST in place -
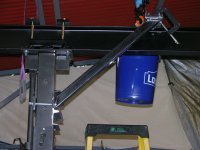
DSCN3192.JPG

the post mounted spreader (channel) will get notched out so the 45 deg. angle end can sit flat inside the channel, then everything will get fiddled with til the gaps go away :rolleyes: - then I'll tack everything (with all the spreader bolts tight), then take both braces down and weld 'em out using the "hopscotch" method :D combined with "kopius kwantitys of Klamps"...

But probably NOT today; still have the other post-mounted spreader to drill and chamfer, get all the spreaders square to their mounting locations (and aligned so everything fits), run a 240 extension cord out there, move the MM211 out there using "hand truck mode", wait for the dang wind to pause for a breath :rolleyes:

Still, it was nice being able to get an idea of how it'll go - those gusset tubes will be 10" apart inside, and the biggest hoist I'll be using on this crane is 8" wide - this design lets me get a long enough gusset to really solidify the post mounts WITHOUT having to give up a couple feet of travel on each end of the beam... Steve
 
   / Container Weld Shop build -
  • Thread Starter
#279  
Discovered there was no decent way to cut the slots in one side of the C channel "spreaders" that I need in order to get those 45 degree tubes to sit flat on the INSIDE of the channel (necessary so the FLAT side of the channel can rest against the upright posts on the HF crane) -

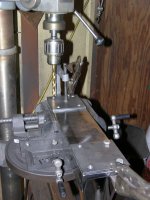
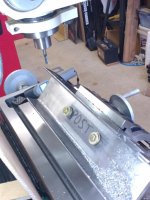
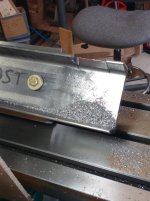
The mill is still the "interloper" in the WOOD shop (where the ONLY 240 volt power is :confused:) so I re-arranged things (again) and set the mill up to cut those (45 degree bottom) slots with a 8mm, center-cut, solid carbide milling cutter - used my auxiliary angle table, set @ 45 degrees, bolted the channels thru their (already drilled for mounting) 2 holes, "eyeballed" to the edge of the mill table, locked down hard and "removed everything that did NOT look like a 45 degree slot" :laughing:

The setup -

SlotMillSetup.jpg

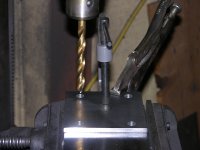
Closer view -

SlotMillClose.jpg

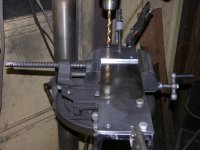
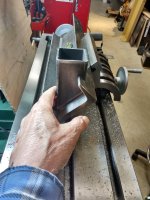
Fit check (used a 45 degree cutoff, actual pieces are 30" long - dang, good thing I don't FEEL as old as my HANDS look :confused: )

SlotFitCheck.jpg

Left the pieces down in the shop last nite, 100' walk in the rain and things rust too dang fast anyway - might get things at least partially tacked before I give up tonite... Steve
 

Tractor & Equipment Auctions

2019 Ford F-250 4x4 Crew Cab Pickup Truck (A50323)
2019 Ford F-250...
2006 DITCH WITCH RT40 RIDE ON TRENCHER (A51242)
2006 DITCH WITCH...
2017 Ford Explorer AWD SUV (A51694)
2017 Ford Explorer...
2020 Lincoln Naultilus SUV (A50324)
2020 Lincoln...
Auger Skid Steer Attachment (A50322)
Auger Skid Steer...
(3) PIVOT TIRES (A51244)
(3) PIVOT TIRES...
 
Top