Container Weld Shop build -

   / Container Weld Shop build - #291  
I have the older 211 (2013), use with .030 70s, my heat and and and and and corresponding wire speed is just about spot on. So nice when I'm going from different thickness of steel, instead of moving both dials, I just move one, haven't tried it on .035 wire yet. My mig gun is 10' long, wonder if that makes a difference in the autoset? Sometimes a longer mig gun will have a harder time feeding wire.
I'm guessing I have the same one but a couple years newer. Yes the gun is a bit short but I have never had a problem that wasn't operator error. :ashamed: Only have run .030 and 75/25 and steel, but I know it is still way better than me.
 
   / Container Weld Shop build -
  • Thread Starter
#292  
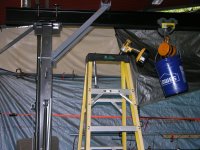
I'm pretty sure my problem is "OEM" - (as in, Operator Error Mostly :rolleyes:) - Yeah, the M150 gun is stiff enough to beat an elephant to death with, but I saw ZERO indications of stutter or any other feed problems, it just seemed like I'd forgotten how to weld uphill - it might not be the machine at all, some of the welds were in places I couldn't find a position to see much, and I WAS on a ladder - one step wasn't high enough for me, and the next one up was TOO high (made me crouch; gettin' too old fer that :( )

For the last couple welds, I raised the crane another notch (6" per notch) and that seemed to help - next chance I get I'm definitely gonna work on "dialing in" some too...

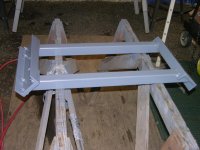
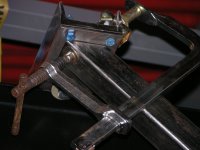
Fixed ANOTHER problem (of my own making) today; I had made the diagonal braces so the upper C channel spreader BOLTS up to a pair of 1/4"x4"x4"flat plates, which are welded to the diagonal tubes - otherwise, if I needed to adjust OR remove those braces I'd have to disconnect the upright posts COMPLETELY from the I beam - (pic is BEFORE welding)
DSCN3206.JPG

I wanted the mounting bolts as wide apart as possible to minimise any tendency to rock, but I got 'em a little TOO far apart, so the channel legs made it so the nuts and lock washers couldn't sit FLAT :rolleyes:

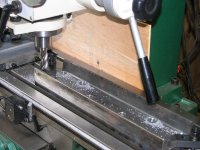
Milling machine and a 3/4" center cut end mill to the rescue -
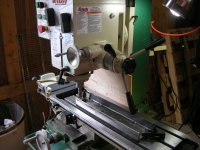
DSCN3213.JPG DSCN3214.JPG DSCN3215.JPG

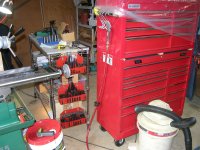
Some of the other goodies the couple years of mandatory OT paid for (the top red box is empty at the moment, bottom one's got boring bars, angle plates, parallels, mills, drill bits, more T nuts, mics, other measuring stuff, tramming indicator, files, center finders, etc, the 6" chuck for that rotary table and all the stuff for the 3 axis DRO (except the time to build it :confused:)

DSCN3216.JPG DSCN3217.JPG

After I finished "un-screwing up", I spent 3 hours "leveling the weeds" that the warmer weather AND ample precipitation were so kind to help grow - 7mph over rough ground ain't nearly as much fun as it NEVER wuz :thumbdown: - I may or may not move manana :rolleyes: ...Steve
 
   / Container Weld Shop build - #293  
Looks like you are getting more orginamasized.
 
   / Container Weld Shop build -
  • Thread Starter
#294  
Yeah, it would SEEM so; that's the beauty of still pics, if you're careful with composition you only show what you WANT people to see :laughing:

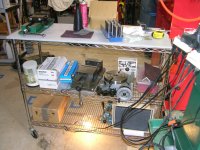
In actuality, I just moved three "modules" away from the REST of the pile that's sorta out of the way for moving "inventory" out into one of the containers - the mill's still on its original shipping pallet (with a "lift kit" so it'll let the pallet jack get under). It, the tool box and that rolling shelf each has its own dust cover, so perpetuating that "lie" was as simple as rolling 3 things away from the "mess", pulling their covers, plugging a couple things in and FAKING it :laughing:

But what the heck, at this stage of the game I'll take even "left-handed" compliments - so your "right-handed" ones are REALLY appreciated :thumbsup:

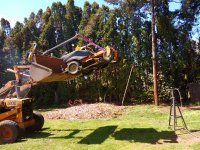
Re: my earlier comments on mowing - the deck got so clogged up last nite it started leaving gaps, but the grass (spelled W-E-E-D-S) had gotten so tall I wanted it done even if I need to do it again in a couple days - it wuz gettin' dark by the time I quit, so I didn't clean the deck (not a quick job) - so today I worked out yet ANOTHER use for my hoe and "tinker toy set" -

TinkerToyMower.jpg

And yeah, that 3 ton rated stand was under the mower/bucket any time I was :thumbsup: Couple minor changes I thought of, but even the FIRST time was a LOT easier than R&R the deck... Steve
 
   / Container Weld Shop build -
  • Thread Starter
#296  
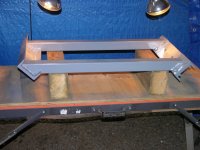
Finally got back to cleanup/paint on the braces for the HF crane - ended up slicing one of the worst "shaky man on a ladder" welds out with a zip disk and re-doing it. Only pic I took was of paint drying ('bout as boring as it sounds :rolleyes:)
View attachment 550935
When I unbolted the upper spreader channel after welding, the tubes had moved just enough to bind up on the mounting bolts - so I clamped one of the legs in the vise, loosened all the nuts and started pushing the tubes apart with one of the Stronghand 4:1 clamps (add the standoff on the OUTSIDE of the "F" part, reverse the acme screw end, and you get a 1200# spreader instead of a 1200# clamp)

I found out I had to push the tubes apart just over 1/2" BEYOND where they needed to be, before they would line up with the bolt holes on their own. Now I can reassemble the braces around the I beam without having to use more clamps to force things into alignment... Steve
 
Last edited:
   / Container Weld Shop build -
  • Thread Starter
#297  
Todays feeble attempt at progress - the first corner brace, ready to re-install. The left piece of channel is the upper spreader, and it needs to be removed from the rest of the brace or I would need to take the entire upright loose from the I beam to get it on; DSCN3224.JPG

so all 8 of those 3/8" bolts came off, then the channel got loosely bolted/clamped onto the I beam; then the rest of the brace got rested on a clamped on piece of square tube just above the outer half of the upright. Once all the OTHER bolts were in and tightened, then the 2 clamp bolts (that hold the upper channel to the I beam) got tightened, and it looks like this -
DSCN3227.JPG

The second brace spent some time under the IR lamps (bit cool for paint today) and got the rest of its paint;

DSCN3228.JPG

After supper it'll have been under the lamps for about 3 hours, so it'll get installed the same way; ('cause it didn't hurt me and went pretty smooth :D) - next I'll need to figure out what to do with those incredibly cheesy "winches" HF uses to raise/lower the beam; they're already slipping... Steve
 
   / Container Weld Shop build - #298  
Seeing your IR heat lamps, I am now kicking myself for giving Goodwill my old one inherited from my parents. Had a nice clamp and why in the heck didn't I think of using it for small paint projects! :mur: Seems I always come up with a need for a junky thing as soon donate it.

Wife just said, 'I told you so'... again.
 
   / Container Weld Shop build -
  • Thread Starter
#299  
I keep 4 of the 250W white IR's for use on this "light bar", these
Amazon.com: Woods 15-Watt Brooder Clamp Lamp With Porcelain Socket (6-Foot, 18/2 Gauge): Home Improvement
work just fine, they're ceramic so I just ignore their "150 watt" rating - I also took a couple pieces of scrap 3/4 ply and added a 12" lazy suzan bearing, whole thing sits on that table (with its scrap plywood cover) - that way, smaller parts (like my ever-burgeoning supply of "tinker toys") can get rotated as I spray, then a small piece of scrap steel wedged against the "susan" so it stays where I put it while curing...

The wider shot of those lamps (deleted, unfortunately) showed my "overkill" support, consisting of a piece of 1" conduit supported by a pair of 3 ton "under-hoist safety stands" - those let me "dial in" the lamp distance anywhere I want it. Maybe overkill, but the adjustment range ROCKS... Steve

Forgot to mention the use of an IR temp gun; most rattle can paints seem to do well anywhere from 80 to 100 degrees (F) - so colder than that and I lower the lamps, higher than 100 and I'll raise 'em a bit - not quite PID control, but I'm retired from that crap now :laughing:
 
   / Container Weld Shop build - #300  
Making a little foldable 'heat' box with lazy Susan maybe with some nail/pins and an overhead hanger for parts makes a lot of sense. I would line with old sheets that are easily replaceable and a rear vent. I smell another project for the list. Where is that darn list though... it's long enough but I still can't find it.
 

Tractor & Equipment Auctions

Set Yield 360 Y Drops (A50514)
Set Yield 360 Y...
2016 Big Tex 14LX 14ft 7 Ton T/A Dump Trailer (A50322)
2016 Big Tex 14LX...
Turfco Mete-R-Matic III Pull-Behind Top Dresser (A51691)
Turfco...
2021 Cat D5 LGP Dozer (RIDE AND DRIVE) (A50774)
2021 Cat D5 LGP...
Case 830 Tractor (A50514)
Case 830 Tractor...
2003 MACK RD688S T/A DUMP TRUCK (A51406)
2003 MACK RD688S...
 
Top