OP
EddieWalker
Epic Contributor
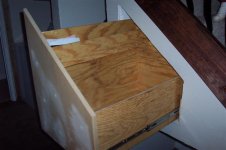
The top space was another one of those that I created without an idea of how it would work out. I had an idea of putting a shelf across it where the angle went up, but wasn't very happy with that idea.
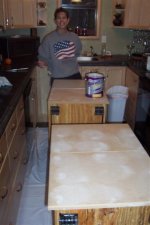
The drawer idea worked well there as well. I just build it up on the tall side and created a small shelf to take advantage of that upper space.
Eddie
The drawer idea worked well there as well. I just build it up on the tall side and created a small shelf to take advantage of that upper space.
Eddie