Creating a Workshop & Home

   / Creating a Workshop & Home
  • Thread Starter
#471  
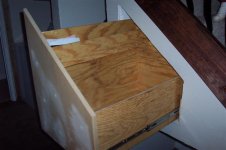
Here it is mounted to the cross member that supports it.

This picture shows how it all fits together.

When I first decided to build this, I spent allot of time working out all sorts of complicated details. Then I would rework my thoughts until I got it down to the simplest form.

That is just how my brain works. /forums/images/graemlins/confused.gif

Eddie
 

Attachments

  • 788968-Workshop 020 (Small).jpg
    788968-Workshop 020 (Small).jpg
    49.5 KB · Views: 544
   / Creating a Workshop & Home
  • Thread Starter
#472  
Looks like it fits!!!

On a test cut, about half of the sawdust went right down the chute to the can. As sawdust builds up, I think more will fall down the chute.

Clean up will be easier since all I have to do is sweep into the chute wihout having to remove the saw.

I'm also thinking about a piece of wood along the wall to catch more of the sawdust.

Obviously a vacume would do a better job and would be simpler to install, but I don't have one, nor do I really want to get a vacume system and run all the tubes.

Eddie
 

Attachments

  • 788971-Workshop 022 (Small).jpg
    788971-Workshop 022 (Small).jpg
    50.5 KB · Views: 482
   / Creating a Workshop & Home
  • Thread Starter
#473  
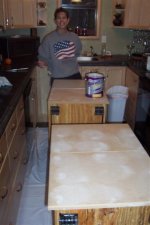
You can see the chop saw and how it fits between my metal table and the new workbench. You can also see the fist step in the shelves I'm building.

The shelves are being hung from my truss's and attached to the walls. Right now they are only glued and screwed at the top. It will take another rainy day for me to get anything else done in there.

Eddie
 

Attachments

  • 788978-Workshop 024 (Small).jpg
    788978-Workshop 024 (Small).jpg
    63.8 KB · Views: 465
   / Creating a Workshop & Home #474  
Looking good Eddie. I hope you don't mind me stealing your sawdust chute idea. That is really neat. Keep it up.
 
   / Creating a Workshop & Home #475  
</font><font color="blue" class="small">( compressore which has the drain petcocks on the bottom of the twin tanks )</font>

It seems to me that very few air-compressors are designed with a "good" drain system. My 30 gallon vertical tank came with the petcock right in the middle of the bottom of the tank, of course, which put it so close to the floor you could barely get your hand under there and the compressor had to be tilted back temporarily to even put a pie pan under it. So I removed the petcock, put in an elbow, a 6" nipple out the side and put the petcock into the end of that. Of course that puts the drain right on the floor, so I had to put blocks of wood under mine, too. /forums/images/graemlins/frown.gif
 
   / Creating a Workshop & Home #476  
I did about the same thing but canned the stock petcock and used a ball valve. Very easy to operate even though the nipple is right on the floor.
 
   / Creating a Workshop & Home #477  
I intended to do the same; dispose of the petcock and use a ball valve, but the Ace Hardware store where I bought the nipple, connector, and elbow didn't have one. I'll still probably change it one of these days.
 
   / Creating a Workshop & Home #478  
Nice job on the dust chute, Eddie. The only thing I might have done different is to make the chute out of canvas (like a funnel) and staple it to the bottom of the table. With canvas (or old dropcloth material) it could extend idown into the mouth of the trash can and then easily be moved aside to dump the can. I'm sure your way will work excellent too. Either way is a big improvement over having to clean up behind the saw all the time.

A vacuum system wouldn't be that much an improvement in my estimation. A quick brush with a broom is all you need with your system. Also, with metal shavings/metal dust, you have to be very careful about the type of vacuum you use. If the air does not bypass the motor, it's only a short time until the motor will fail.
 
   / Creating a Workshop & Home #479  
Great job on the bench Eddie. I'm sure you'll give it a workout. I live about 8 miles from the Cabela's in Dundee,MI. They have pretty awesome displays.
 
   / Creating a Workshop & Home
  • Thread Starter
#480  
Thanks for the kind words. The chop saw has been getting some use in it's new home. The dust chute is working really well. I think I'm getting about three quarters of all the dust into it with hardly any mess at all. /forums/images/graemlins/grin.gif

Of course, the best part is having the benches on either side at the same height so the material I'm cutting is flat. That's the best part!!!!

The weather is cold and I need to get the workshop cleaned up and organized before Christmas Eve. We're having dinner here in the workshop then.

Over the weekend I cut and intalled all the support pieced that will hold the shelves up. I thought I'd get more done, but Christmas activities keep distracting me.

Each strip is 2 inches wide and screwed into the wall or plywood sides.

Earlier some of you mentioned that I should use a piece of blocking wood to tie in the siding on the walls where they meet without a stud. This was what I was trying to explain as to why it didn't matter when I was putting it up.

Eddie
 

Attachments

  • 792403-Workshop 025 (Small).jpg
    792403-Workshop 025 (Small).jpg
    46.5 KB · Views: 474

Tractor & Equipment Auctions

2015 Honda Pilot SUV (A48082)
2015 Honda Pilot...
MEGGER EZ THUMP (A50854)
MEGGER EZ THUMP...
2021 John Deere 333G Two-Speed Hi Flow Compact Track Loader Skid Steer (A50322)
2021 John Deere...
Set of Ag R4 Wheels and Tires (A51039)
Set of Ag R4...
Craftsman T1800 42in. Riding Mower (A49346)
Craftsman T1800...
More info coming soon! (A49346)
More info coming...
 
Top