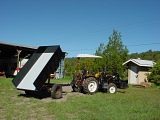
Dump Trailer - start to finish

   / Dump Trailer - start to finish
  • Thread Starter
#11  
Here is what I got done today. The sides are on.
I still have some "engineering" and fabrication to do on the rear of the trailer where the tail gate is to be installed.
 
   / Dump Trailer - start to finish
  • Thread Starter
#12  
An over all shot from a little distance.


I will use 2"x12"'s for the decking and paint them gray.
They will be installed with 5/16" carriage bolts, with some fancy stainless steel square cut washers I found on-line. They are designed for carriage bolts & wood and the exact name of them is Stainless Steel Torque Washers
CLICK HERE To see them
 
   / Dump Trailer - start to finish
  • Thread Starter
#13  
The weather was finally nice today (Labor-day) and I got busy on the dump trailer project. Took the twisted wire wheel cup & the angle grinder to all the rust. Cleaned it up real nice. Then I primed it.
Here is a picture of the primed trailer.
As always you may click on the picture to enlarge.
 
   / Dump Trailer - start to finish
  • Thread Starter
#14  
It took about two hours of the wire wheel to get all the rust off to my satisfaction.
 
   / Dump Trailer - start to finish
  • Thread Starter
#15  
After the primer cured for about an hour I proceeded to paint it black.
I had 12 cans of black but ran short by about 2 cans. It will need two coats of black so I need to pick up some more paint next time I'm in town.
 
   / Dump Trailer - start to finish
  • Thread Starter
#16  
When painting the underside I used the tractor hydraulics to "dump" the trailer so that is was easy to get to the bottom of things.


I still have a few things left to do.
Finish the black paint & give it a second coat.
Pick up the lumber for the floor, Paint the lumber, install the floor.
Make some brackets to hold the hydraulic hoses.
Make the tail gate.
After I do the above items I am going to use it around the homestead.
Then next year I think I will make it "Street Legal" by adding some fenders and lights, get it weighed, inspected and get a license plate for it.
 
   / Dump Trailer - start to finish
  • Thread Starter
#17  
Worked on the dump trailer again today.
Finished all the painting, it now has two coats of Black.
The hydraulic hoses can now be attached to the tong. I needed to make the clamps. I scrounged around the shop and remembered I have a bunch of steel bushings. So I cut four of them in half (long ways)
This first pic is cutting the bushings in half. I have cut pipe before but not like shown in the picture. I didn't want my fingers any where near the blade so I came up with this crazy idea:

Here they are all cut in half along with the center piece with mounting hole drilled and ready to weld together:
 
   / Dump Trailer - start to finish
  • Thread Starter
#18  
Got them welded together, primed and painted.

Here is a close up of one installed, I used 1/4-20 bolts, Drilled & taped the tong to install the clamp.
 
   / Dump Trailer - start to finish
  • Thread Starter
#19  
I installed four clamps evenly spaced ~ 20" apart to hold the hydraulic hose so that it would not sag.

I picked up the lumber for the floor yesterday. I started to install it as the clouds were starting to build up in the sky (AGAIN) :mad:
I got 3 of the 5 planks drilled & carriage bolted on. Then as I was getting ready to cut the fourth board it was lightening all around me, real close :eek: . Then the sky let loose and the rains came down. So I scrambled to pick up all my tools and took the last shot of the day. Just as well, I was getting tired and hungry the Mrs. was ready to serve up dinner.
 
   / Dump Trailer - start to finish
  • Thread Starter
#20  
It finally stopped raining! Probably for the rest of the year.
I had a little time this past weekend to finish the floor on my dump trailer in between celebrated my Mom & Dad's 60th wedding anniversary. My sisters from Florida & Ohio were there as well as my brother from Albuquerque it was also a family reunion. Had a wonderful time.
Anyway I got all the floor boards installed, primed & painted machine tool gray.
In the background to the right you can see my "Solar Powered Outhouse". It's stuccoed to match the house :D
I say solar powered because I installed a solar charged "reading" light :cool:.

This shot includes the Motorcycle "shed" It's finished inside complete with sealed concrete floor, Smooth finished & painted Sheetrock walls and textured celling.

Next is to make some fenders, tail gate, and install some tail lights. I will do that at my leisure as it's time to go get more firewood for winter.
 

Tractor & Equipment Auctions

2019 Ford F-150 4x4 Ext. Cab Pickup Truck (A50323)
2019 Ford F-150...
2013 Ford F-550 4x4 Ext. Cab Auto Crane 6406H 6,000LB Crane Service Truck (A50323)
2013 Ford F-550...
2014 MACK CXU (PINNACLE) (A50854)
2014 MACK CXU...
2025 Swict 72in Bucket Skid Steer Attachment (A50322)
2025 Swict 72in...
2017 Ram 5500 Valve Placer Bucket Truck with Versalift STP36NE - 41FT Working Height, Low Miles (A51039)
2017 Ram 5500...
(INOPERABLE) CAT D4D (A50854)
(INOPERABLE) CAT...
 
Top