tstex
Gold Member
Hello to all,
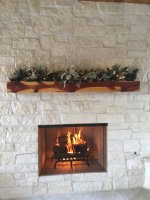
I am in the process of ordering 4 blk powder-coated double 1/2" thick hairpin legs, 14" tall, for a coffee table I am making for our outside area in Hou. The table will match the fireplace mantel.
The dimensions of the table are two mirror images of cedar: two 46"L, 10.5" W and 2.75" H. So when joined, it will be 46" x 20" x 2.75" [note, I am ripping both pieces to 10" widths. Here are a few questions:
All feedback welcomed [remember, I am using an 18V cordless 1/4" shank router w brand new carbon tipped bits].
Thank you,
tstex
I am in the process of ordering 4 blk powder-coated double 1/2" thick hairpin legs, 14" tall, for a coffee table I am making for our outside area in Hou. The table will match the fireplace mantel.
The dimensions of the table are two mirror images of cedar: two 46"L, 10.5" W and 2.75" H. So when joined, it will be 46" x 20" x 2.75" [note, I am ripping both pieces to 10" widths. Here are a few questions:
- What is the best way to join the 2 pieces together?
- I was going to use a round over bit for all of the top edges. How much should I remove? Is it customary to do anything to the bottom perimeter of the table?
- Last thing I was considering was a "V" groove on the inside of the table to follow exactly the perimeter of the table? Two ques: What should be the depth and how far from the perimeter inside should I [customarily] go?
All feedback welcomed [remember, I am using an 18V cordless 1/4" shank router w brand new carbon tipped bits].
Thank you,
tstex