First serious box blading.

/ First serious box blading. #1  

duckhunter27

Gold Member
Joined
Jul 1, 2010
Messages
268
Location
Dannebrog , NE
Tractor
Bobcat CT 335
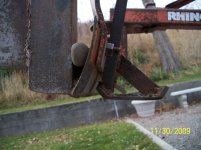
Hi guys thought i would let ya know how it went for me with my first start on my driveway with box blade. I have a CT 335 HST with a Land pride 25-66 hinged box blade. First off my driveway is wavey like a roller coster so i went and tried to hit all the high spots first which is easyer said then done. Any how i started with box about level and it seemed to dig very well and fill up box . So after taking tops off high spots for awhile i tried shorting my top link as far as it would go and try it that way. Whiched seemed to make it harder to control would react very fast so I tried going way long with top link and i also did not have my hinged door locked. I think it would work better like this with hinged rear door locked but i didnt have time to mess with it will play more tonight. So i went back to level seem the best spot for me for know any how as I learn more. So after taking tops off high spots i started at one end and dropped box and drove slow i tried adjusting box on low and high spots as i went i didnt just but box down in float postion. I t seemed to do a perty nice job the waves in driveway make it tough as tractor goes up blade wants to dig and then as tractor goes over top blade comes up but i think as i take more and more off high spots will get better. To night i want to put rippers down and tear up left side of driveway and then try tilting box and putting a nice little ditch to match other side also can use that dirt on low spots will let ya know how it turns out. P.S i was worried which blade to get for my tractor so far i could pull a full box of dirt still scrapping in high gear no problem so next i will see how it pulls with rippers down but as of now i would say a CT335 would pull a 7 ft box blade no problem.
 
/ First serious box blading. #3  
Dont get discouraged. When you are learning on a difficult road dont expect wonders. Each time you work it the road will get better.
I would set the top link so that the blade cuts OK. Then set your blade depth to make a small cut - not to deep. Then go very slow and as the tractor front end raises and dips try to keep the cutting depth uniform and flat by using your lift arm control to compensate for the raises and dips. This takes practice and is not easy. But if you keep going back and forth it will get better and better. If you use the scarifiers do the same thing and DONT go to deep. You want to end up with the undisturbed solid part of the road under the loose stuff you create to be flat and not wavey. Then you can lengthen the top link so you don't cut any more and drag the loose stuff around until the surface is level.
 
/ First serious box blading. #4  
duckhunter,
I agree with Gordon, "don't get discouraged". Most people try to go way to fast trying to boxblade. You need to try to cut off the high spots as you pass over them slowly and incrementally raise the boxblade just as you approach the lower spots. When I say slow I should say creep.

Another method you can try if the waves are accentuated is to drop the rippers down all the way on the boxblade and rip up the highest mounds, then pick this up and dribble it out over the low spots. You can backdrag over the low spots as you add the fill.

I usually will get it fairly even with the above methods then use a rear blade angled and tilted to build the crown next. Then finish it off with a landplane/grader.

The more seat time you get the easier this kind of work is to do.
 
/ First serious box blading. #5  
duckhunter,
I agree with Gordon, "don't get discouraged". Most people try to go way to fast trying to boxblade. You need to try to cut off the high spots as you pass over them slowly and incrementally raise the boxblade just as you approach the lower spots. When I say slow I should say creep.

Another method you can try if the waves are accentuated is to drop the rippers down all the way on the boxblade and rip up the highest mounds, then pick this up and dribble it out over the low spots. You can backdrag over the low spots as you add the fill.

I usually will get it fairly even with the above methods then use a rear blade angled and tilted to build the crown next. Then finish it off with a landplane/grader.

The more seat time you get the easier this kind of work is to do.

Can you explain this a little more? What do you mean by backdrag and are you saying to use the box blade in a high enough position that only the rippers contact the ground? And if backdrag doesn't involve the rear facing blade when do you use that?
 
/ First serious box blading. #6  
I was referring to breaking up the surface so that he could scoop up the loosened dirt with his loader bucket.

The second part was using his loader bucket to spread and knockdown the small piles of dirt. That is running the loader bucket almost flat in reverse.


edit; Sometimes it is faster to simply shave off the high points with the loader bucket and then carry this dirt and drop it in the low spots. It often limits the amount of dirt you are moving around.
 
/ First serious box blading. #7  
I will begin by saying I am not a box blade expert. High gear and box blade don't go well together from my experience unless I am transporting the box blade.
 
/ First serious box blading.
  • Thread Starter
#8  
Well day 2 of box scraping was about like day 1 lol did try and take more of the high spots on the wavey parts of driveway it is tough to do and you need a light touch. I liked the loader idea and may try that alittle to see how it works. I did put rippers down and tried to dig a ditch on left side of my driveway didnt work to bad and it gave me alot of dirt to work with I made a cpl passes with box angled and rippers down then i put rear blade on and pulled all loose dirt up and out and on to driveway. I agree it is going to take time and alittle at aliite bit at a time. I will keep cutting on high spots and try putting it in low spots and in time i will have it strightened out i am sure. P.S when i said i could pull box scraper with full load of dirt in high gear didnt mean i was going fast my tractor is a HST and i have a low , med, and high i can creep in high if i want was just saying tractor had plenty of power to pull it in high. But last night when i set rippers all the way down and angled blade as far as i could it was low gear, med would pull it put left in low had wheels spinning at diferant times and would have to adjust box . But i am learning as you can tell by looking at my driveway i ts a mess but i figure its work in progress but i can only do so much at night after work this weekened i will be able to spend lot more time at it.
 
/ First serious box blading. #9  
I built and attached "shoes" to my blade.
They really help on the bumps etc when blading the drive.
Sorry about the size of the pic.
By adjusting the top link, you can adjust the height of the
blade slightly also.
 

Attachments

  • Tractor 001.jpg
    Tractor 001.jpg
    501.4 KB · Views: 452
/ First serious box blading. #10  
I am a newbie to boxblading too though I'm getting some practice. One of the things I found helpful is to remember that you have two blades back there, and either one can be used to control the action of the other. If the rear blade is low it limits the depth the front can cut, but if it is high the front will cut more aggressively, etc.
 
/ First serious box blading. #11  
Someting that helps with the wavy road issue is to replace your top ling with a chain lower your blade and fill the box this will let your blade float a bit as the tractor goes up and down. Then when you get it smoothed out replace your adjustable top link for more control. I have a float detent on my top part of the top and tilt that allows this with the cylinder.
 
/ First serious box blading.
  • Thread Starter
#12  
Day 3 of box scraping my driveway is starting to come around I used the fel last night to cut and back drag the high spot gave me lot mor control. then went over driveway agian with box blade. I like the idea of a chain in top link to let box float more may try that tonight now that i have most of the wavy part out of drive. its about where i want it for now and i think it will be easyer to mantian now that i have it levell. Thanks agian guys for all your help you guys have great ideas that i guy can forget or just never think of when he is in the middle of a project.
 
/ First serious box blading. #13  
I've been wondering how a box grader might work for finish work if you mounted detachable 4-5 foot long angle iron skids on the bottom outside of the side plates. Let the blade be an inch or less below the skid. Make it kind of like a one-blade Dura-grader. Then let it float. Easier and cheaper than gauge wheels.

Bruce
 
/ First serious box blading. #14  
I've been wondering how a box grader might work for finish work if you mounted detachable 4-5 foot long angle iron skids on the bottom outside of the side plates. Let the blade be an inch or less below the skid. Make it kind of like a one-blade Dura-grader. Then let it float. Easier and cheaper than gauge wheels.

Bruce

Interesting idea. That would be an easy modification, and I can see how it could work in theory, but I'm not experienced enough in this area to have any valid opinions as to actual feasibility. Anybody else out there have any thoughts about this?

Joe
 
/ First serious box blading. #15  
I have mentioned this a few times on TBN this year without any response from others.

Next chance I get to pickup some steel I will buy some boxbeam to make these with wear strips. While I have an eight ft grader/landplane the ability to use my boxblade with rippers and much higher carrying capacity is intriguing.

A side benefit for me is the weight savings, my landplane/grader weighs about 950 lbs. and the boxblade is 1250 lbs. Hauling both of these with the tractor on my trailer is a bit much, but 200 lbs of skids added to the boxblade would be doable.

The next consideration is mounting, I first thought about a simple mounting that would bolt up over welded in place bushings (a fixed mounting). Now I am considering a hydraulically adjusted tilt and trying to weight the pros and cons compared to the present topntilt method.
 
/ First serious box blading. #16  
I've been wondering how a box grader might work for finish work if you mounted detachable 4-5 foot long angle iron skids on the bottom outside of the side plates. Let the blade be an inch or less below the skid. Make it kind of like a one-blade Dura-grader. Then let it float. Easier and cheaper than gauge wheels.

Bruce

I watched a demo video of a land plane recently and that was exactly the feature they touted as making their product better than a boxblade....the longer rails reducing the up/down volatility.
 
/ First serious box blading. #17  
duckhunter,
You can use a chain to float the boxblade and other implements like a rotary cutter too. Moving the dirt to the right place directly is usually faster though. Floating works well to smooth over the surface but down pressure will speed up the smoothing process where small mounds of dirt or gravel need to be moved.

Here are some pics of a patio I built this past week where I had to build a berm around the outside edge. On the inside or right side of the patio is a septic system about 10 ft away from the patio so I couldn't drive over that. When I built the patio the finished grade for the left corner was about 36 inches higher than the ground around it, so I brought in fill and topsoil to taper and smooth it out. All of it is compacted except the top couple of inches and ready for seed.

All of this was done with the fel on my 110tlb.


Marketplace Items

Bigfoot Plastic Baler (A57148)
Bigfoot Plastic...
2007 Ford F-750 2,000 Gallon Water Truck (A60352)
2007 Ford F-750...
2019 KENWORTH T680 TANDEM AXLE SLEEPER (A59904)
2019 KENWORTH T680...
Case-IH 180 Magnum (A57148)
Case-IH 180 Magnum...
2000 Morbark Towable Brush Chipper (A59228)
2000 Morbark...
2006 John Deere 120C Hydraulic Excavator (A56857)
2006 John Deere...
 
Top