Fun with square tubing

   / Fun with square tubing
  • Thread Starter
#11  
You got it.

Give me a couple of days to work it in. I'm behind the eight ball on getting some work out. But knowing me I'd guess that there will come that moment when I have to get away from the project at hand and do something real fun. Making a bender is real fun.

Making a bender for square is real easy. Making one for round, that's involved. I'm not so sure we should go there.

But if I was wanting a bender for round, I think it could be done.

The hardest thing about making a bender is figuring out exactly what's happening when the bend is being made. Once we figure that out then we can allow and adjust to accomodate it.

We'll do it.
 
   / Fun with square tubing #12  
Thanks, W-harv! We're all waiting with bait breath. Or something /w3tcompact/icons/grin.gif
 
   / Fun with square tubing #13  
Enjoy your posts and your ingenuity - my buddy has a shop with all the toys so I am hoping we will get to play at a few of these things over the next while. (I get to do the web stuff and search out the ideas and he gets to teach me /w3tcompact/icons/smile.gif how to turn them into something useable) I look forward to your "photo-tell"

Bob
 
   / Fun with square tubing #14  
Harv, it's certainly understandable why there's 'gold' in front of you're being a member! You're contributions are worth their weight..............
 
   / Fun with square tubing
  • Thread Starter
#15  
We had some success. And we had a failure or two.

The biggest failure was a bad floppy. I take my photos with a Sony FD97 and instead of using the memory stick I use the floppys.

So the first picture that showed exactly how I had it all clamped in will come up in image preview but I can't resize it with any of my photo software (three of'em) or get it to upload full size to the photo site I use. Bad floppy combined with probably a bit of operator error.

I'll do it again tomorrow and I'll use another brand of floppy and try to make it as clear as I can.

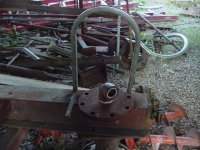
This first picture was taken after I'd removed the clamps. This is a piece of one inch sixteen gauge tubing. Sixteen gauge usually equates out to about sixty five thousandths for you decimal types.

What I did is take this piece of steel that I salvaged off of a tank and tacked it underneath to the I beam I use for a welding table. I then laid the piece of tubing beside the flange I'd just tacked on. I marked the outside of the tube on the I beam. I then welded a short piece of three quarter inch bar stock along that mark.

I then laid the piece of galvanized tubing back in it's place. The piece is was about seven feet long. I made sure it laid down flat and then I used two clamps to hold it firmly to the three quarter bar stock.

I then gripped the other end firmly and with a constant smooth pressure I pulled the piece around the flange. You can see the results.
 

Attachments

  • 53-156194-MVC-007F.JPG
    53-156194-MVC-007F.JPG
    85.6 KB · Views: 1,148
   / Fun with square tubing
  • Thread Starter
#16  
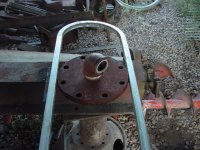
This is another picture of the piece and the bender. There is some deformation. Sometimes when the bend is extremely tight I will help with the deformation of the tubing. It's going to deform. So what I will do is weld in a little piece of round stock in the middle of the piece I'm using as the die to wrap around. What this does is it forces it to deform where I want it to instead of where it wants to deform.

I'm editing this to point out that corkscrewed piece of two inch (2 3/8) schedule forty in the background. I was having trouble bending some pieces without them twisting a bit on me. So when I got done with my pieces I sat down with Miss Hossfield we had us a dancing contest. I figured out how far she wanted to twist the piece and so I pushed her a tad farther. We ended up with that piece.

I've had some ideas for that piece of pipe. There's a part of me that would like to make me a nice chair that I could kick back for one of my catnaps. I'd use that piece for the back.

I've thought about putting in a spring inside one end and sitting all that on a shaft in the ground. Then on top mount a mail box. That way when someone hit the mail box it's twist out of the way and then come back.

Of course I've already done that by using a piece of two and three eighths for the inside shaft of a mail box post. Then I put a two and seven eighths over it. The trick is having a grease zert on the two and seven eighths above the cut.

The cut is about thirty degrees angle across the two and seven eighths. The lowest part of the cut faces the street. The part below the cut is welded to the two and three eighths.

The upper part of the two and seven eighths above the cut is attached to the mail box. If it's greased up when the mailbox is hit the upper part will twist. But it will always come back to face the street because of the thirty degree cut.

I degress. But I just like that piece of tweaked pipe. Can't explain it except maybe that dance with Miss Hossfield meant more than I thought it would.
 

Attachments

  • 53-156197-MVC-008F.JPG
    53-156197-MVC-008F.JPG
    85.4 KB · Views: 1,048
   / Fun with square tubing
  • Thread Starter
#17  
Here's the last picture from another angle.

But let's say the boss told you she wanted a small greenhouse. You price them. After you get out of the hospital you decide to make her one that's nicer than anything she'd want or you could afford.

So you go down to your local junk yard. You find you a flange about like the one I have here. You don't have a big old piece of I beam but you do have a receiver hitch on the truck.

You weld the flange and piece to clamp to on a piece of two inch square tubing, heavy wall. You think ahead and have the flange away from the bumper and the piece to clamp to parallel with the bumper but between the bumper and the flange.

You go down to your local fence company wholesaler. If he won't sell to you because you're not a company you go buy one from a fence man that he will sell to. What you're wanting to buy is one inch square sixteen gauge galvanized tubing.

Let's say the boss wants her green house to be twelve feet long and eight feet wide. For the simplicity of this discussion let's say you've got some playing room on the width.

You buy your pieces twenty four foot long. You're a nervous sort and like to overbuild things. So you figure you need five trusses. One every three feet and one of the end.

No problem. You have twenty four foot of material. So you take out your sharpie marking pen and you make a mark at five feet from one end. Then you make another mark at ten feet and another at fifteen feet. You have a mark every five feet.

You have the boss hold up the loose end and you place the first mark at a specific and definate place on your clamp to bar. Then you clamp it down tight. A quarter inch slip and your truss goes over to the pile you're gonna cut pieces for tying all this together. Then you grab it firmly and with constant pressure you pull the tubing around the flange. You have boss helping you by just holding on to the loose end that's hanging out there. This is all for her after all. You're wanting a forty five degree bend.

There's a couple of ways to pull that forty five. One is you can mark off the flange into quarters and then eighths. When you've pulled one eighth you've got a forty five degree bend. Or you can pull your piece out and lay one side level on the ground. You then take your speed square and lay the bias on the angle you've bent. You put your torpedo level on the level side of the speed square. If you're dead on the level will read level. If you're close you don't have to put it back into the bending jig to adjust. Just a little care and pressure this way or that and you can have it dead on.

Now you go to the mark at ten feet. Make sure you put the mark in the same exact place on our clamp to bar that you put the five foot mark. And that your bend is going to be on the same side of the marks.

Now you pull a ninety degree bend. You can pull a quarter of the flange. Or you can pull it out and place one side level on the ground and put your level on the vertical piece. If it reads plumb you did good. If it's close a little gentle application of force and you're home free.

Now you go to the fifteen foot mark. You do exactly the same thing you did at the five foot mark. You pull a perfect forty five.

What you should now have is a piece that looks like two walls and a peaked roof in profile. Except the walls are of different lengths.

You very carefully bend four more pieces exactly as possible the same way.

The reason I leave the legs long is I have a problem with the exactly. So when I get them all done I pick a measurement that will fit all the pieces for leg length. I know it isn't the way you usually do things but it works. It's always easier to trim than stretch stuff after it's cut.

Let's say you pick the shortest leg and it's that long. You lay it on top of the first piece you want to cut to size. You lay it where your right leg size is on the left. You mark your piece. Then you flip your right leg size over on to the right side of your piece you're gonna cut you mark the right leg. Then you cut that piece on those two marks. You now have the perfect template for the other four pieces.

You have your five verticals for the walls on each side. You have the joists for the roof. The rest is easy, guaroantee.

If there's interest we can finish it up tomorrow. It's awful late for an old man.....
 
   / Fun with square tubing #18  
W-Harv,

You forgot to attach the picture!

Now, if my brain wasn't filled with enough potential projects before, now with your techniques, I see overcrowding going on in my brain from the whole slew of new things I can imagine -- /w3tcompact/icons/smile.gif
 
   / Fun with square tubing #19  
Hi W-Harv...

What's the chances you start a separate Basic Welding 101 thread...? /w3tcompact/icons/grin.gif

I'll promise to sit in the front row desk and write everything down.../w3tcompact/icons/wink.gif

Besides the basic to advanced welding techniques, you can also discuss choosing a "beginning" welding rig that will last us up through the intermediate stages...

Ok Harv... I'm ready... got my pencils sharpened, my marking chalk ready and my blank notebook open... /w3tcompact/icons/smile.gif

18-35197-JD5205JFMsignaturelogo.JPG
 
   / Fun with square tubing #20  
W-Harv, did you fill the tubing with anything before you bent it? Can't see real well, but I don't see a lot of buckling on the inside of the radius. Maybe it's how you clamped it?

I'd like to see your welding table.

Generally, are you saying round tubing takes more specialized equipment than flat or round bar, or square tubing stock? A matter of supporting the material on the inside of the bend??
 

Tractor & Equipment Auctions

Case-IH 165 Puma (A47307)
Case-IH 165 Puma...
2016 Cadillac ATS Sedan (A46684)
2016 Cadillac ATS...
Deere 325G (A47307)
Deere 325G (A47307)
2017 VOLVO VNL64 T300 DAY CAB TRACTOR (A43005)
2017 VOLVO VNL64...
Harlo HC5600 (A47307)
2014 UTILITY 53X102 DRY VAN TRAILER (A45678)
2014 UTILITY...
 
Top