You are using an out of date browser. It may not display this or other websites correctly.
You should upgrade or use an alternative browser.
You should upgrade or use an alternative browser.
Hard facing a bucket
- Thread starter Hookblock
- Start date
- Views: 23042
More options
Who Replied?
/ Hard facing a bucket
#21

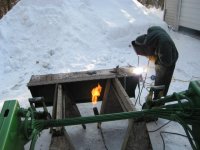
I really enjoy welding, but if I had to do it again, I would use Highbeams advise and use 7018. I think the 7018 would be easier to use and less money. Not saying the stoody is a bad choice I just needed more practice. I did have a hard time adjusting to the hard face rod.
AKfish
Super Member
- Joined
- Oct 1, 2004
- Messages
- 5,420
- Location
- Alaska
- Tractor
- JD 5115M; JD 110 TLB; JD 4720; Ford 9N; JD X300R
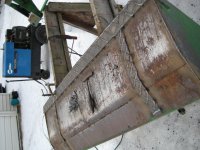
Hook, Good lookin' job! I did the same thing to my FEL bucket last year. Used the same hard-surface rod as you...
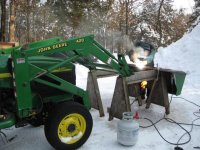
Did my work inside, though. Didn't preheat the bucket.
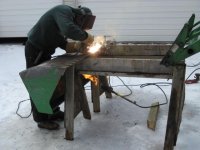
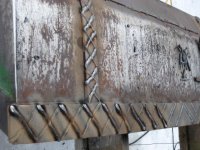
John_bud is on the dollar, too. The area of the bucket just before it rolls back is a place of significant wear. Notice how shiny it is?
I added a couple of additional wear sections of 3/8" flat bar (maybe 3"x4") welded to the area between the full length wear sections and hard-surfaced those, too.
AKfish
Did my work inside, though. Didn't preheat the bucket.
John_bud is on the dollar, too. The area of the bucket just before it rolls back is a place of significant wear. Notice how shiny it is?
I added a couple of additional wear sections of 3/8" flat bar (maybe 3"x4") welded to the area between the full length wear sections and hard-surfaced those, too.
AKfish

Farwell
Veteran Member
Hookblock,
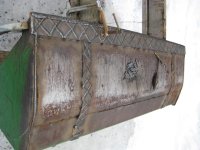
Your hard facing job looks pretty much like the bottom of my bucket that I had rebuilt by a pro last year. I think you did a great job. I have used the bucket to do a lot of digging in sand this past Summer and Fall, the bucket base is holding up great. The one thing the welder did was plug up the drain hole in the bucket that may cause a potential problem. I plan on drilling a 3/4" hole in the back of the bucket base to let the melted salt laden snow run out of.
Your hard facing job looks pretty much like the bottom of my bucket that I had rebuilt by a pro last year. I think you did a great job. I have used the bucket to do a lot of digging in sand this past Summer and Fall, the bucket base is holding up great. The one thing the welder did was plug up the drain hole in the bucket that may cause a potential problem. I plan on drilling a 3/4" hole in the back of the bucket base to let the melted salt laden snow run out of.
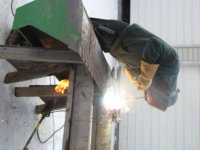
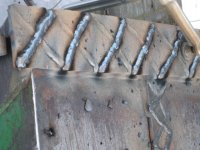
Farwell Thanks, I did think it turned out to well. But the posts made me feel better about my work. The biggest problem I had was adjusting to the longer arc length. I still plan on adding the extra plates that Jon Bud and AKfish had recommended. Just out of curiosity, do you have any pictures?
Pennsylvania Weldor
Member
- Joined
- Mar 16, 2008
- Messages
- 48
yomax4 said:Howdi. Stoody 19 is a good choice as is 21, 31, 35 or wire such as 101,110. One thing to remember is if you have a half inch of material missing, You will need to build it up prior to hard facing. Hard facing materials should only be put on 2-3 layers. If you want a nice booklet on hard facing send me you address and I will send one to you.
MM ( Stoody Rep.)
This is right on. The reason for only applying 2-3 layers of hardfacing is simple. It will break off. The reason for not only applying 1 layer of hard is it mixes with the base metal and won't be the hardness desired. The second layer achieves desired hardness. I usually only apply 2 layers. I also use Stoody Hardfacing alloys. Have for years, with good results. Build up with a E7018, then apply your Hard stuff. Be prepared to pay for it though. Those rods ain't cheap. Most welding supply houses won't sell less than 5 lbs. Some even more quantity. Good Luck.
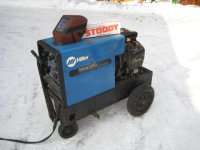
My local welding suplier recommended Stoody rod. I tried to run it with my Buzzbox. After a few minutes the rod would turn to cherry red. Checked with Stoddy who said that rod was best run on DC, something my AC buzzbox can't do. But for my toubles the Stoddy gave me a roll of hardfacing wire for my Hobart 175. It worked great and was very easy to use.
Very informative thread. For someone who is learning to weld, I can use all the information (and practice) I can get. I really like the idea of hardfacing but will wait until I have lots more practice before attempting it.
Hardfacing does seem like a good way of getting in some additional stick time by practicing on scrap metal.
Hardfacing does seem like a good way of getting in some additional stick time by practicing on scrap metal.
Here are some similar links:
- Replies
- 4
- Views
- 646