I'd like to build a barn!

   / I'd like to build a barn! #32  
I never stand them on edge. I always lay them flat but I space trusses on 4-5' centers depends on post spaceing. And I don't use roofs this steap so maybe someone has better advice for you. Make sure you tell your truss builder about the 8'spacing. They will have to build them a lot heavier.
 
   / I'd like to build a barn! #33  
Looking at your plans, I'm wondering about your dimensions. Are you going with shingles or a metal roof? If metal, it comes in three foot widths, so making your roof width based on a multiple of three makes more sense. You can get the panels cut to any length you want, to the inch. Are you going to have eaves or soffits?

Why the 7:12 pitch? It makes the math a little harder and it's at that point it's tough to walk on. 6:12 is the steepest I like to go because that's all I can handle to walk on. With shingles it's pretty good any time, with metal, you have to have clean shoes and the metal has to be dry, otherwise, 6:12 is impossible to walk on. I have a 4:12 pitch on my house with a metal roof and that's easy to walk on any time. With a lower pitch, you can use 16 ft posts inside your barn resting on concrete footings. Just use the brackets that are set into the top of the concrete and bolt the post to the bracket. Then set your exterior posts in the ground for added sheer strength.

I know some builders use laminated 2x's for their posts and they claim they are less likely to twist on you. The real advantage to laminating boards together is that you don't have to cut your notches, which saves a lot of time. The cut the boards where they want the notches and then glue and screw them together. It's faster that way. The negative to laminating posts is that if they are going in the ground, you ABSOLUTELY have to find 2x's that are ground rated. You will not find them at Lowes or Home Depot. I've heard you can special order them, but I've never seen this anywhere myself.

Strength isn't the issue. A 4x4 is plenty strong as a post. The problem with 4x4's and now 4x6's is that the new treatment process make a lot more of them twist then ever before. I only use 6x6's because they remain straight. That is the only reason I have for going up to that size, but it's well worth the extra expense and hassle of handling the extra weight. They are easy enough to notch with a cordless saw for the initial cut, then a cordless sawzall to finish off the cut.

I'm not a fan of anything in the bottom of the hole before putting the post in. I know people say it allows the moisture to drain away, but I disagree and I think it creates a place to moisture to go to and remain. Moisture that gets to the bottom of the pole is already traveling through soil to the bottom of the pole. Once it gets to the bottom, it either has a place to build up and remain with gravel there, or no place to build up without any gravel there because it's all compacted soil. You also have to remember that with a roof and walls protecting the post, no water should be getting to the post at all anyway. The building site should be sloped so water runs away from the building. Posts never rot out from the bottom. They rot out where they come out of the ground. Water sitting at the base of the post causes the rot and if you don't let water puddle around the base of the post, you wont' have any problems. Slope your dirt!!!

Why are you using a scissor truss with your walls already so tall? A more traditional truss will give you more strength and be easier to install. Probably cheaper too, but that's just a guess on my part. Deciding how far apart you want your trusses is up to you. If you go father then 4 ft apart, you will have to use purlins on the edge. If you are going with a shingle roof, you need to remember that your spacing for purlins for the decking cannot exceed 2ft. So you need a lot of purlins, or you get rid of the purlins and put your trusses every 2ft on center. If you are going with metal, then you can go apart as far as you want as long as your purlins are sized correctly. Rule of thumb is the width of the wood in inches is where you want to be in feet. So a 2x8 is the size purlin you want for trusses every 8 ft apart. To hold your purlins in place, you have several options. One is to just add a short piece of 2x4 to the side of your truss that connects to your purlin and holds it 90degrees from the angle of your pitch and gives you something solid to attach it to. Or you can buy a bracket that does this. Or you can use joist hangers between every truss. This is the most expensive way to go, but it gives you the option of having a lower roofline if that's desirable. I like putting my purlins on top of my trusses because that allows me to run them across several trusses and to stagger where they start, which I feel gives me more strength. I also prefer to put my trusses every four feet and use 2x4's on the flat that are 16 feet long for purlins. It's not a right or wrong thing, you have lots of options.

Eddie
 
   / I'd like to build a barn!
  • Thread Starter
#34  
Looking at your plans, I'm wondering about your dimensions. Are you going with shingles or a metal roof? If metal, it comes in three foot widths, so making your roof width based on a multiple of three makes more sense. You can get the panels cut to any length you want, to the inch. Are you going to have eaves or soffits?

Why the 7:12 pitch? It makes the math a little harder and it's at that point it's tough to walk on. 6:12 is the steepest I like to go because that's all I can handle to walk on. With shingles it's pretty good any time, with metal, you have to have clean shoes and the metal has to be dry, otherwise, 6:12 is impossible to walk on. I have a 4:12 pitch on my house with a metal roof and that's easy to walk on any time. With a lower pitch, you can use 16 ft posts inside your barn resting on concrete footings. Just use the brackets that are set into the top of the concrete and bolt the post to the bracket. Then set your exterior posts in the ground for added sheer strength.

I know some builders use laminated 2x's for their posts and they claim they are less likely to twist on you. The real advantage to laminating boards together is that you don't have to cut your notches, which saves a lot of time. The cut the boards where they want the notches and then glue and screw them together. It's faster that way. The negative to laminating posts is that if they are going in the ground, you ABSOLUTELY have to find 2x's that are ground rated. You will not find them at Lowes or Home Depot. I've heard you can special order them, but I've never seen this anywhere myself.

Strength isn't the issue. A 4x4 is plenty strong as a post. The problem with 4x4's and now 4x6's is that the new treatment process make a lot more of them twist then ever before. I only use 6x6's because they remain straight. That is the only reason I have for going up to that size, but it's well worth the extra expense and hassle of handling the extra weight. They are easy enough to notch with a cordless saw for the initial cut, then a cordless sawzall to finish off the cut.

I'm not a fan of anything in the bottom of the hole before putting the post in. I know people say it allows the moisture to drain away, but I disagree and I think it creates a place to moisture to go to and remain. Moisture that gets to the bottom of the pole is already traveling through soil to the bottom of the pole. Once it gets to the bottom, it either has a place to build up and remain with gravel there, or no place to build up without any gravel there because it's all compacted soil. You also have to remember that with a roof and walls protecting the post, no water should be getting to the post at all anyway. The building site should be sloped so water runs away from the building. Posts never rot out from the bottom. They rot out where they come out of the ground. Water sitting at the base of the post causes the rot and if you don't let water puddle around the base of the post, you wont' have any problems. Slope your dirt!!!

Why are you using a scissor truss with your walls already so tall? A more traditional truss will give you more strength and be easier to install. Probably cheaper too, but that's just a guess on my part. Deciding how far apart you want your trusses is up to you. If you go father then 4 ft apart, you will have to use purlins on the edge. If you are going with a shingle roof, you need to remember that your spacing for purlins for the decking cannot exceed 2ft. So you need a lot of purlins, or you get rid of the purlins and put your trusses every 2ft on center. If you are going with metal, then you can go apart as far as you want as long as your purlins are sized correctly. Rule of thumb is the width of the wood in inches is where you want to be in feet. So a 2x8 is the size purlin you want for trusses every 8 ft apart. To hold your purlins in place, you have several options. One is to just add a short piece of 2x4 to the side of your truss that connects to your purlin and holds it 90degrees from the angle of your pitch and gives you something solid to attach it to. Or you can buy a bracket that does this. Or you can use joist hangers between every truss. This is the most expensive way to go, but it gives you the option of having a lower roofline if that's desirable. I like putting my purlins on top of my trusses because that allows me to run them across several trusses and to stagger where they start, which I feel gives me more strength. I also prefer to put my trusses every four feet and use 2x4's on the flat that are 16 feet long for purlins. It's not a right or wrong thing, you have lots of options.

Eddie
Thanks for chiming in Eddie. I appreciate everyone's advice and constructive criticism on here, but I particularly hoping you would chime in given my impression of other posts of yours I've read on here. Thanks for taking the time to write such a long, informative post.
 
   / I'd like to build a barn!
  • Thread Starter
#35  
Looking at your plans, I'm wondering about your dimensions. Are you going with shingles or a metal roof? If metal, it comes in three foot widths, so making your roof width based on a multiple of three makes more sense. You can get the panels cut to any length you want, to the inch. Are you going to have eaves or soffits?

Why the 7:12 pitch? It makes the math a little harder and it's at that point it's tough to walk on. 6:12 is the steepest I like to go because that's all I can handle to walk on. With shingles it's pretty good any time, with metal, you have to have clean shoes and the metal has to be dry, otherwise, 6:12 is impossible to walk on. I have a 4:12 pitch on my house with a metal roof and that's easy to walk on any time. With a lower pitch, you can use 16 ft posts inside your barn resting on concrete footings. Just use the brackets that are set into the top of the concrete and bolt the post to the bracket. Then set your exterior posts in the ground for added sheer strength.

I know some builders use laminated 2x's for their posts and they claim they are less likely to twist on you. The real advantage to laminating boards together is that you don't have to cut your notches, which saves a lot of time. The cut the boards where they want the notches and then glue and screw them together. It's faster that way. The negative to laminating posts is that if they are going in the ground, you ABSOLUTELY have to find 2x's that are ground rated. You will not find them at Lowes or Home Depot. I've heard you can special order them, but I've never seen this anywhere myself.

Strength isn't the issue. A 4x4 is plenty strong as a post. The problem with 4x4's and now 4x6's is that the new treatment process make a lot more of them twist then ever before. I only use 6x6's because they remain straight. That is the only reason I have for going up to that size, but it's well worth the extra expense and hassle of handling the extra weight. They are easy enough to notch with a cordless saw for the initial cut, then a cordless sawzall to finish off the cut.

I'm not a fan of anything in the bottom of the hole before putting the post in. I know people say it allows the moisture to drain away, but I disagree and I think it creates a place to moisture to go to and remain. Moisture that gets to the bottom of the pole is already traveling through soil to the bottom of the pole. Once it gets to the bottom, it either has a place to build up and remain with gravel there, or no place to build up without any gravel there because it's all compacted soil. You also have to remember that with a roof and walls protecting the post, no water should be getting to the post at all anyway. The building site should be sloped so water runs away from the building. Posts never rot out from the bottom. They rot out where they come out of the ground. Water sitting at the base of the post causes the rot and if you don't let water puddle around the base of the post, you wont' have any problems. Slope your dirt!!!

Why are you using a scissor truss with your walls already so tall? A more traditional truss will give you more strength and be easier to install. Probably cheaper too, but that's just a guess on my part. Deciding how far apart you want your trusses is up to you. If you go father then 4 ft apart, you will have to use purlins on the edge. If you are going with a shingle roof, you need to remember that your spacing for purlins for the decking cannot exceed 2ft. So you need a lot of purlins, or you get rid of the purlins and put your trusses every 2ft on center. If you are going with metal, then you can go apart as far as you want as long as your purlins are sized correctly. Rule of thumb is the width of the wood in inches is where you want to be in feet. So a 2x8 is the size purlin you want for trusses every 8 ft apart. To hold your purlins in place, you have several options. One is to just add a short piece of 2x4 to the side of your truss that connects to your purlin and holds it 90degrees from the angle of your pitch and gives you something solid to attach it to. Or you can buy a bracket that does this. Or you can use joist hangers between every truss. This is the most expensive way to go, but it gives you the option of having a lower roofline if that's desirable. I like putting my purlins on top of my trusses because that allows me to run them across several trusses and to stagger where they start, which I feel gives me more strength. I also prefer to put my trusses every four feet and use 2x4's on the flat that are 16 feet long for purlins. It's not a right or wrong thing, you have lots of options.

Eddie
Since I revived this thread a couple of weeks ago, I've been all over the place doing research on options. Not just sizes, but different pitches, scissor vs common truss, permacolumns, sturdi wall brackets, even steel truss/columns. I tend to over analyze things, but a project this big and expensive deserves attention to detail.

As for the roof pitch, I'm trying to match the house's roof pitch, which is 7/12. Of course, depending on orientation and proximity of the barn, 6/12 would probably be fine as well.

I like the idea of scissor trusses for the extra head height. Has nothing to do with agricultural use, but I thought it would be nice for part of the barn to have enough ceiling clearance for the kids to play basketball. regulation is 25', but I figure if I shoot for close to 20' that would be enough for recreation. I guess I could do 18' side walls with common trusses and that might be fine too. The other reason for the head height is to allow for a mezzanine on one half of the barn with a shop below.

I'm still thinking things through. I appreciate the input.
 
   / I'd like to build a barn!
  • Thread Starter
#36  
I'm really torn on options. I've heard over and over again about not building too small. In order to compare "apples to apples" I'm getting quotes on 40x60 and that sometimes sounds huge sometimes sounds right. I'm not a gear head but I have some toys and I like to tinker. I hate leaving equipment outside, too. I'd like a space high and open enough for kids to play basketball. But that doesn't have to be a dedicated space. It could have a tractor parked in the middle of it most of the time.

I dislike the idea of wood in the ground. I know it's proven and will be out of the weather in my application but it still bothers me. I've considered permacolumns but they add so much to the cost over posts alone ($5k) that I may as well go a bit farther and pour a stem wall and stick build.

Then there's steel which has a variety of pros and cons as well...

I'm collecting quotes on different options in the meantime.
 
   / I'd like to build a barn! #37  
Start out getting quotes for poles in the ground. This is by far the cheapest way to go. Then if you have the funds left over, you can upgrade in a variety of ways. Larger roll up door would be at the top of my list. Running water and a bathroom are also very nice to have in a shop. Then more size or height if you really need it. Changing to concrete footings or posts isn't something I'd spend money for, but if you have the extra money to spend and it's what you want, then you can know what it costs over treated posts in the ground.

Is basketball something your boys are actually going to play in the barn or is that just something that sounds like a nice option? My thinking is that the building is going to store stuff and over time, you will have more stuff in there. Whether it's tractor and car stuff, or woodworking tools, or just the Christmas decorations, everything needs to be stored somewhere and once you start storing stuff, it's very hard to open it up for an hour of play.

Instead of building an indoor basketball court, price what it would cost to pour them a cement driveway with a hoop on it.

Eddie
 
   / I'd like to build a barn!
  • Thread Starter
#38  
As always Eddie thanks for the plain speak and direct questions. I'm calling one part of the barn for basketball not so much as just that but as an easy way to convey its purpose as an open area without much obstruction overhead. My wife and I have long planned for some sort of entertaining/recreation area line this. It would be nice too for the kids as they get older.

I am collecting quotes for pole barn, metal, and stick built both finished and if I constructed myself and with help. So far not much difference on pole vs metal.
 
   / I'd like to build a barn! #39  
Any development on your barn build? I have read your entire thread, and find it very informative. As you are planing for the long haul, it takes much to get started on the right foot. Hope your thread will come back to life...:)
 
   / I'd like to build a barn!
  • Thread Starter
#40  
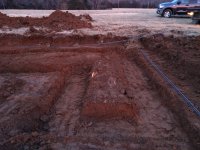
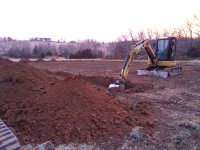
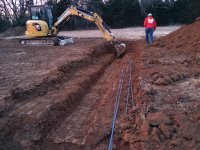
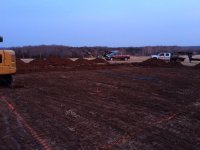
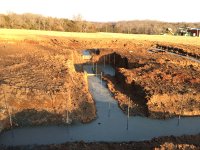
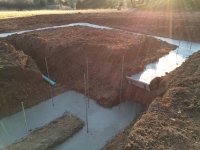
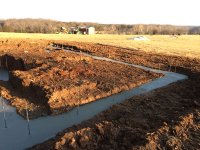
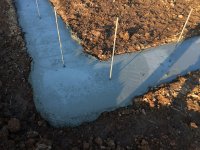
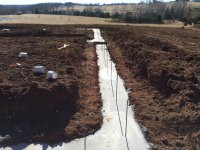
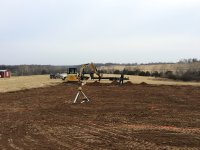
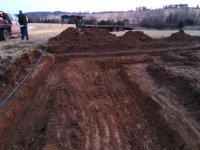
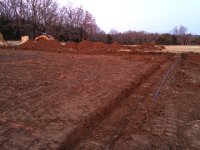
Hello everyone. It's been a while since my last post. And even longer since I posted about building a barn. I guess the name of this thread might not technically be appropriate, since I'm not sure what defines a barn verus a shop/workshop versus a "barndominium". Back in March/April I thought I had it worked out on what I wanted. I even started getting bids on pole barns. But then I had some unpleasant personal and work-related things that came up. Everything got put on hold through the Fall, but then my wife and I decided to kick this back into gear. Using the "Home Designer Pro 2012" program I've mentioned in the past, we drew up plans for a building that is part shop, part living space. Eventually we will build a traditional home on our property. However, the thought of a home mortgage, land mortgage, and construction loan all at once scares me. So our plan is to build a 40'x60' metal-sided, stick built on slab building with a living space in part of it with savings. Based on my research, I know people have done this before, so I can't take credit for it. But the advantages are we'll have a place to live while our home in town sells and our home at the land is being built, we'll be able to do more work ourselves and oversee construction of the home easier since we'll already be living out there, and we'll have a place for guests/in-laws when the house is built. Like many, I considered stick-built vs metal frame vs pole barn. All three have their advantages/disadvantages, but stick-built appeals to me the most as the most familiar. So that's what we're doing. I had also considered a simple structure with an RV parked next to or inside it. My wife vetoed that. We debated a lot on the size of the living space. I know it's going to seem excesive to a lot of you, but happy wife = happy life. unhappy TBN-ers = log my computer off. In the end we decided to measure the rooms that we really use on a daily basis in our current house plus bedrooms and essentially replicate that space. That ended up being 1900 SF. I wish it was smaller, but I have a few consolations. One and most importantly my wife is happy with it. Two is that I don't know how long we'll be there. It may just be a couple years, it may be 10, it may be forever. Three, I'm intentionally making the spaces adaptable. For instance, the downstairs could easily be a handicap-accessible suite. The upstairs could be one big room for storage/entertainement. As it stands, it will be living/kitchen/bath/utility downstairs in a 24x40 space on one end of the building. Above that will be a second floor with 3 bedrooms and a 3/4 bath. There's a "mezzanine" going over part of the shop space level with the second floor that provides for a crafting space for my wife and general storage. And four, is that we're doing everything "builder grade", using coupons, second hand materials, "dent and ding", whatever we can do to save on materials. Plus sweat equity of course. I think that most people on her mean well, but at times I'm not sure how valuable some of the advise on this site tends to be. No offense - many times I agree with posts and many times I learn something. Sometimes I disagree with what is said and it might strengthen my resolve otherwise. But SOMETIMES it makes me doubt myself or frustrates me. To be fair, the last category is the one that I find most troublesome. I have to admit, I debated on whether to post this build on TBN. Part of me wants to just keep going on my own and not share anything. But that said, I have learned a lot on here in teh past. And I enjoyed many posts on here. So I feel like it could be worthwhile to post my progress on this. Obed's "At home in the woods" certainly comes to mind. As long as things don't get out of hand or negative, I'll try to keep posting on the progress and I'll try to be open to CONSTRUCTIVE comments and suggestions. And please no posts that second guess things that I can't reasonably change. I read too many of those on Obed's thread. Whew, sorry for the long post! If you made it that far, then here's the good news: We broke ground last week! Here's pics of the build site and footers. I use my phone exclusively for pics. Most of my posts will be done through that. Sorry in advance for typos and poor formatting.

image-1556682668.jpg
Looking South over worksite after sod has been pushed off to the side. The orange rebar is set "square" and that's what they measured off of.

image-2181401702.jpg
Looking South over the porch area.

image-3716403077.jpg
Looking East along the southern wall of the building. This side of the building is the 40' wall. The living space will be along this wall and have the southern view.

image-3989223957.jpg
Standing basically where the front door will be looking East over the porch area.

image-2556470934.jpg
Looking basically West over the NE corner of the building. This will be the front corner of the shop area. There will be a lean-to that is 12' wide and 40' long along this wall.

image-174716758.jpg
Looking basically North along the "shop" portion of the East wall. This wall is 60' long. There will be a 16' and 9' wide overhead door to this area.

image-889404184.jpg
Standing at the NW corner of the building/shop looking SE over the whole building site. There will be a 7' wide overhead door for a lawnmower and general access in this corner along the West facing wall.

image-188442685.jpg
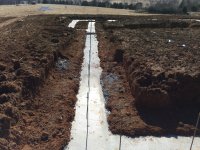
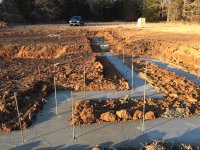
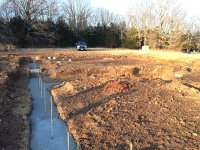
I wasn't there the next day when they poured the footers, but the remaining photos were taken the next afternoon after the footers were poured obviously. This is toward the middle of the building. There's a 40' long wallgoing down the middle of the building that separates the living space from the shop space. There is a stairsell that abuts this wall, and underneath that I have allowed for a 3.5' by 10' storm shelter. We were in Joplin visiting family when the tornado hit in 2011. I will never live in a house without a basement or storm shelter if I can help it.

image-1778694302.jpg
Another view of the storm shelter. There is a drain in the floor that will go out to daylight. If you can't tell from the pictures, the slope of the property is downhill mostly S/SW.

image-1168207121.jpg
Looking SE over the West end of the living space. That's my 10' by 24' shed I built 3 years ago in the distance. I have a make-shift, temporary lean-to with tarp attached to it for my 5083.

image-631625556.jpg
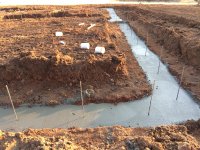
This is the SW corner of the building . It's also the lowest spot and determing the overall elevation of the building. The walls will be 4' at this point. It will need some backfill, but I've got plenty of soil....

image-2596448993.jpg
I thought this was a neat picture. I'm standing at the NE corner looking south over the front of the shop and porch. It's noon and if the rebar is plumb, the building looks pretty much oriented North to South as planned.

image-1853241309.jpg
Looking north over the porch area. The front door would be on the left side of the pic. The porch kind of wraps around the SE corner of the building.

image-1830976100.jpg
Looking north over the living area.

image-1982259385.jpg
Back corner of the shop area looking South.

image-3030435865.jpg
And another view looking south and of the storm shelter.
 

Attachments

  • image-814227329.jpg
    image-814227329.jpg
    738.5 KB · Views: 91
  • image-2927290882.jpg
    image-2927290882.jpg
    828.4 KB · Views: 115
Last edited:

Tractor & Equipment Auctions

2021 POLARIS RANGER 4x4 UTV (A51222)
2021 POLARIS...
2025 Swict 78in Bucket Skid Steer Attachment (A50322)
2025 Swict 78in...
2013 FREIGHTLINER CASCADIA DAY CAB (A51219)
2013 FREIGHTLINER...
2020 CASE CX37C EXCAVATOR (A51242)
2020 CASE CX37C...
2016 Mercedes-Benz GL-Class SUV (A50324)
2016 Mercedes-Benz...
2013 LONE STAR TRAILER MFG. (A50854)
2013 LONE STAR...
 
Top