Kub top link bracket repair
Ok let's see if I can comment on some of the great replies and at the same time explain what we have done.
Scott vt. A welder confirmed what I remember from an old heat & beat class the cast iron is not the easiest thing to weld without warp/crack . Also concern re: seals and gaskets getting too hot. Nope it's not the way it was coming from the factory. Old saying,"
everybody drives a used car."
Two bit score- you'll see JB weld in the details.
Polo1665 - afraid deeper drill / tap might penetrate the oil res.
Dqdave1 - did not choose to try drill / tap
DanD78 - see above did not want to weld
Diamondpilot - I'm not sure what broke mine, I had been using the PH but the chard was a little rusty so must have been earlier.
Duh,
I need to pay closer attention when modifying. Keep reading
Firemanpat2910 - thanks but I choose to stay away from welding on that part.
Sandman2234 - I have access to a part time machine shop so you'll see what we did
Sackett2 - used part of you solution.
Wayne H - Old tight wad here - and not confident mechanic - was guestamated labor $250 still have to get new seals etc.
greenmule - thanks for your input.
Valley - removing to weld ? See above
Akfish - Old tight wad here - and not confident mechanic
Cocre - you reaffirmed my memory (50 years ago)about heating cast iron before welding
tommu56 - that is close to what I did.
Polo1665 - going to see if the plate with three good bolts works
kcarl - thanks, more confirmation re: pre-heat cast iron
Now if I haven't worn out my welcome here is where it stands now and a brief description of what was done.
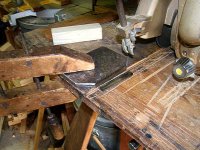
Found a 1/2 " steel plate almost the right size.
Had to nip corners and then remove 1/4" on one side.
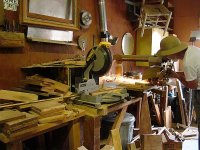
How do you like my combo wood/metal radial arm saw?
Took many passes to cut. Did not even get too hot to touch.
I know it's a mess, but if I didn't save stuff I would not have had the 1/2inch plate.


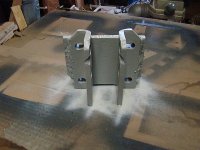
Cut wooden spacer to clamp between the brackets for welding NOT good idea.
Wooden spacer let the brackets move when welding and holes were too far apart.
Back to milling machine. Elongate holes 1/8 inch to sides.
Purchase 4 new bolts 1/2 inch longer & 4 lock washers.
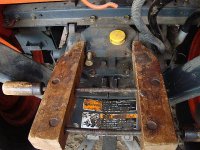
 Now I know what caused the break. When I added TnT I did not check clearances close. The top cylinder was forcing the brackets apart. Your can see the evidence in the picture. I have cut out a little extra now and the top cylinder does not touch when lifted to the max.
So dear friends, when you start mixing and mis-matching be sure to check all movement from one extreme to the next.
JB weld broken chard back in place with bolt covered with paste wax to keep JB out of threads
Tighten bolts in three unbroken holes then tighten bolt in JB welded hole just snug twist of the wrist. Had used 4 minute JB did hold.

Hooked up the tiller with the three bolts holding and looks OK for now.
Thanks again for all your concern and replies.


