John Deere 317 project!

   / John Deere 317 project!
  • Thread Starter
#101  
Thanks!! Yesterday I did my very first welding!!! I need to slow down and I missed the cracks a few times but ive never done it. So i fixed the cracks on the muffler shroud, and I'm going to go cut a curve out of it so it will line up and not hit the muffler pipe. Got my hubcap too! One small dent the size of a quarter, but you cant see it.
 

Attachments

  • image-2386020915.jpg
    image-2386020915.jpg
    356.7 KB · Views: 219
   / John Deere 317 project!
  • Thread Starter
#102  
Today I figured out why the muffler was hitting the shroud, had it on too far, so I pulled it out 1/4 of an inch, and got the firewall ad shroud painted black. Should be putting tins on tomorrow!!! ( grille, hinge mount, green posts)
 

Attachments

  • image-2075651455.jpg
    image-2075651455.jpg
    356.9 KB · Views: 292
  • image-3883625186.jpg
    image-3883625186.jpg
    402 KB · Views: 1,440
   / John Deere 317 project! #103  
That tractor is coming along very nicely. I'm excited to see the finished project now. Keep up the good work.
 
   / John Deere 317 project!
  • Thread Starter
#104  
Today was not a good day, the new name for it is Murphys Law. I managed to lose a bolt for the throttle linkage, looled for it forever, in the tractor since it didnt hit the floor, found it an hour later and scratched the front arms, gouged the pto sheave, trying to put the grille in and I cant remember how anything goes back together on the front... Super aggrevated this afternoon, also put a chip in the hood yesterday. Right on the front corner on the top.
 

Attachments

  • image-122487130.jpg
    image-122487130.jpg
    410.7 KB · Views: 267
  • image-139532186.jpg
    image-139532186.jpg
    440 KB · Views: 295
   / John Deere 317 project! #105  
Today was not a good day, the new name for it is Murphys Law. I managed to lose a bolt for the throttle linkage, looled for it forever, in the tractor since it didnt hit the floor, found it an hour later and scratched the front arms, gouged the pto sheave, trying to put the grille in and I cant remember how anything goes back together on the front... Super aggrevated this afternoon, also put a chip in the hood yesterday. Right on the front corner on the top.

I heard of a guy around here who took a hammer to the door frame of his brand new truck. He put a small dent in it where you could only see it when the door was open. The friend of mine who was telling me the story asked what the **** the guy was doing. The guy said, "Now it has the first dent. I don't have to worry anymore about putting the first dent in it."

Now that you've put a few scratches in the paint assembling your newly re-built tractor you can use it without worrying about putting the first scratch on it.
 
   / John Deere 317 project!
  • Thread Starter
#106  
I heard of a guy around here who took a hammer to the door frame of his brand new truck. He put a small dent in it where you could only see it when the door was open. The friend of mine who was telling me the story asked what the **** the guy was doing. The guy said, "Now it has the first dent. I don't have to worry anymore about putting the first dent in it."

Now that you've put a few scratches in the paint assembling your newly re-built tractor you can use it without worrying about putting the first scratch on it.

True, I just dont like looking at them. Everytime i look at the part, I can see the gouge/scratch.:mad: I guess I can get over myself......:confused2:
 
   / John Deere 317 project! #107  
True, I just dont like looking at them. Everytime i look at the part, I can see the gouge/scratch.:mad: I guess I can get over myself......:confused2:

Just don't throw out any left over paint yet. Once you get it all put together you can go back and touch up the visibile scratches.
 
   / John Deere 317 project!
  • Thread Starter
#108  
Just don't throw out any left over paint yet. Once you get it all put together you can go back and touch up the visibile scratches.

Well, It all hardened up. I think I will get some JD touch up paint, and if it doesnt match, Oh well, at least it wont be white!:thumbsup:
Had a halfway decent afternoon, tweakin the grille, put the battery pan back in, got the battery hooked up, fixed a wire so now it starts again, put the firewall back on and wasted my time cutting a notch in it. Also fixed the throttle linkage, and thats about it.:cool:
 

Attachments

  • image-445650404.jpg
    image-445650404.jpg
    424.4 KB · Views: 273
  • image-3358203225.jpg
    image-3358203225.jpg
    377.2 KB · Views: 210
  • image-3229529690.jpg
    image-3229529690.jpg
    432 KB · Views: 206
  • image-13779656.jpg
    image-13779656.jpg
    390.2 KB · Views: 183
  • image-3500014895.jpg
    image-3500014895.jpg
    398.6 KB · Views: 180
  • image-1720638577.jpg
    image-1720638577.jpg
    372.5 KB · Views: 165
  • image-3056558821.jpg
    image-3056558821.jpg
    401.7 KB · Views: 200
  • image-2593768579.jpg
    image-2593768579.jpg
    371.3 KB · Views: 198
  • image-1355132435.jpg
    image-1355132435.jpg
    408.8 KB · Views: 207
  • image-1917419443.jpg
    image-1917419443.jpg
    435.5 KB · Views: 202
  • image-138466707.jpg
    image-138466707.jpg
    400.4 KB · Views: 194
  • image-2861079899.jpg
    image-2861079899.jpg
    344.7 KB · Views: 201
Last edited:
   / John Deere 317 project! #109  
Looking good.

Chris
 
   / John Deere 317 project!
  • Thread Starter
#110  
Tonight, I put the hood and side panels on, that was a task, broke a stud off the inside of the hood where the hinge goes, fixed that. Then we got everything figured out, latched it, and now it wont unlatch!!!! Only my luck. I had a pretty sh!tty day today. Went to tsc and looked at tires. I think im gonna stick to my deestones and maybe vredenstein.....
 

Attachments

  • image-1631115083.jpg
    image-1631115083.jpg
    303.5 KB · Views: 238
  • image-3910182706.jpg
    image-3910182706.jpg
    325.1 KB · Views: 190
   / John Deere 317 project! #111  
No need for progressive tires beyond turf tires, without the flame kit..

Looks good. I have had fun watching you build this thing... :)
 
   / John Deere 317 project!
  • Thread Starter
#112  
My dad went and got my ext. springs today, wish i could have gone and had a decal kit ordered, oh well, going to go up there tomorrow
 
   / John Deere 317 project!
  • Thread Starter
#113  
Okay, got my brakes put back together, had to take the backing plate, cut the weld to where the linkage connects to the rod, turned and rewelded it so it lines up, got all my springs and shoes back on, and got the rest of the rims sanded, there will be no sandblasting. Also, there are the original front hubcaps, and a glimpse of the deck. Once this is done i will get that out and start the process. Also, where is the V-Belt? Did some research, I think the deck for this is a 50". Thats what deck came up several times when i searched the belt number.....
 

Attachments

  • image-4128511497.jpg
    image-4128511497.jpg
    364 KB · Views: 168
  • image-3089795595.jpg
    image-3089795595.jpg
    400.4 KB · Views: 206
  • image-3887463501.jpg
    image-3887463501.jpg
    427.3 KB · Views: 184
  • image-406073839.jpg
    image-406073839.jpg
    372.3 KB · Views: 211
  • image-3103600356.jpg
    image-3103600356.jpg
    356.6 KB · Views: 201
  • image-211279375.jpg
    image-211279375.jpg
    352.4 KB · Views: 205
  • image-3502996840.jpg
    image-3502996840.jpg
    353.9 KB · Views: 256
Last edited:
   / John Deere 317 project!
  • Thread Starter
#114  
Im beginning to think that my grandfather ordered the wrong belt, and thats why it was never used. Anyways, today i started to polish the hubcaps, boy I hate that job. I used mothers aluminum polish, works good, but you have to put some ***** into it. I guess tomorrow, he wants to get something out to try and get the rust and pitting out. I have a feeling of what it is......
 

Attachments

  • image-4199116089.jpg
    image-4199116089.jpg
    362.2 KB · Views: 205
  • image-1190858436.jpg
    image-1190858436.jpg
    361.8 KB · Views: 178
  • image-3848159753.jpg
    image-3848159753.jpg
    371.2 KB · Views: 158
  • image-2927212784.jpg
    image-2927212784.jpg
    367.6 KB · Views: 179
  • image-1393541339.jpg
    image-1393541339.jpg
    356.6 KB · Views: 168
  • image-2192777348.jpg
    image-2192777348.jpg
    393.8 KB · Views: 176
  • image-2162528199.jpg
    image-2162528199.jpg
    407.3 KB · Views: 225
  • image-3187878001.jpg
    image-3187878001.jpg
    375.1 KB · Views: 304
   / John Deere 317 project!
  • Thread Starter
#115  
Put the fenders on yesterday, And tonight when I get home from school I will post pics, and try to do better on the hubcaps.......
Just took it for a joyride, I need to tighten the throttle, and boy does it ride hard!!! I got 2 videos but it wont let me post them from thid ipod. I'll try to plug it in the cp when i get home. I guess my grandfather is going to get his rims powdercoated since they are chipping badly, and he is going so send mine aswell! Not sure when that will be, and I will have to dismount before then..... Also, it needs a tuneup, you have to choke it every start, and it runs on 1 cyl sometimes and even quits! Bad at skippin too, I'm not a fan of these "kold blooded kohlers". Also put my gm emblems on.
 

Attachments

  • image-1309751642.jpg
    image-1309751642.jpg
    440 KB · Views: 176
  • image-3238613344.jpg
    image-3238613344.jpg
    363.5 KB · Views: 172
  • image-976617931.jpg
    image-976617931.jpg
    391.9 KB · Views: 188
  • image-732392126.jpg
    image-732392126.jpg
    391 KB · Views: 170
  • image-38112644.jpg
    image-38112644.jpg
    476.1 KB · Views: 209
  • image-4061044572.jpg
    image-4061044572.jpg
    437.7 KB · Views: 222
  • image-1341372104.jpg
    image-1341372104.jpg
    344.9 KB · Views: 166
  • image-369824569.jpg
    image-369824569.jpg
    399 KB · Views: 208
  • image-740249076.jpg
    image-740249076.jpg
    388.2 KB · Views: 202
  • image-417048605.jpg
    image-417048605.jpg
    394.7 KB · Views: 179
  • image-3428016478.jpg
    image-3428016478.jpg
    404.5 KB · Views: 190
  • image-1100535936.jpg
    image-1100535936.jpg
    363.8 KB · Views: 179
Last edited:
   / John Deere 317 project!
  • Thread Starter
#116  
Did just about nothing this afternoon, tried to push the fenders back so they wont rub on the left panel, that didnt work. Then I got into the throttle linkage at the carb, the lever where the cable attaches, moves side to side, so i put another washer in there and tightened it. Nope didnt work. The spring down in there that goes onto this lever is loose. Any ideas on how I can get that spring to have tension? We had to paint part of a log truck, so I now have a oiece that will cover the whole tractor, and then some! I put the tires/ hubcaps on so they were out of the way.
 

Attachments

  • image-782980501.jpg
    image-782980501.jpg
    317 KB · Views: 207
  • image-216466891.jpg
    image-216466891.jpg
    303.7 KB · Views: 197
  • image-2854761156.jpg
    image-2854761156.jpg
    413.8 KB · Views: 199
  • image-352642116.jpg
    image-352642116.jpg
    406.4 KB · Views: 183
  • image-3078965050.jpg
    image-3078965050.jpg
    429.1 KB · Views: 181
   / John Deere 317 project! #117  
It's looking like a tractor again.

I'd strongly recommend installing the steering wheel before you take it for a test drive :laughing:
 
   / John Deere 317 project!
  • Thread Starter
#118  
Iplayfarmer said:
It's looking like a tractor again.

I'd strongly recommend installing the steering wheel before you take it for a test drive :laughing:

Haha i took it off so I could put the plastic over it.
 
   / John Deere 317 project! #119  
bump ^ for update
 
   / John Deere 317 project!
  • Thread Starter
#120  
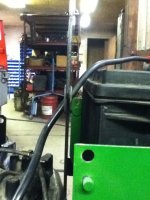
Okay, Its been awhile since my last post, so I figured I would make one this AM while I had time. Nothing has really changed all that much on this project in the time since my last post, so I'm just going to wing it. My dad has been busy working late these past couple of weeks to get jobs farther along, and hasnt had time to give me advice or help me with stuff, like that throttle. As for things I still need to do, here it goes.
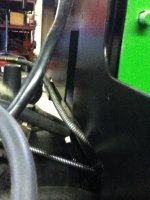
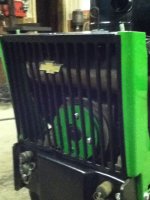
Paint rims,clean the carb,fix throttle,get the decal kit/put them on,polish hubcaps more,decide what I'm doing about tires,fix paint on side panels and hood, clean light lense, fix headlights?,figure out T-light wiring and get tailights,get touch up paint to fix chips in various spots. After all that, I'll grease everything once its done. Then It is on to the deck and belt tensioner.:confused2:
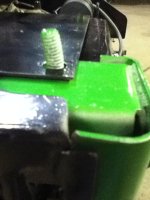
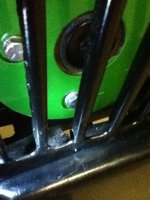
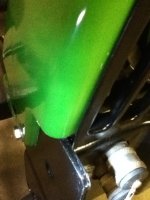
Okay, back onto what went on. So, I ended up getting some chrome paint to put on the insde of the hood behind the headlight lense. Well, I taped a decent amount of area off, and started to paint. I didnt think of the paint blowing off to the sides, so I covered the top of the side panels, tiny bit of the hood, and top of the bumper plate.:mad: 
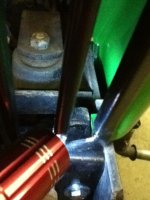
To top it off, the paint wasnt thickening up ,even after I shook the can for about a minute. It wouldnt stick to the top, and ran down to the bottom. As you can see from the pics.:mur: Also, if you run the tractor, because of the engine heat it gets tacky.:confused2: On easter, my cousins wanted me to take the tractor out and go for rides. So I did, and my grandfather let me take out the 80 cart! That is still his. Anyways, we put the three of them in the cart and toured around for about half an hour. Anyways, Heres the pics!:thumbsup:
 

Attachments

  • image-3351014016.jpg
    image-3351014016.jpg
    373.8 KB · Views: 178
  • image-3663731743.jpg
    image-3663731743.jpg
    374.5 KB · Views: 173
  • image-945711060.jpg
    image-945711060.jpg
    353.7 KB · Views: 191
  • image-4155321824.jpg
    image-4155321824.jpg
    333.3 KB · Views: 182
  • image-4216304998.jpg
    image-4216304998.jpg
    343.1 KB · Views: 156
  • image-736339878.jpg
    image-736339878.jpg
    346.3 KB · Views: 151
  • image-506088901.jpg
    image-506088901.jpg
    403.6 KB · Views: 167
  • image-1393551749.jpg
    image-1393551749.jpg
    390.5 KB · Views: 173
  • image-2927345496.jpg
    image-2927345496.jpg
    352.6 KB · Views: 151
  • image-3633547720.jpg
    image-3633547720.jpg
    458.7 KB · Views: 164
  • image-3154251484.jpg
    image-3154251484.jpg
    412.6 KB · Views: 163
  • image-2500348074.jpg
    image-2500348074.jpg
    368.4 KB · Views: 142
  • image-227991782.jpg
    image-227991782.jpg
    372.7 KB · Views: 160
  • image-3766768186.jpg
    image-3766768186.jpg
    353.9 KB · Views: 159
  • image-2153308302.jpg
    image-2153308302.jpg
    386.7 KB · Views: 162
  • image-72875466.jpg
    image-72875466.jpg
    330.9 KB · Views: 147
  • image-428519432.jpg
    image-428519432.jpg
    285.1 KB · Views: 157
  • image-3529493391.jpg
    image-3529493391.jpg
    320 KB · Views: 157
  • image-1927647759.jpg
    image-1927647759.jpg
    377.7 KB · Views: 158
  • image-3653652382.jpg
    image-3653652382.jpg
    363.4 KB · Views: 245
  • image-1238099594.jpg
    image-1238099594.jpg
    458 KB · Views: 158
  • image-517781706.jpg
    image-517781706.jpg
    433.9 KB · Views: 184
  • image-2581003432.jpg
    image-2581003432.jpg
    403.9 KB · Views: 185
  • image-2716486344.jpg
    image-2716486344.jpg
    314.9 KB · Views: 159
  • image-1809468345.jpg
    image-1809468345.jpg
    352.3 KB · Views: 163
  • image-1691668818.jpg
    image-1691668818.jpg
    373.3 KB · Views: 165
  • image-4120144997.jpg
    image-4120144997.jpg
    381.8 KB · Views: 150

Tractor & Equipment Auctions

2019 CATERPILLAR 326FL EXCAVATOR (A60429)
2019 CATERPILLAR...
1999 GMC C7500 S/A Dump Truck (A59230)
1999 GMC C7500 S/A...
2014 Nissan Juke SUV (A59231)
2014 Nissan Juke...
207273 (A52708)
207273 (A52708)
2012 MCLAUGLIN/VERMEER V800AWXT VACUUM EXCAVATOR (A57880)
2012...
208320 (A58375)
208320 (A58375)
 
Top