You are using an out of date browser. It may not display this or other websites correctly.
You should upgrade or use an alternative browser.
You should upgrade or use an alternative browser.
Kama TS254C Fuses ratings
- Thread starter grsr3
- Start date
- Views: 5421
More options
Who Replied?
/ Kama TS254C Fuses ratings
#1
TedLaRue
Gold Member
Your post is a bit vague, but I gather that you distrust Chinese fuses and want to replace them with in-line fuses (probably also made in China).
An amp meter wouldn't help you. You need to read the ampere rating on each Chinese fuse and replace it with an in-line fuse of the same rating. You may find the amp ratings in the owner's manual for your machine/vehicle.
An amp meter wouldn't help you. You need to read the ampere rating on each Chinese fuse and replace it with an in-line fuse of the same rating. You may find the amp ratings in the owner's manual for your machine/vehicle.
Hi Ted,
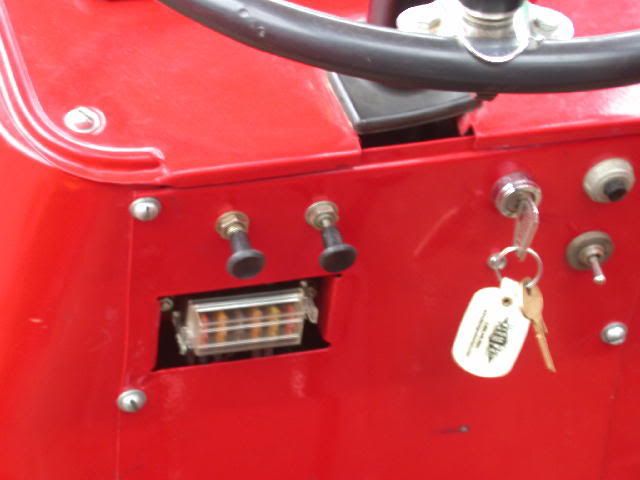
The amp ratings are not listed in the parts book or the owners manual. The plastic body of some of the fuses must have over heated at one point and show signs of melting apart. Don't know why?? Everything works ok except for intermittent disconnects at some of those faulty fuses. How do you take an amp reading across fuses without an amp meter?? When i read amps on my house wiring I close the meter jaws around the line when the load is working. That gives you the amp draw. How do you do it across the fuse??
Geo.
zogman
Silver Member
- Joined
- Sep 2, 2005
- Messages
- 113
- Location
- Lexington, South Carolina
- Tractor
- Kama TS354C & Ferguson TO20
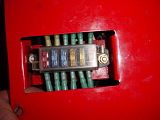
Make sure the extra fuse wire is not wrapped around the fuse body in effect shorting the fuse out and melting the fuse body. Mine did that when I first got it.
TedLaRue
Gold Member
Geo,
In Googling around I find that you aren't the only one having fuse problems with a Kama. Your old fuses may have overheated if the connection from the fuse to the socket was corroded or had high resistance for some reason. High resistance causes high power dissipation (heat). For example, if you're drawing 10 amps through a connection with only 1 ohm resistance, that connection will get as hot as a 100 watt light bulb. (power = amps x amps x ohms)
It sounds like you were thinking about measuring the current flowing through the fuse and using that to guess the correct size. That might work, but if at all possible you should find the correct size fuse from a manual or maybe someone here owns the same machine and can read the amp rating from their fuses. I'm astounded that neither your owner's manual nor the parts book lists the fuse size. And I assume you can't read the fuse size from the fuse itself? See below for some information that might help.
My concern about the amp meter is this: The amp rating of fuses/breakers is not based on the current load. The size of the fuse is determined by the size of the wire that the fuse supplies. The fuse protects the wire from overheating. A given gauge wire can carry a certain amount of current (its ampacity) before it gets dangerously hot. The fuse must be at or below that rating. Of course the wire size is based on the maximum anticipated current load, so in that sense the fuse size does relate to the anticipated load.
You might find this link helpful:
CHINESE TRACTOR OWNERS CLUB FORUM
In case that link dies, here's one post from it, posted by gugliols:
===================
I dont have a Kama but I did a search and came up with the color code and amps for chinese fuses. This may help?
http://hyyongwei.en.alibaba.com/product/50215354/51175393/fuse/Fuse.html
Color and current (A)
1) Grey: 2
2) Violet: 3
3) Pink: 4
4) Orange: 5
5) Brown: 7.5
6) Red: 10
7) Blue: 15
8) Yellow: 20
9) Clear: 25
10) Green: 30
11) Purple: 35
===================
TedLaRue
Gold Member
grsr3 said:When i read amps on my house wiring I close the meter jaws around the line when the load is working. That gives you the amp draw. How do you do it across the fuse??
You used a clamp on ammeter for your AC house wiring. If you have access to a clamp on DC meter (not all of them handle DC) then you simply clamp it over the line leaving the fuse. If you can't find that wire, you could remove the fuse, insert a jumper wire where the fuse was, and clamp over that jumper wire. If you have a regular volt-ohm meter, you would set the meter to DC amps, remove the fuse, and insert the probes where the fuse was, and measure the current (red probe on the battery side, black on the load side). This forces the current to run through your meter where it can be measured. Be sure your volt-ohm meter will handle the current you're expecting. Some have a 10amp maximum, for example. There are other methods like using a shunt resistor, but you probably don't want to mess with that.
GuglioLS
Veteran Member
- Joined
- Feb 13, 2005
- Messages
- 1,155
- Location
- Edgewood, NM USA
- Tractor
- Jinma 354, 1953 Ford NAA Golden Jubilee, Komatsu Bulldozer
Geo,
A BIG FYI -
Here is a thread where I did some electrical upgrades to Rob's (3RRL) Kama 554.
The OEM wire wound fuse block was removed, then a new modern ATC type fuse block was installed in it's place. The entire thread is long but here is a link to pick up where the fuse block install was documented -
CLICK HERE then scroll down to reply # 139 and pick it up from there.
My hope is it will illustrate that with a little determination, there is nothing that can't be updated or otherwise modified on these tractors to suit your needs or desires ---
As a sample here is what was done: Please forgive me if I get carried away
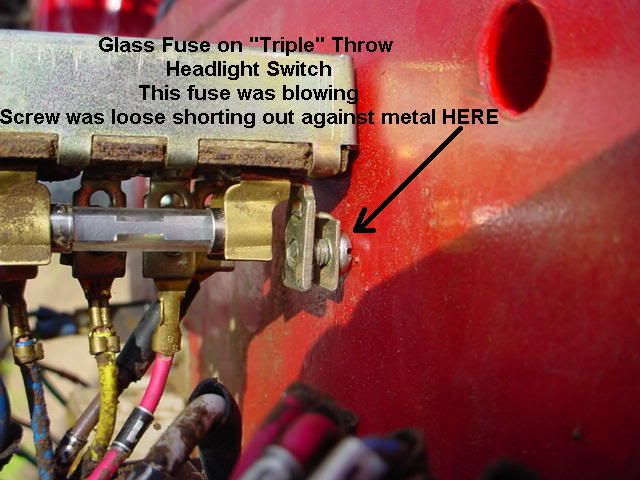
Rob was having some problems with a glass fuse blowing on his headlight switch. After looking at the switch I found a loose screw that was shorting out against the lower dash panel.

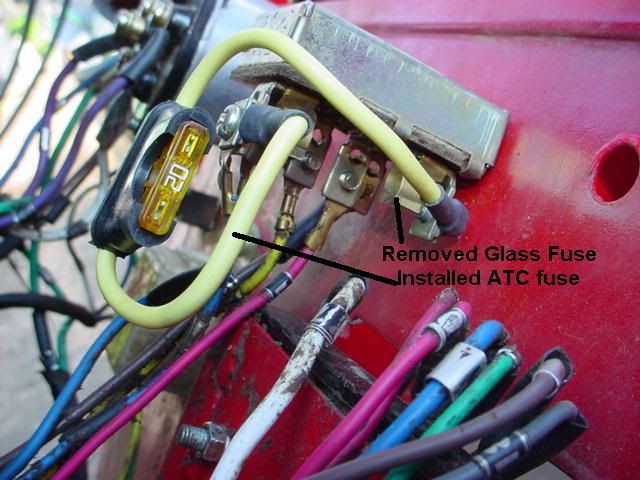
I am not a fan of Glass fuses in tractors so I removed the glass fuse and installed a 20 amp ATC fuse:
Since these repairs only took a short while. It was time for some serious rewiring.
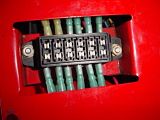
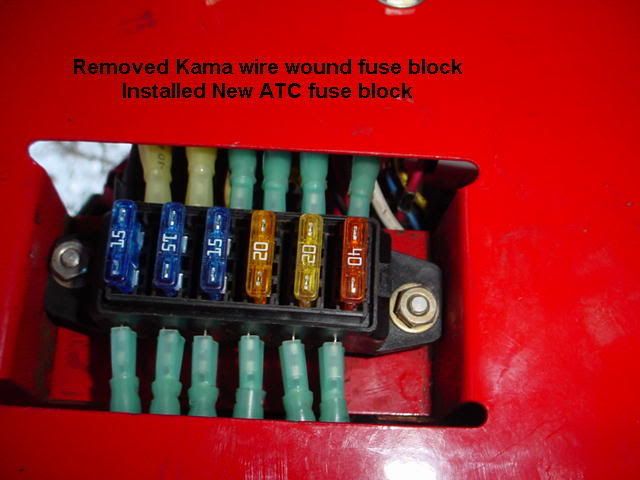
I removed the OEM wire-wound fuse block to install a nice new genuine ATC fuse block:

Larry
A BIG FYI -
Here is a thread where I did some electrical upgrades to Rob's (3RRL) Kama 554.
The OEM wire wound fuse block was removed, then a new modern ATC type fuse block was installed in it's place. The entire thread is long but here is a link to pick up where the fuse block install was documented -
CLICK HERE then scroll down to reply # 139 and pick it up from there.
My hope is it will illustrate that with a little determination, there is nothing that can't be updated or otherwise modified on these tractors to suit your needs or desires ---
As a sample here is what was done: Please forgive me if I get carried away
Rob was having some problems with a glass fuse blowing on his headlight switch. After looking at the switch I found a loose screw that was shorting out against the lower dash panel.
I am not a fan of Glass fuses in tractors so I removed the glass fuse and installed a 20 amp ATC fuse:
Since these repairs only took a short while. It was time for some serious rewiring.
I removed the OEM wire-wound fuse block to install a nice new genuine ATC fuse block:

Larry
GuglioLS
Veteran Member
- Joined
- Feb 13, 2005
- Messages
- 1,155
- Location
- Edgewood, NM USA
- Tractor
- Jinma 354, 1953 Ford NAA Golden Jubilee, Komatsu Bulldozer
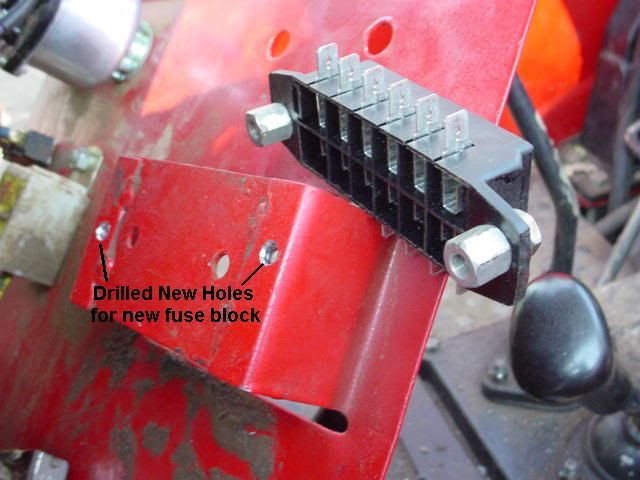
The New ATC fuse block fit PERFECTLY after drilling two new holes. I also installed two standoffs to move the new fuse block away from the metal and more forward for ease of fuse inspection and replacement.
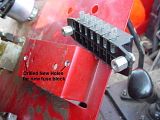
Here it is installed ready for wires:
Larry
Here it is installed ready for wires:

Larry
GuglioLS
Veteran Member
- Joined
- Feb 13, 2005
- Messages
- 1,155
- Location
- Edgewood, NM USA
- Tractor
- Jinma 354, 1953 Ford NAA Golden Jubilee, Komatsu Bulldozer
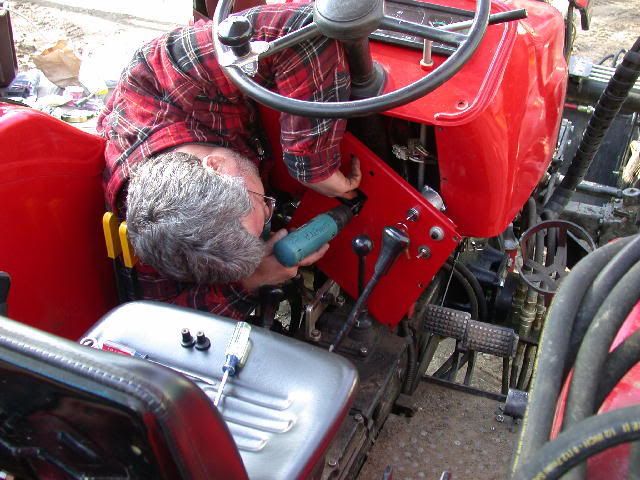
Even though Rob's Kama is very large, getting to all the wires was a little difficult. Here I am being a "contortionist"
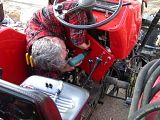
Rob could not bear to look at me cutting off all those wires.
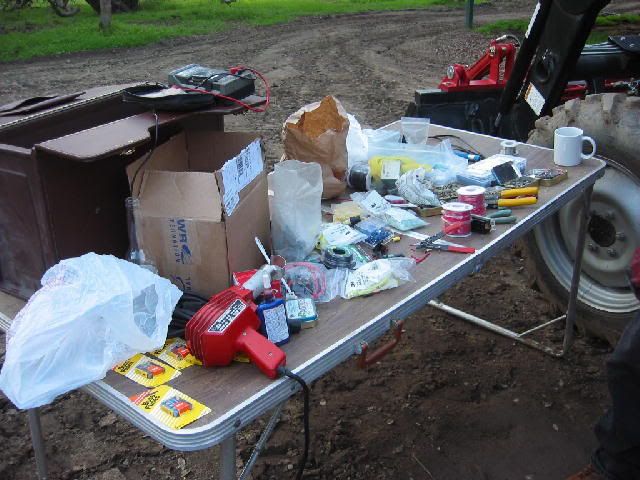
Here are all the "Medical" Supplies:

And your's truly having the time of my life -

Larry
Rob could not bear to look at me cutting off all those wires.
Here are all the "Medical" Supplies:
And your's truly having the time of my life -

Larry
GuglioLS
Veteran Member
- Joined
- Feb 13, 2005
- Messages
- 1,155
- Location
- Edgewood, NM USA
- Tractor
- Jinma 354, 1953 Ford NAA Golden Jubilee, Komatsu Bulldozer
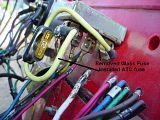
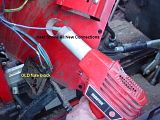
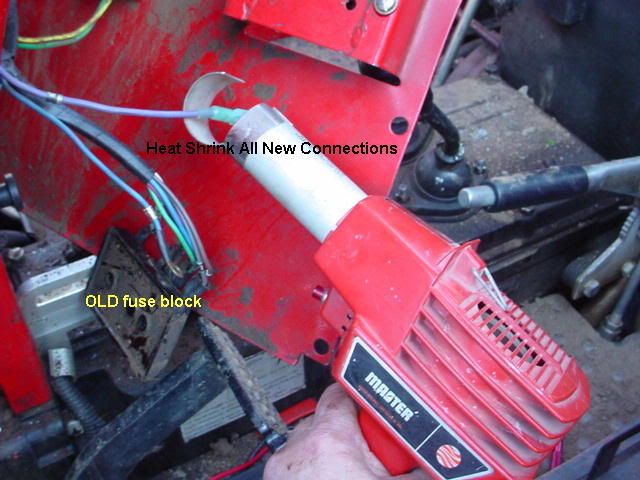
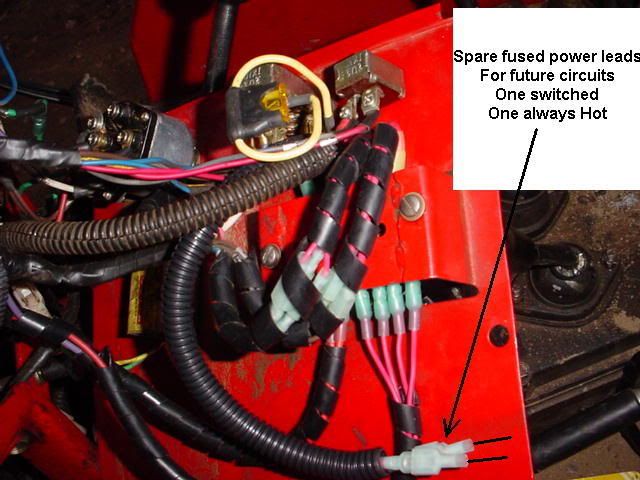
Here are all the new connections on the back of the new fuse block. I had to extend the existing wires for more slack. So I added some self sealing heat shrink push connectors to short wire extensions. Since the new fuse block had 2 spare fuse positions I added some short wires so that Rob could add additional lights and or a cigarette lighter at a future date.
One of the spare circuits is Hot all the time and one is switched on & off by the main key switch.

This is a front view of the new fuse block:
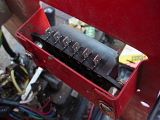
Here are the fuses installed:

And this one shows the water proof fuse cover in place. It has an o-ring seal:
Larry
One of the spare circuits is Hot all the time and one is switched on & off by the main key switch.
This is a front view of the new fuse block:

Here are the fuses installed:
And this one shows the water proof fuse cover in place. It has an o-ring seal:

Larry
GuglioLS
Veteran Member
- Joined
- Feb 13, 2005
- Messages
- 1,155
- Location
- Edgewood, NM USA
- Tractor
- Jinma 354, 1953 Ford NAA Golden Jubilee, Komatsu Bulldozer
After testing every circuit with my amp meter, I was able to determine the exact amperage fuse required for all the circuits.
NOTE - YES you can us a clamp on DC amp meter to measure current draw.
I then installed the appropriate fuse to protect the circuit being fused.
Here is the finished product:
And FINALLY we are done! Rob is a VERY HAPPY CAMPER!
He was so happy Rob Almost hugged me - so I changed the subject to Hunting.

This was a great time and I wrote all about my other Camp adventures with Rob & Loretta at there 3RRL camp in the appropriate section.
Larry
3RRL
Super Member
- Joined
- Oct 20, 2005
- Messages
- 6,931
- Tractor
- 55HP 4WD KAMA 554 and 4 x 4 Jinma 284
George,
You'll notice how Larry didn't want to get out of my tractor.
You'll notice how Larry didn't want to get out of my tractor.
That's great stuff guys.
I decided to keep the old block in place and use in-line fuses because someone wrote that it would be hard to find a fuse block that would fit in the same spot, and it would not be good to drill more holes, and other negative stuff. But after seeing that installation I think I'll go with the new block.
ALSO--------------You must tell how you post those pictures on this site. I've been using the Photobucket site but would rather post pics directly here like you do.
Thanks again for the help---Geo.
3RRL
Super Member
- Joined
- Oct 20, 2005
- Messages
- 6,931
- Tractor
- 55HP 4WD KAMA 554 and 4 x 4 Jinma 284
Off topic...
Posting thumbnails is easy and I'll walk you through it.... lol ... But I needed help too figuring it out, and Larry helped me.
Ok so first thing is to re-size your photos to make them around 50 to 100 kb size. This will help the dial up members. I use a Windows Picture Re-sizer that is free to download.
When I open or preview a picture, right mouse click on the photo and one of the options will be to "resize" the photo. I usually use "medium" setting and large only for more detailed ones. Here is the link to the Windows Picture resizer.
Window Picture Resizer
Or do a search if you don't have XP for the computer system you have.
When you re-size a picture, it makes a copy of the original photo so it is not lost. I keep the resized pictures in a separate folder under TBN photos, under individual folders for each project.
OK, once you have a folder of resized pictures, you can log on to your photobucket account and also log onto TBN and to the thread you want. So now you have 2 web browsers open at the same time.
Minimize the TBN and go to the photobucket web browser. I have made sub albums in the photobucket account for each project too. Make one for "Boxblade" and click on it so you are in that sub account and upload those pictures to that.
Once the photos are upload, they will all appear as thumbnails on your screen. Below each photo is a square box with the name of the photo and also 4 types of formats, but disregard those.
What you want to do is check that box by the photo name by clicking on the box. You can check more than one photo at a time if you want. It will highlight the photo(s) and puts a red border around it.
After checking the box(s), scroll all the way down to the bottom of the page. There is an option to select/unselect all and also 3 rectangles below that.
You want to click on the one that says "Generate HTML and IMG code".
Click on it and another screen pops up with 5 more rectangles.
You want the 3rd rectangle down that says "IMG clickable thumbnails for message boards - recommended".
Highlight all that is in the box and Right mouseclick on it to copy it.
Then open up the TBN browser and "paste" the information into the reply with another right mouse click.
When you "Pre-view" your reply, you should see a clickable thumbnail in it along with your written post. That is why I don't use the "quick reply" so I can check my spelling and also my photos.
Click on the preview thumbnail and it should open up. If good, post it.
Sounds harder then it really is, but like anything else, once you get used to it it's not bad at all. lol ... Like tying your shoe laces the first few times.
Try that and keep these instructions in your computer for reference. I should keep a copy of these instructions too, since many TBN'ers have asked me how to do this.
OK George, Best regards
blegdleg
Member
The New ATC fuse block fit PERFECTLY after drilling two new holes. I also installed two standoffs to move the new fuse block away from the metal and more forward for ease of fuse inspection and replacement.
Here it is installed ready for wires:
Larry
i would really like to know where you got this atc fuse box or what is the part no. for it. I know this is an old message. but maybe you are still there
Bennie

Here are some similar links:
- Replies
- 14
- Views
- 4K