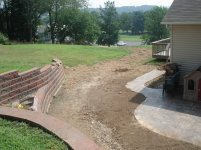
My first of many Retaining Walls to tame my slope - DIY

   / My first of many Retaining Walls to tame my slope - DIY #21  
I've got the same blocks, they are definitely fun to work with. :tired: When I bought my home, it already had a 60' wall in place, approx 7' high. I then added another 50', and must've handled 6 pallets of those :censored: blocks 3 or 4 times.....:muttering:

You are right, the fabric goes horizontally into the fill behind the gravel every couple courses. After filling these blocks with gravel and the locking lip setback, I dont think any amount of years/hrdraulic pressure will move em!
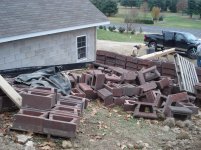
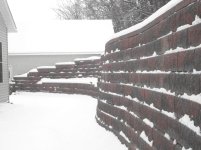
906.jpg925.jpg

Good luck!
 
   / My first of many Retaining Walls to tame my slope - DIY
  • Thread Starter
#22  
I think the filter fabric can also serve as a tie back. Say every other course? I believe I have seen plans in which the fabric sits on the block. the next block anchors it in place.

For sure the comment on the hydraulic pressure is a good one. If you don't get that water away from the wall you are in trouble IMO. I also question why you are compacting the crushed stone? You want voids in the stone to hold water and let it drop down to your drain pipe. And you are correct on 3/4" as I believe 3/4" holds most amont of water per cu. ft.
The Geotextile 'fabric' that is recommended by the manufacturer is more of a plastic mesh than a fabric. I am not doing this as I am staying within the 4ft limit of a gravity wall with a 6 degree set back dictated by the block design. I will however in other walls probably need an 'engineer's stamp' to be legal. The pisser here is that I am an engineer, just not licensed in Washington. Oh well.. a second opinion on design is never a bad thing!

I am compacting the 3/4in clean crushed stone because this is per the block manufacturer install specs! Once compacted there is still plenty of drainage potential. The compacting I assume will help alleviate any settling and shifting that might occur until the surrounding soil reaches equilibrium states (summer/winter).

Not to be argumentative... but I am not understanding your logic about 3/4in 'holding' the most amount of water. If the drain below will carry the water away, it will theoretically be able to drain faster as there is more voids... right?
 
   / My first of many Retaining Walls to tame my slope - DIY
  • Thread Starter
#23  
I've got the same blocks, they are definitely fun to work with. :tired: When I bought my home, it already had a 60' wall in place, approx 7' high. I then added another 50', and must've handled 6 pallets of those :censored: blocks 3 or 4 times.....:muttering:

You are right, the fabric goes horizontally into the fill behind the gravel every couple courses. After filling these blocks with gravel and the locking lip setback, I dont think any amount of years/hrdraulic pressure will move em!

View attachment 327195View attachment 327196

Good luck!

Very nice! So I know for sure you know what I am dealing with! :salute:

I am learning about positioning the pallets... I did a good job of spacing them to minimize individual transport to the wall but I have close quarters to work with my tractor navigating the gravel pile, fill dirt pile and the pallets. Need to give this even more thought on next of many walls.

Did you need to get a permit/engineer sign off? We do here if it is more than 4 feet wall height.
 
Last edited:
   / My first of many Retaining Walls to tame my slope - DIY
  • Thread Starter
#24  
An idea for pulling the plywood...


I then could loop the rope around the two "handles" I had made on the sheet of plywood (the rope fits into the slot created from the shorter block that's between the wider block and the plywood sheet). I brought both rope ends up and attached to the draw bar.

Cross section of rope in slot.

-----
---O
----------------------------

It worked - I was able to pull the plywood by the handles screwed to the plywood.

You may be able to create handles like this, only on the width side of the plywood. Then after you fill a foot or so, pull the plywood up by a rope looped around the handles with the two rope ends on your loader hooks.

View attachment 326932

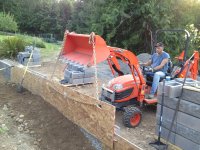
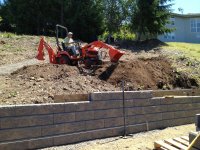
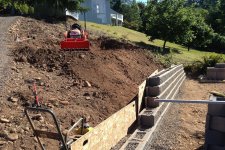
Mr. GolfAddict, I wish I was on the course with you... instead I was laying (not slaying) a course (actually 4). I ended up ripping two sheets of plywood and created 4 2x8ft backer boards with handles. This gave me almost 32ft of temporary retention wall while I filled gravel directly behind the wall and backfilled with fill dirt on the hillside. Worked beautifully. We were able to pull some of the panels out by hand but if not, I rigged up the chain as you suggested. Worked perfectly! Here is a pic...

IMG_3937.JPG

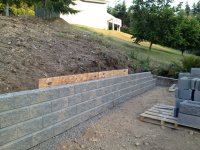
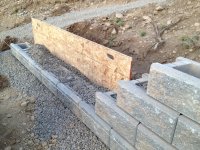
Here are a couple more showing some progress...

IMG_3941.JPG IMG_3943.JPG

More to come!
 
   / My first of many Retaining Walls to tame my slope - DIY #25  
   / My first of many Retaining Walls to tame my slope - DIY #26  
Mr. GolfAddict, I wish I was on the course with you... instead I was laying (not slaying) a course (actually 4). I ended up ripping two sheets of plywood and created 4 2x8ft backer boards with handles. This gave me almost 32ft of temporary retention wall while I filled gravel directly behind the wall and backfilled with fill dirt on the hillside. Worked beautifully. We were able to pull some of the panels out by hand but if not, I rigged up the chain as you suggested. Worked perfectly! Here is a pic...

View attachment 327201

Here are a couple more showing some progress...

View attachment 327202 View attachment 327203

More to come!

Man I got to say that's nothing short of impressive. That's turning out very very nice. That BX is paying off big time. Now I bet your wondering how you ever got by without it.
Nice work. :thumbsup:
 
   / My first of many Retaining Walls to tame my slope - DIY
  • Thread Starter
#27  
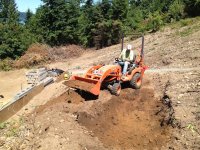
Update... got pretty much a full day in today. Spent a lot of it working on the slope above the wall. Two reasons... first I wanted to create another fairly level area behind/above the wall to reduce the 'surcharge' (pressure) on the wall, and second... I kind of screwed up and built the first row too far from the cut in causing me to need for a lot of backfill. Next wall will be built as close to the cut as possible. Because of all the grading work, I didn't lay as much block as I had hoped but do have 5 courses for much of the wall. One more to go and then the cap. Still scratching my head on the ends and how they will transition.

IMG_3947.JPG IMG_3959.jpg

If you look close you can see the wall isn't perfect. A bit of rise in the middle which seemed to get magnified as the wall got higher. I really didn't notice it until the 4th course. Note the vibratory Plate I had to rent this morning from HD. I didn't want to pay the $90 rental for a day but last night after I got to thinking hard about it and the wife reading some do's and don'ts, I was guilted into it. I guess I am glad I did.

IMG_3329.jpg

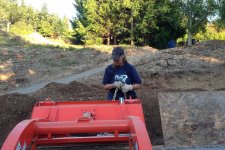
The Chain gang... I needed to pull the backer boards out with chains because after using the compactor, the boards were too tough to pull by hand. First time my wife wrestled with chains :D

IMG_3332.jpg

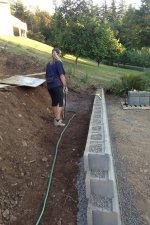
Okay my BH (not Back Hoe... Better Half! :D ) watering down the soil. She also read that the soil when compacting should be not too dry and not too wet, so she took it upon herself to moisten the backfill. It is fairly straight and level but as they say... spend a lot of time getting the first course perfect!

IMG_3335.jpg
 
   / My first of many Retaining Walls to tame my slope - DIY #28  
Very nice! So I know for sure you know what I am dealing with! :salute:

Did you need to get a permit/engineer sign off? We do here if it is more than 4 feet wall height.


No permit or sign off....the 7' wall was done when I bought the home. I extended it out past the garage I built all being under 5'....very lenient building codes here. ;)
Here's a pic of the transition on one end....you have to buy the end square blocks, and step down.....then of course the caps.....

1007.jpg

Great place there! I used to live in Port Angeles, still have some land and a house there. Love it up there.....Do you have a view of the Hood Canal??
 
   / My first of many Retaining Walls to tame my slope - DIY
  • Thread Starter
#29  
No permit or sign off....the 7' wall was done when I bought the home. I extended it out past the garage I built all being under 5'....very lenient building codes here. ;)
Here's a pic of the transition on one end....you have to buy the end square blocks, and step down.....then of course the caps.....

View attachment 327389

Great place there! I used to live in Port Angeles, still have some land and a house there. Love it up there.....Do you have a view of the Hood Canal??

Uh... sort of! :D These might give you a hint of why I just cleared some more of my slope in front of me and am building retaining walls!

IMG_0996.JPG IMG_1413.jpg IMG_1805.jpg IMG_1674.jpg IMG_1414_2.jpg
 
   / My first of many Retaining Walls to tame my slope - DIY #30  
Trying to keep all walls at 4ft to avoid engineering, permits... But the two that will be near the top of slope next to house might be 6ft or so and I will need professional help then.

I have laid Alan blocks before.

You might as well get the engineering done now. The cost will be to design the highest wall you intend on having, and it is the same whether you build one wall or 1000 walls. Get it done at the beginning and if you want to make a wall higher than 4', you can.

I have used the geogrid (looks like mesh) and you need to be careful. For many types the strength is higher in the machine direction than in the perpendicular direction. Think of a roll of toilet paper, the machine direction is the direction that you pull the paper off the roll. The perpendicular direction is the direction of the perforations. There are different brands, be sure you know what you have and its specifications and that they meet the requirements for the design you are using.

The strength being higher in the machine direction means that you should cut many short lengths of geogrid, and run them perpendicular to the wall instead of unrolling the grid along the wall. Ask if that doesn't make sense to you and I will make up a drawing.

You are correct in making the base from 3/4 minus gravel, this is what the plan calls for. Drain rock goes behind the wall. I have used the plywood idea and if you burry the plywood more than about 12" you will not be able to lift it properly.

Don't rent a plate compactor from Home Depot at $90 a shot, go down to HF and buy one for about $500. I have one and it has been working well for 5 years or so.
 
 
Top