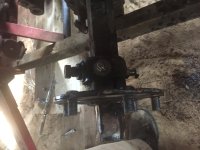
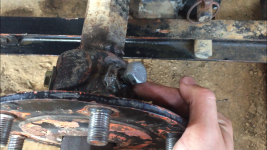
New Owner of a YM165

   / New Owner of a YM165 #141  
Those hubs look to have been repaired before. Have they got plates or something welded inside them? It might explain only 1 bolt hole.
 
   / New Owner of a YM165 #143  
you have some wood working skills too I see. Especially the drink holder.! And some good engineering skills and brain to think how to attach all that stuff.

Always looking for something to tinker with.
 
   / New Owner of a YM165 #144  
I would say if you have the original rims then the bolt pattern would be the same, if not, who knows.

If there not the original hubs like California mentioned (not saying they are or are not at this point) and are Kubota they would be Kubota rims as well since yanmar and Kubota have different patterns. That would be easier to salvage the rims to then to reweld the centers like California had to do to run the Kubota rims on his tractor.
 
   / New Owner of a YM165 #145  
... reweld the centers like California had to do to run the Kubota rims on his tractor.
No, they are 2-piece wheels. The orange color Kubota rims bolted up properly to my black Yanmar centers. Nothing welded. See my sig photo below.

Those oversize rear tires (and matching rims) were on the YM240 when I bought it. I don't know why. The previous owner must have gotten a better deal on them compared to just buying the correct tires.
 
   / New Owner of a YM165 #146  
Yes. The problem is that the hub is too loose. There is too much slop between the hub and the axle shaft. I can physically rock the hub back and forth with my hands when the cinch bolt is tightened very tight and the through-bolt is tightened.

Last night I tried to shim the hub with some sheet metal. Did not worked as I had hoped. Later this week I am going to drill and tap a new hole and add a second cinch bolt.

I doubt that shims of any kind will work - the reason being the same reason why there are always a minimum of two hub-fixing bolts on this type of axle hub. It's pretty much a guarantee that no manufacturer is going to use a single bolt in that kind of application. If the manufacturer has design engineers who let that through, their tractors are going to have bigger problems.

I like the drilling and tapping idea. If you are going that way my guess is you have access to a good vise and drill press or maybe a milling machine as well as some metal-working skills. It wouldn't surprise me if you learn more about that hub when you actually get it off and in your hand. Let us know.

Depending on the hole diameter, once you clean things up it might be that you can enlarge and tap the existing pin hole for a second fixing bolt and then drill a dedicated pin hole in the hub somewhere out of plane with the fixing bolts. I wouldn't mind seeing the replacement pin hole slightly closer to the wheel rim if necessary - although I do understand why it is better practice to put it out beyond the fixing bolts. For the hub-fixing bolts I'd either match the metric size or use a similar sized bolt in Imperial (US) thread.

On my YM165D the two hub-fixing bolts are 12mm grade 5 with about 35mm threaded length and a 19mm head. That's a common metric size....and very similar in size & holding capacity to a regular old 1/2" UNC bolt in grade 5 or better with a 3/4" head. Just for S&G, using the metric size gives you about one extra thread over the engaged length in the hub, but the UNC thread form compensates by being a bit stronger in shear.

For holding the bolt torque against backing out, I really like the standard stout spring and washer setup over having the alternative of using a jamb nut against the hub. But those fixing bolts definitely need help to hold against working loose. If it were mine I'd use regular Loktite in the threads plus either the spring or the jam nut. And I'd do that right from the start. Not even give them a chance to work loose. I'll post some info on hub bolt torque in a new thread.

BTW, the stock pin is 10mm diameter....just over a 3/8" US bolt size.
Good Luck,
rScotty
 
   / New Owner of a YM165
  • Thread Starter
#147  
I doubt that shims of any kind will work - the reason being the same reason why there are always a minimum of two hub-fixing bolts on this type of axle hub. It's pretty much a guarantee that no manufacturer is going to use a single bolt in that kind of application. If the manufacturer has design engineers who let that through, their tractors are going to have bigger problems.

I like the drilling and tapping idea. If you are going that way my guess is you have access to a good vise and drill press or maybe a milling machine as well as some metal-working skills. It wouldn't surprise me if you learn more about that hub when you actually get it off and in your hand. Let us know.

Depending on the hole diameter, once you clean things up it might be that you can enlarge and tap the existing pin hole for a second fixing bolt and then drill a dedicated pin hole in the hub somewhere out of plane with the fixing bolts. I wouldn't mind seeing the replacement pin hole slightly closer to the wheel rim if necessary - although I do understand why it is better practice to put it out beyond the fixing bolts. For the hub-fixing bolts I'd either match the metric size or use a similar sized bolt in Imperial (US) thread.

On my YM165D the two hub-fixing bolts are 12mm grade 5 with about 35mm threaded length and a 19mm head. That's a common metric size....and very similar in size & holding capacity to a regular old 1/2" UNC bolt in grade 5 or better with a 3/4" head. Just for S&G, using the metric size gives you about one extra thread over the engaged length in the hub, but the UNC thread form compensates by being a bit stronger in shear.

For holding the bolt torque against backing out, I really like the standard stout spring and washer setup over having the alternative of using a jamb nut against the hub. But those fixing bolts definitely need help to hold against working loose. If it were mine I'd use regular Loktite in the threads plus either the spring or the jam nut. And I'd do that right from the start. Not even give them a chance to work loose. I'll post some info on hub bolt torque in a new thread.

BTW, the stock pin is 10mm diameter....just over a 3/8" US bolt size.
Good Luck,
rScotty

Yep, the sheet metal shims did not work at all.

Funny you say that, I have very rudimentary metal working skills :thumbsup:. I'm typically better when working with wood. But I've pretty much come to the conclusion that I can learn anything if I put my head to it lol. I don't consider myself overly-mechanically inclined, but if I put enough thought into it, I can usually figure it out. I had never owned or operated a tractor before in my life and my first tractor was a non-running Massey Ferguson 35. In my opinion it was a pretty good one to start out with because it was pretty simple to work on. I ended up doing a lot of work to that tractor myself (dialing in the ignition system, installing a new water pump, new thermostat, etc etc).

Anyways, borrowed a tap set last night from my father in law. He only had SAE so I will be tapping it 1/2". Planning to work on it some tonight after work and this weekend. Going to pick up nuts and bolts after work. Have to make time in between there for anniversary dinner with my wife though :p.

I am considering adding 2 new cinch bolts on each hub, for a total of 3 + through-pin. Once I get the hubs off and look at them I will decide.

I'll try to get some pictures for you guys along the way, but I usually get carried away and forget.
 
   / New Owner of a YM165 #148  
Yep, the sheet metal shims did not work at all.

Funny you say that, I have very rudimentary metal working skills :thumbsup:. I'm typically better when working with wood. But I've pretty much come to the conclusion that I can learn anything if I put my head to it lol. I don't consider myself overly-mechanically inclined, but if I put enough thought into it, I can usually figure it out. I had never owned or operated a tractor before in my life and my first tractor was a non-running Massey Ferguson 35. In my opinion it was a pretty good one to start out with because it was pretty simple to work on. I ended up doing a lot of work to that tractor myself (dialing in the ignition system, installing a new water pump, new thermostat, etc etc).

Anyways, borrowed a tap set last night from my father in law. He only had SAE so I will be tapping it 1/2". Planning to work on it some tonight after work and this weekend. Going to pick up nuts and bolts after work. Have to make time in between there for anniversary dinner with my wife though :p.

I am considering adding 2 new cinch bolts on each hub, for a total of 3 + through-pin. Once I get the hubs off and look at them I will decide.

I'll try to get some pictures for you guys along the way, but I usually get carried away and forget.

I have the same problem with taking pictures. Always wished I took more, but hard to stop and do so.

The key to tapping is drilling a straight perpendicular hole with parallel sides and then to hold the tap straight and perpendicular as well. And the key to doing that is a really rigid mount for the part - as well as using either a drill press or mill. Not that you can't do it all by hand drill and eyeball, but it is sure best if you can clamp things rigidly. You can do it by hand....but it takes touch and luck. I've even gone so far as to make a 1" thick pilot block out of alum. or wood to insure that the drill and tap get a straight shot.

THE TAP DRILL FOR A UNC 1/2" bolt is 27/64". I would use UNC, rather than UNF. If you don't have that size bit , you'll need to get one. Half inch won't do for this purpose. Sneak up on the final drill size.

And use a T handle tap wrench. There's a lot of torque required cutting half inch threads. When the tap taper starts in, be sure to keep it straight and perpendicular. Then once it begins to cut full depth threads back it out every turn or two to clear the chips. You'll be able to tell by the force required when it is time to clear the chips. That T handle tap wrench helps a lot to keep the tap straight. Very difficult to keep it going straight using a regular wrench..... too much uneven side force.

But in spite of these cautions, there is no reason why you can't cut threads by hand perfectly well. It's all in keeping things going true.
good luck,
rScotty
 
   / New Owner of a YM165
  • Thread Starter
#149  
Quick update on the wheel hub situation:

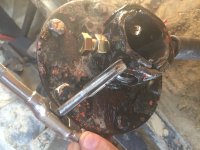
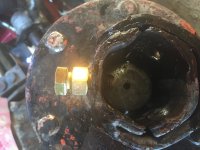
I added 1 new cinch bolt to each hub. I used a 1/2" fine thread grade 8 bolt, with a grade 8 nut. The hubs drilled and tapped just fine (I think), but it seemed that the metal was either too soft, or not thick enough, or a combination of both, to support the pressure when cranking down on the bolt. So I had my father in law weld the nut to the hub over top of the threaded hole. I did add some JB Weld to the nut on the passenger side hub to give it some extra strength because we thought that weld may not have penetrated as well.

I also drilled a small indentation into the axle shaft so that the bolt would have a place to rest when tightened down. I may have to go back and make this indentation a little deeper to give the bolt a good purchase. But we shall see. For now, I am a lot more confident with how the hubs are attached to the tractor.

Here's a quick video recap I made for the process. It's basically the same thing that I just typed out here:

Fixing Wheel Hub on a Tractor - YouTube

Here's some pictures:

IMG_3843.JPG

IMG_3844.JPG

IMG_3845.JPG

IMG_3900.PNG
 

Tractor & Equipment Auctions

2009 Chevrolet Cobalt Sedan (A46684)
2009 Chevrolet...
NEW BUlk Lot Of 5/16 Chain Slings (A48289)
NEW BUlk Lot Of...
Chery 7' 16 Drawer Workbench (Blue) (A47307)
Chery 7' 16 Drawer...
2016 Toyota Prius Hatchback (A46684)
2016 Toyota Prius...
2009 Freightliner Columbia 120  10-Speed, Mercedes MBE4000, 6x4 (A48561)
2009 Freightliner...
2015 LEDWELL LW48 HTHT2 48FT  HYDRATAIL TRAILER (A45677)
2015 LEDWELL LW48...
 
Top