PTO chipper

   / PTO chipper #21  
Cheap. Hope it isn't.
I hope so too. Either way I'll let every one know.
I'd seen stuff about the Farmers Helper chipper and was going to get that one. But I'm slow to spend that much money with out a lot of research (about a year), then found this. Took a lot of searching to find reviews, seemed like more were positive on this one. Everything else I'll have to find out about the hard way.
 
   / PTO chipper #22  
I got some photos this morning.

Here's a view showing the zerks on the rear of the machine:
a01-rear-view.jpg


The two upper red arrows point to the zerks on the rear of the flywheel shaft and the jack shaft. I mis-remembered last night, it's the rear jack shaft bearing that easy, and the front one that's difficult. The green arrow points to the hole you are supposed to use to access the front bearing zerk. The lower red arrow points to my relocated zerk for that bearing.

Below is a closeup of the opening you are supposed to use to access the zerk on the front of the jack shaft. It looks pretty big, but there was an angle zerk there, and it was so close to the edge of the opening I couldn't get a grease gun on it. I didn't have any tools that could enlarge it with the zerk in place, and after taking it out I couldn't reach back behind the pulley to get it back in anyway. The shaft had rusted enough that moving the pulley seemed like a challenge I wasn't up to.

You can see here the adapter that replaced that zerk, with the end of the extension hose screwed in to it. I couldn't get a photo of the hose itself without removing the belt guards, but you can see again the zerk at the end of it at the lower right corner of the photo.

a05-closeup-jack-shaft-rear.jpg


Below is a view of the extended zerk on the bearing on the front of the flywheel shaft. It pointed straight up, so straight pipe brings it up through the belt guard. The hard part was collecting nipples and couplers of the right length to come to the height I wanted. Local auto parts stores didn't have much selection, so I had to go to two of them to get the right length. It required an adapter to get from the 6mm threads on the bearing to the 1/8" nipples I could find. Locating the hole was "interesting," but it worked fine. I drilled a small hole, cut and X to the corners, then folded over the edges to avoid the raw sheet metal edges.

a06-flywheel-shaft-front-extended.jpg
 
   / PTO chipper
  • Thread Starter
#23  
I got some photos this morning.

Here's a view showing the zerks on the rear of the machine:
View attachment 693853

The two upper red arrows point to the zerks on the rear of the flywheel shaft and the jack shaft. I mis-remembered last night, it's the rear jack shaft bearing that easy, and the front one that's difficult. The green arrow points to the hole you are supposed to use to access the front bearing zerk. The lower red arrow points to my relocated zerk for that bearing.

Below is a closeup of the opening you are supposed to use to access the zerk on the front of the jack shaft. It looks pretty big, but there was an angle zerk there, and it was so close to the edge of the opening I couldn't get a grease gun on it. I didn't have any tools that could enlarge it with the zerk in place, and after taking it out I couldn't reach back behind the pulley to get it back in anyway. The shaft had rusted enough that moving the pulley seemed like a challenge I wasn't up to.

You can see here the adapter that replaced that zerk, with the end of the extension hose screwed in to it. I couldn't get a photo of the hose itself without removing the belt guards, but you can see again the zerk at the end of it at the lower right corner of the photo.

View attachment 693854

Below is a view of the extended zerk on the bearing on the front of the flywheel shaft. It pointed straight up, so straight pipe brings it up through the belt guard. The hard part was collecting nipples and couplers of the right length to come to the height I wanted. Local auto parts stores didn't have much selection, so I had to go to two of them to get the right length. It required an adapter to get from the 6mm threads on the bearing to the 1/8" nipples I could find. Locating the hole was "interesting," but it worked fine. I drilled a small hole, cut and X to the corners, then folded over the edges to avoid the raw sheet metal edges.

View attachment 693858
 
   / PTO chipper
  • Thread Starter
#24  
Terry, I can't thank you enough for taking the time to do all of this!
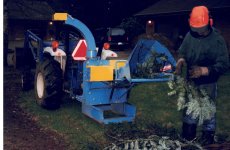
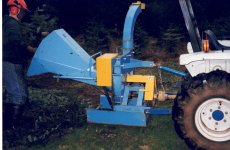
What a project that was, but you only had to do it once! I bet the designer of the chipper never had to greese it😂. I'm in the middle of doing my winter clean after wind storms, but will tackle this project next month. Love this chipper, it's a workhorse! Stay safe out there!✌🏻
 
   / PTO chipper #25  
You're welcome, Alan.

Winter's not over here, so it will probably another month before I break it out and make the rounds chipping winter's "prunings" and blowing the chips into the woods.

Yes, it's a great chipper for individual use. I'd want auto feed for commercial use, but no need to mess with that for occasional cleanup on a 12-acre homestead.
 
   / PTO chipper #26  
I have what could be called the great grandfather of your chipper, a BushHog 5+" chipper shredder. The chipper/shredders have gone through a lot of companies, but BushHog never made them, just rebadged. Echo owned 'em for a while, but I think sold them off. Here's a tip that might help you. Keeping the chipper knives razor sharp is a huge help in getting the job done. Sharpening chipper knives is a job best left to professionals, but I've had very good luck with - starting with new blades, dressing them on a flat metal diamond "stone." I doubt it would work much if you wait until the blades are really dull, but I try to get at them every 5 -10 hours of chipping time, preferably the lower. My machine requires a huge amount of time and effort to remover the 20 or so nuts and bolts to get at the knives. I hope on the newer ones like yours they made it easier to access the knives. Mine have only one edge, so they are not reversible like the ones on the new machines.
 
   / PTO chipper #27  
The old Bush Hog chipper/shredders were a major pain to get to the blades. That, and the lack of a blower, were the reason I got rid of mine and replaced it with the Bear Cat. On it removing one bolt allows the top half of the chamber to swing aside, and the blades are right there.

I sharpen mine quite successfully with a Tormek wet sharpening system, which has jigs to hold the angle steady. They've gotten pretty pricey, but I see there is a cheap imitation available at the big box stores for less money. I have no idea how well those would work.
 
   / PTO chipper #28  
I will definitely keep an eye on the edge. I don't have any idea at this time how big of a PITA it will be to adjust the clearance though.
I watched a video on an arborist web site that claimed a 39 degree angle on the blades was better and lasted longer.
Any body have any experience with this?
 
   / PTO chipper #29  
I just measured the original angle and sharpened to the same. I don't recall what it was. I don't think I've ever adjusted the clearance.

It's pretty easy to know when it needs sharpening -- when you find yourself having to push straight stuff into the chipper it's time. Trouble is it happens gradually, so you suddenly realize you've been working harder than necessary. How long that takes depends greatly on what you're chipping. Dry hard stuff wears them down.
 
   / PTO chipper #30  
I've never had my own chipper, so I'm new to this stuff.
Don't you have to remove the blades to sharpen them?
If you remove the blades, how do you know what gap to leave?
I guess I'll find out.
 
 
Top