Putting Split Rail Fence in

   / Putting Split Rail Fence in #21  
Up here the fence would shift the first spring. We've got heavy clay soil and a pretty brutal freeze/thaw cycle. Even a 3 foot white picket fence that will never have more stress than the occasional cat sitting on it gets 3 foot deep holes when I build it. I don't like warranty calls.

Yep, there's a heck of a difference in our latitudes. Frost depth where I live is only a few inches even in a cold winter, and our winters are very dry with only occasional light snow. A big snow here would be 6-8". OTOH, we often get some very destructive ice storms caused by freezing rain, so chain saws, candles, backup wood stoves, and generators are standard equipment for most rural homes.
 
   / Putting Split Rail Fence in #22  
I found I could dig 3 or 4 holes ahead, but put them up one section at a time. My rails are around 11' long, holes were spaced about 10'6" or so. Also, if you can get locust, get it. The PT pine posts doesn't last as long. I do have some pine posts that are now 10 yrs old, but a couple have rotted off at the ground. I also marked my posts where I wanted them to be at ground level, then would adjust the hole. I just plant my posts in dirt, nothing else. I did put one post in a plastic sleeve, so I can pull the rails and take it out do drive thru if I need to. I've used this for delivery semi's to pull out onto my road without having to back out, I easily pull 1 post and they can drive out thru the yard.
 
   / Putting Split Rail Fence in #23  
While my split rail fences are mostly decorative, they stand the test of times.

I drive 'T' bars in with my homemade post pounder.
Then I wire the rails onto the "T' bars.
Next I wire add , front and back, my false posts for looks.
Also I sometimes cheat and use spikes or nails to fasten the false 1/2 posts in place.

With the 'T' bars I don't worry about frost heaves or rot and honestly, you need to get real close to notice my cheating.

Occasionally I can't drive the 'T' s as deep as I want so I merely hacksaw the protrusions off.

I even split my own cedars for the rails. (good exercise)
 
   / Putting Split Rail Fence in #24  
I like the look of weathered split natural red cedar, don't like the machine-made look of treated rail fencing, and locust posts are not available in my area. I wouldn't mind using old fashioned Abe Lincoln style laid rail fence, but mowing and trimming then becomes a real chore and I'm sort of a neat freak where mowing is concerned. So I'm probably going to stick with cedar split rail, but would like to make the posts last longer between replacements.

I always do the drainage gravel thing in the bottom of post holes (works well and also is a handy way to equalize post top heights as you go), but still end up in several years with rot, invariably right at ground level or slightly below. Next time I'm thinking of painting all the new posts with a broad 10"-12" band of heated black asphalt roofing compound, centered at ground level. Anybody tried this?

BTW, Buckeyefarmer, great idea on post in a plastic sleeve for an access opening for trucks, etc. I'll keep that one in mind for future use!
 
   / Putting Split Rail Fence in #25  
posts rot at ground level.
 
   / Putting Split Rail Fence in #26  
Just a warning: Split rail fence will eventually rot. Trust me, I know. ;)
 
   / Putting Split Rail Fence in #27  
I dunno, putting in fence this time of year, east of Pittsburgh. I think even if the ground can be worked due to the cold weather we've had, the frost will more than likely push the posts out of the ground.

Maybe it's just me, but, I think I would wait til late spring or summer.
 
   / Putting Split Rail Fence in #28  
I like the look of weathered split natural red cedar, don't like the machine-made look of treated rail fencing, and locust posts are not available in my area. I wouldn't mind using old fashioned Abe Lincoln style laid rail fence, but mowing and trimming then becomes a real chore and I'm sort of a neat freak where mowing is concerned. So I'm probably going to stick with cedar split rail, but would like to make the posts last longer between replacements.

I always do the drainage gravel thing in the bottom of post holes (works well and also is a handy way to equalize post top heights as you go), but still end up in several years with rot, invariably right at ground level or slightly below. Next time I'm thinking of painting all the new posts with a broad 10"-12" band of heated black asphalt roofing compound, centered at ground level. Anybody tried this?

BTW, Buckeyefarmer, great idea on post in a plastic sleeve for an access opening for trucks, etc. I'll keep that one in mind for future use!
I haven't tried that on fence posts, but what I did do in the trailer I had at one time was .........mixed gasoline with roofing tar(to thin it down), then brushed that onto T111 siding that extended from the trailer to about 4 inches into the ground. 5 years later the T111 looked like new, above and below ground.

But if I was to do what you are asking about, I would cover the entire undergound section of the post(and part way above ground). The reason why is that the asphalt will 'trap' water, and could coneivably rot the post out just below where you treated it.
 
   / Putting Split Rail Fence in #29  
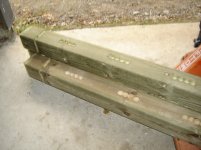
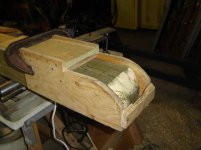
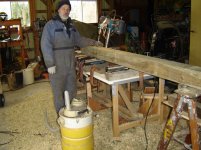
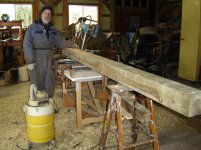
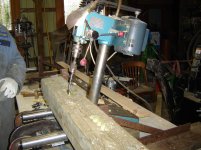
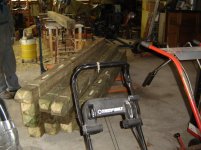
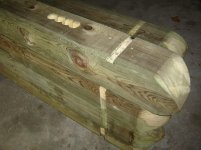
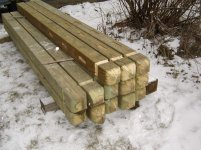
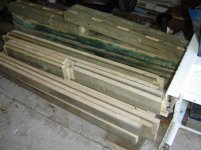
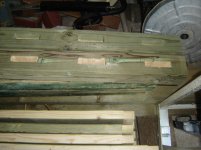
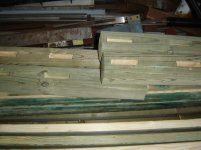
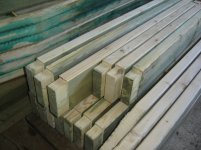
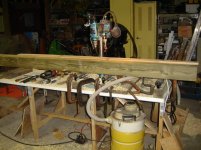
I am presently in the middle of building a 3 rail entrance at the front of the property. I have completed drilling out all 14 6"x6" PT timbers x 10' .Yes they are long but only 4' 8" are going in the ground and the rest has a fancy top. I have pics of the posts but they still in the camera. So I borrowed a pic of what the gate is going to look like. The first side rails are rough drilled out and laying on the bench. i fabed up rollers and used a 1 1/2 " spade bit to drill through using a bench top drill press. As the slots are on angles it was not a 90 degree job. The job went slow but the results are great. Before the ground froze up I cut and chipper ( 4 ) 30 ' trees and used the BH to remove 2 of the stumps.
Craig Clayton
Where are the gate pieces stored in the barn for the winter. They were left oversized by1/8 " to allow for drying shrinkage. I will then run them throught the router in the spring.
Craig Clayton
 

Attachments

  • DSC01356.jpg
    DSC01356.jpg
    353.4 KB · Views: 139
  • DSC01357.jpg
    DSC01357.jpg
    292.6 KB · Views: 115
  • DSC01358.jpg
    DSC01358.jpg
    232.2 KB · Views: 129
  • DSC01408.jpg
    DSC01408.jpg
    361.3 KB · Views: 240
  • DSC01409.jpg
    DSC01409.jpg
    353.3 KB · Views: 184
  • DSC01410.jpg
    DSC01410.jpg
    350.9 KB · Views: 235
  • DSC01411.jpg
    DSC01411.jpg
    392.1 KB · Views: 138
  • DSC01412.jpg
    DSC01412.jpg
    346.7 KB · Views: 109
  • DSC01413.jpg
    DSC01413.jpg
    317.7 KB · Views: 149
  • DSC01414.jpg
    DSC01414.jpg
    373.5 KB · Views: 119
  • DSC01500.jpg
    DSC01500.jpg
    271.4 KB · Views: 105
  • DSC01501.jpg
    DSC01501.jpg
    300.7 KB · Views: 108
  • DSC01502.jpg
    DSC01502.jpg
    265.8 KB · Views: 115
  • DSC01503.jpg
    DSC01503.jpg
    277 KB · Views: 162

Tractor & Equipment Auctions

1996 Monon 45X96 Dry Van Trailer (A46878)
1996 Monon 45X96...
2021 Case Trident 5550 Spreader (A46878)
2021 Case Trident...
2025 Wolverine GB-11-72W Grapple Bucket Attachment (A47484)
2025 Wolverine...
Deere 326E (A46443)
Deere 326E (A46443)
2018 Ford Explorer AWD SUV (A44572)
2018 Ford Explorer...
2001 Ford F-150 Ext. Cab Pickup Truck (A44572)
2001 Ford F-150...
 
Top